Capture Live Video Content
To capture live video content, you must first switch your DV camcorder to recording mode before you click on the DV Capture icon (Step 2). PowerDirector will detect your selection, and automatically activate the DV Camera capture mode. Live shots from your DV camcorder will then be displayed in the Preview window. Note: In DV Camera mode, navigation commands in the Preview window will be disabled, except for the recording button. Please note that the recording button in PowerDirector is used to record video from your DV camcorder; it cannot be used to activate recording on your DV camcorder.
|
|
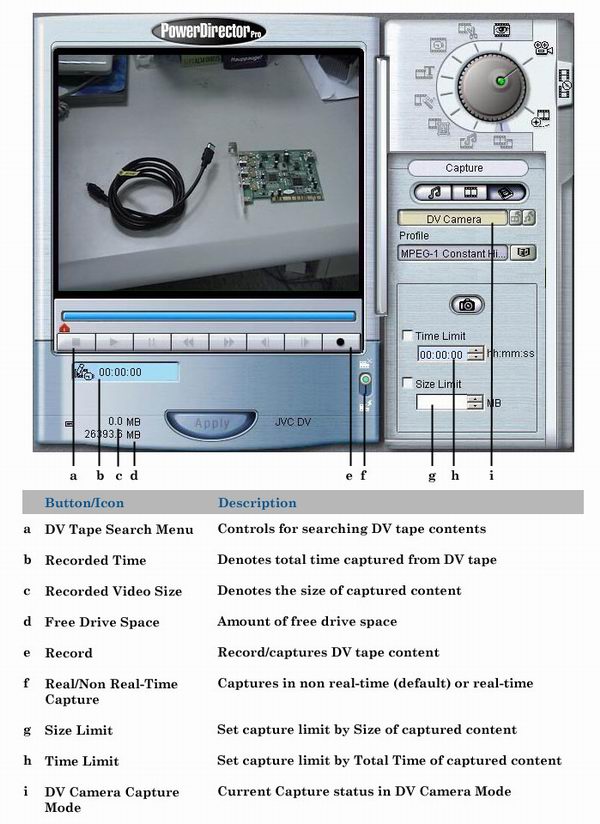
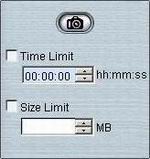
Set Time/Size Limit Before you start recording from your DV camcorder, you can adjust your capture profile settings or choose to capture in real-time or non real-time. To find out more, please click here. |
 |
Start Recording
Once you have adjusted your profile settings and recording options, then you can start capturing.
Simply click on the record button ![]() , and PowerDirector will start recording live images from your DV camcorder. While recording, the total recording time is displayed just beneath the preview window
, and PowerDirector will start recording live images from your DV camcorder. While recording, the total recording time is displayed just beneath the preview window
Stop Recording
Click on the Stop button to stop recording ![]() . If you previously set a time or size limit, then the program will stop recording once it has reached the capture size or time limit.
. If you previously set a time or size limit, then the program will stop recording once it has reached the capture size or time limit.
![]()
![]()
