
Create Selective Color using the Edit mode in PhotoDirector

In this tutorial, we will demonstrate another quick and easy approach to create selective color. The beauty of PhotoDirector is that you don’t have to work with complicated layers.
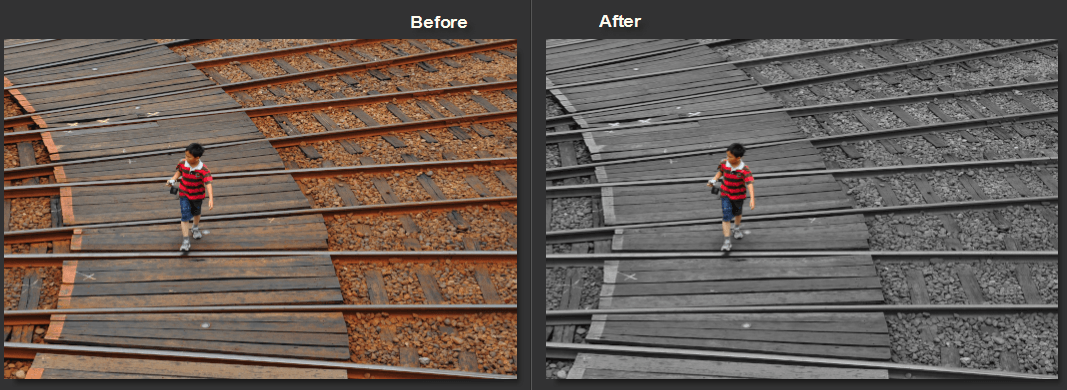
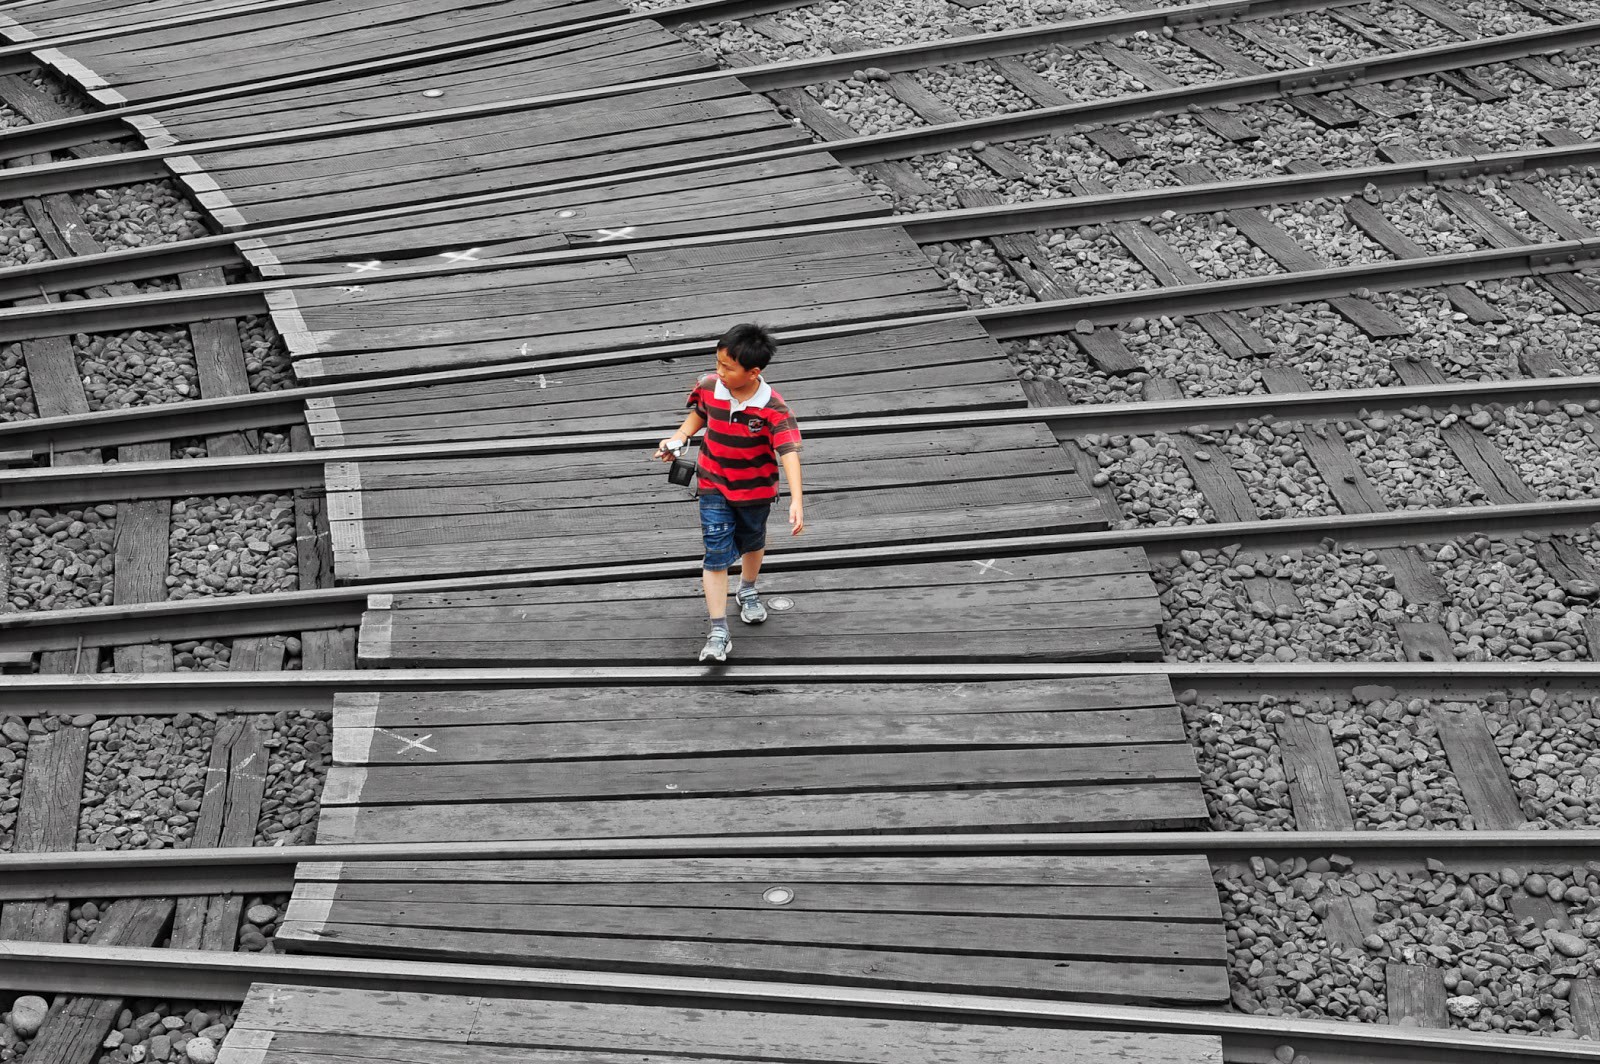
This is the original photo and the final result we want to achieve.
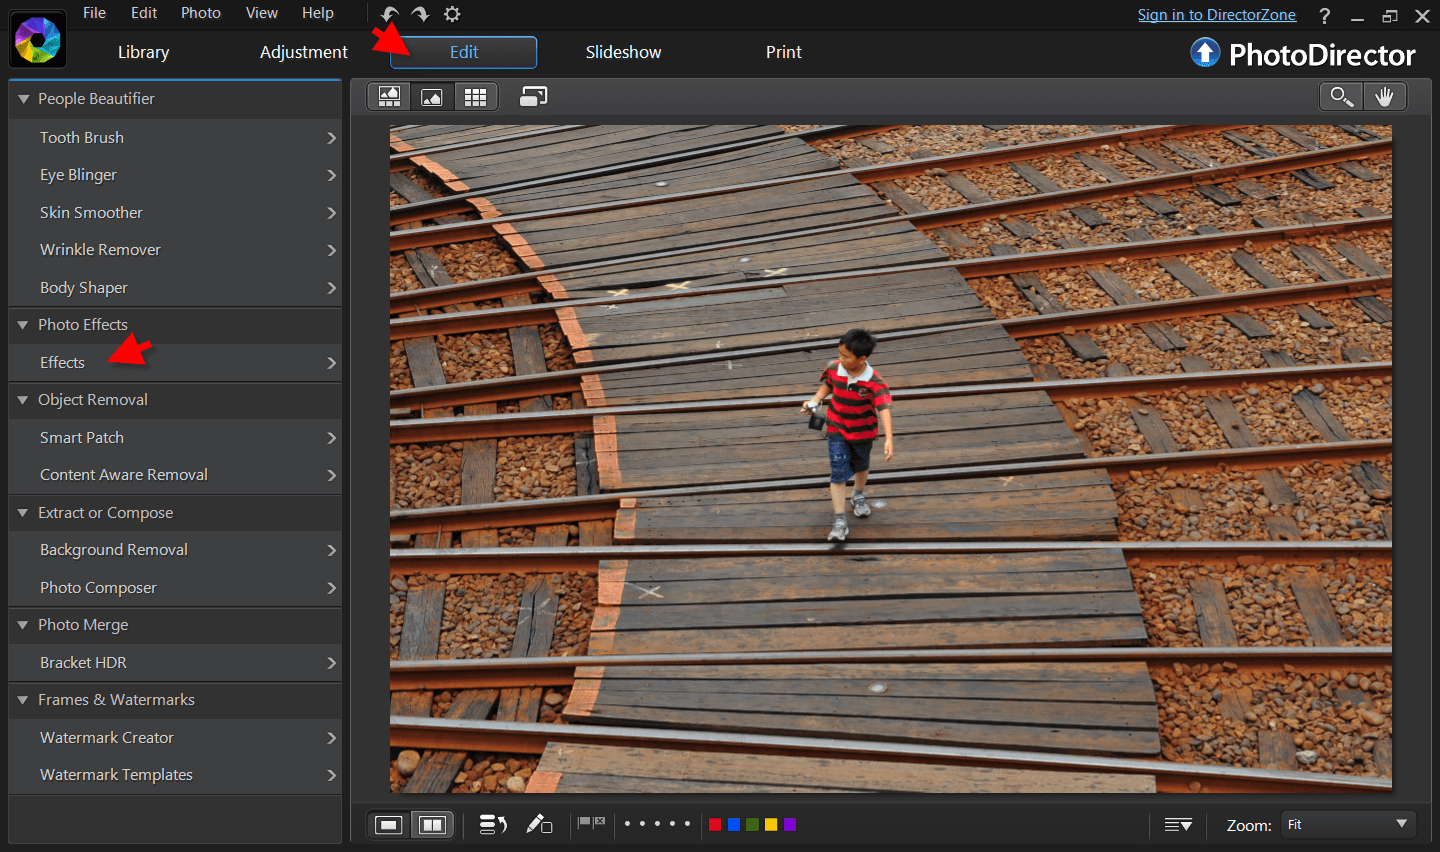
After importing the photo into PhotDirector and selecting the photo, click on the “Edit” tab and select “Effects” on the left menu.
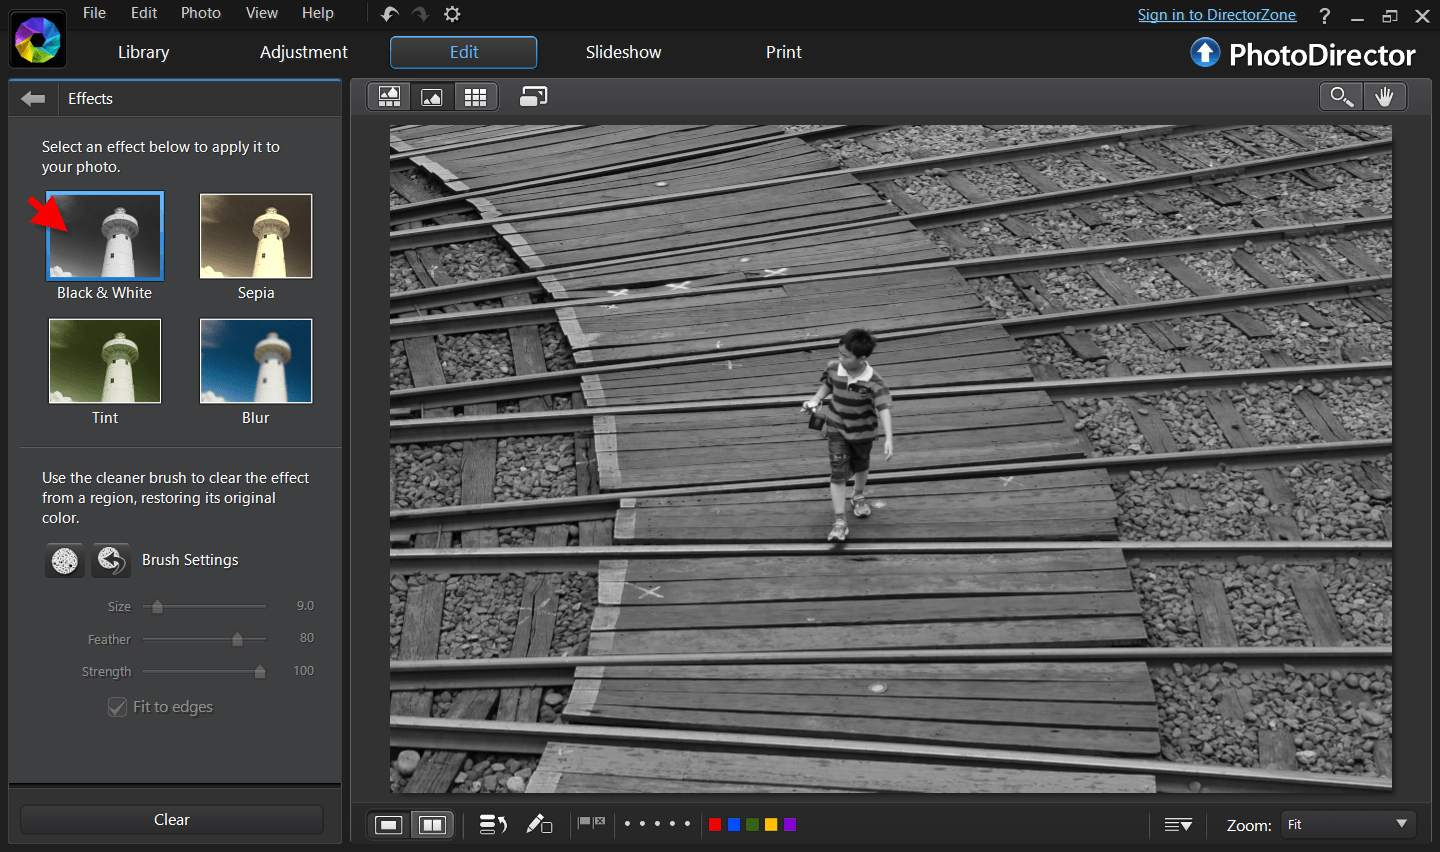
Now select “Black & White” and as instructed, your photo turns into a black and white image.
Double click to zoom in, this makes it easier to deselect the area and restore to its original colors using the “Brush Tool”.
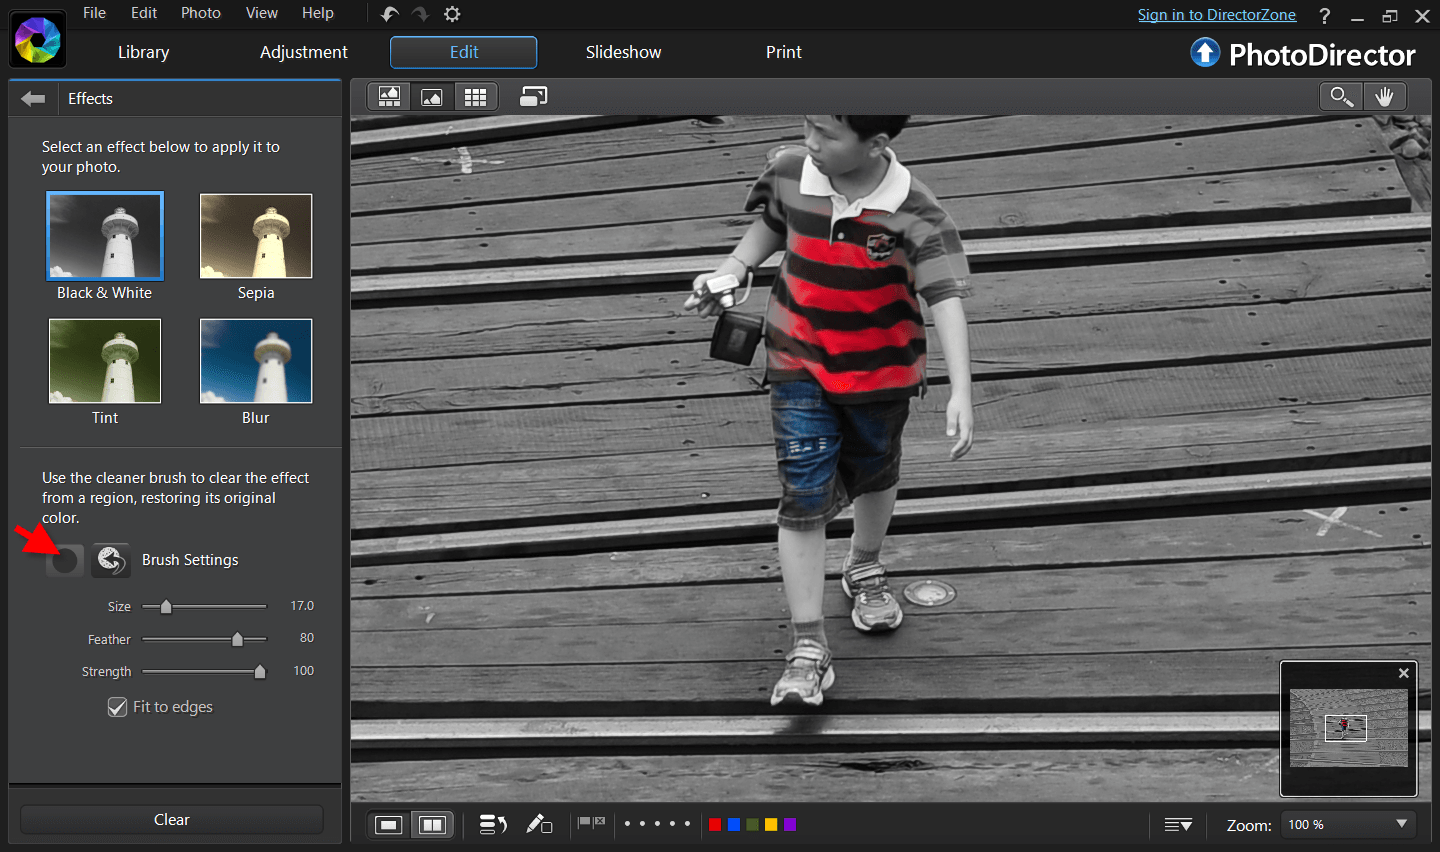
You can rescale the brush size by scrolling up and down the mouse, and if you deselected outside the area you want, you can always use the Erase brush to select it back to black and white.
And here is the final photo.
PhotoDirector 2026 Essential
Free Software With 30-Day Premium Features
