
Create a 3D Animated Video Intro with NewBlue Plugins

In this tutorial, we will show you how to create a stylish opening sequence with PowerDirector's PiP Designer, NewBlueFX Titler Pro* plug-in, Video Effects and Keyframe.
Note
NewBlueFX Titler Pro plug-in is included in PowerDirector 13 Ultimate and higher version, check the comparison table for differences between different PowerDirector versions.
Adding Zoom-in Effect to background video with PiP Designer & Keyframe
In the demo video, the background video is a time-lapse video, we are adding a slow zoom-in effect to the background.
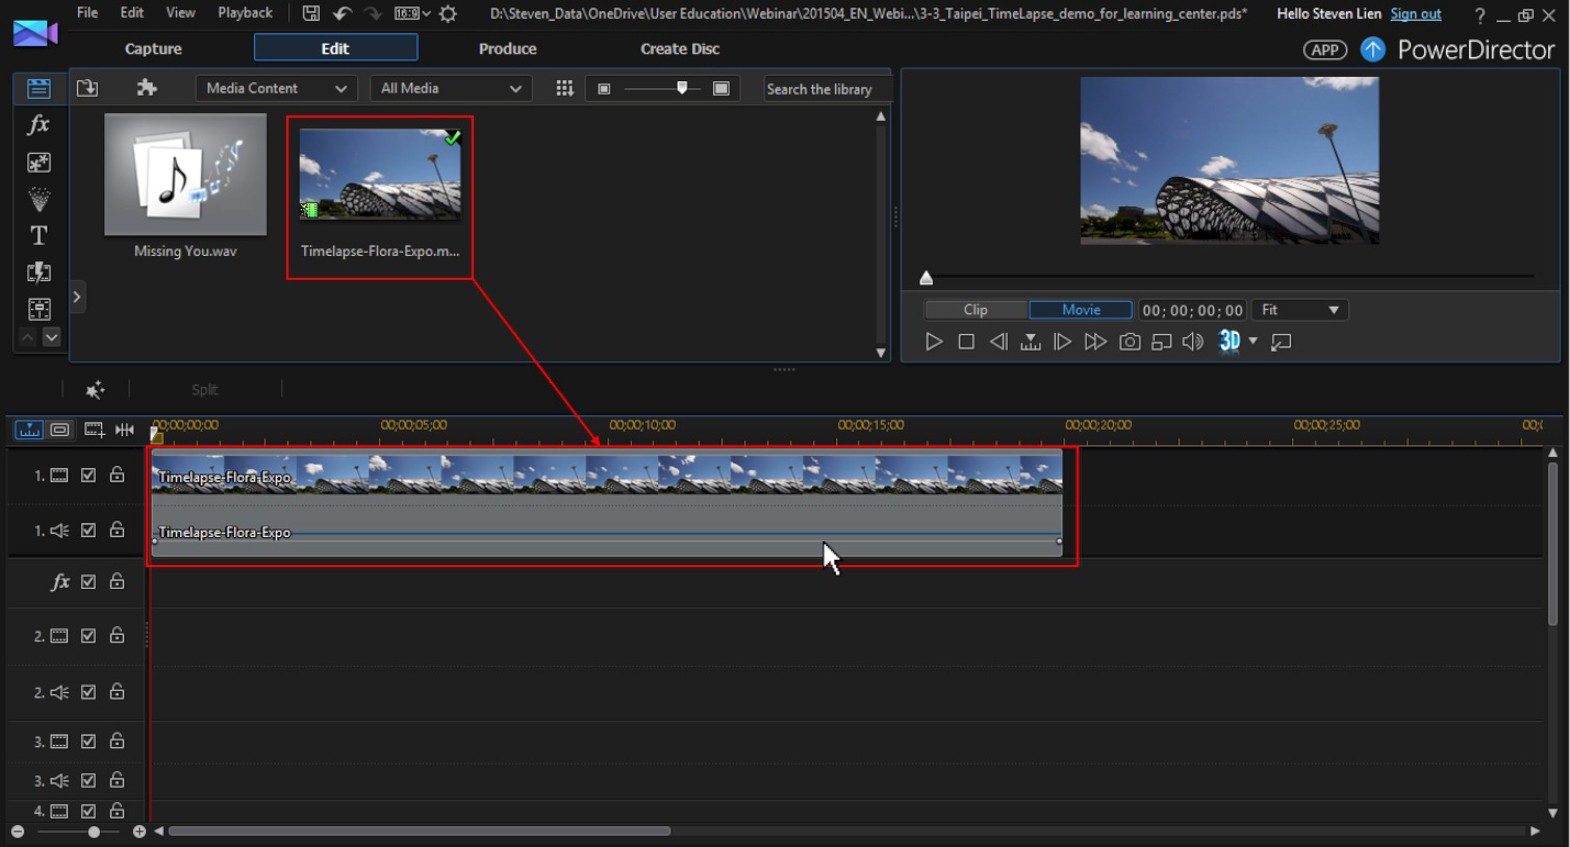
1. Drag and drop the background video clip to timeline track 1, and double click on timeline object.
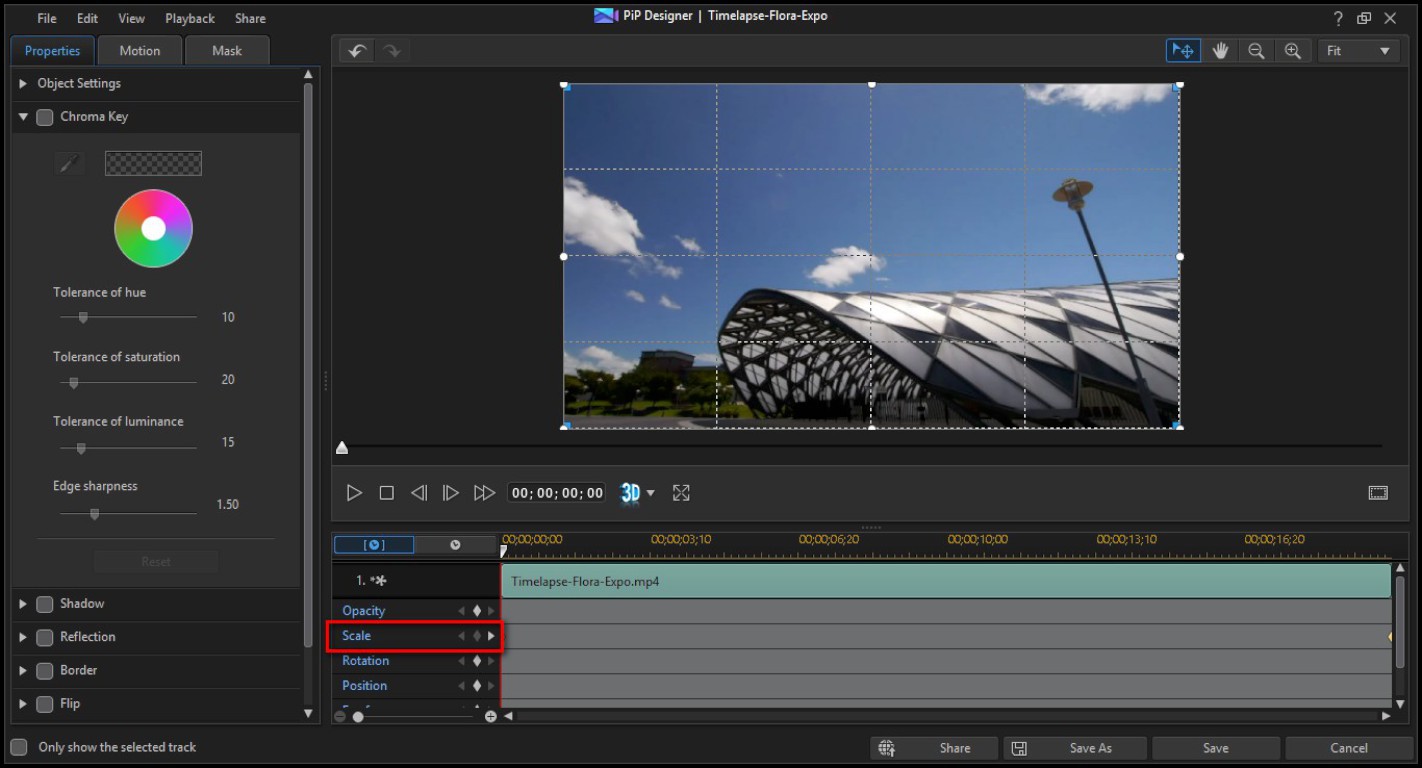
2. In PiP Designer, click on  in Scale track to add keyframes to the beginning and ending of the clip.

The part marked red shows the keyframes being added to the scale keyframe track. Move the timeline mark to the beginning of the track. When the keyframe color turns red, that means you can adjust the behavior of that keyframe.
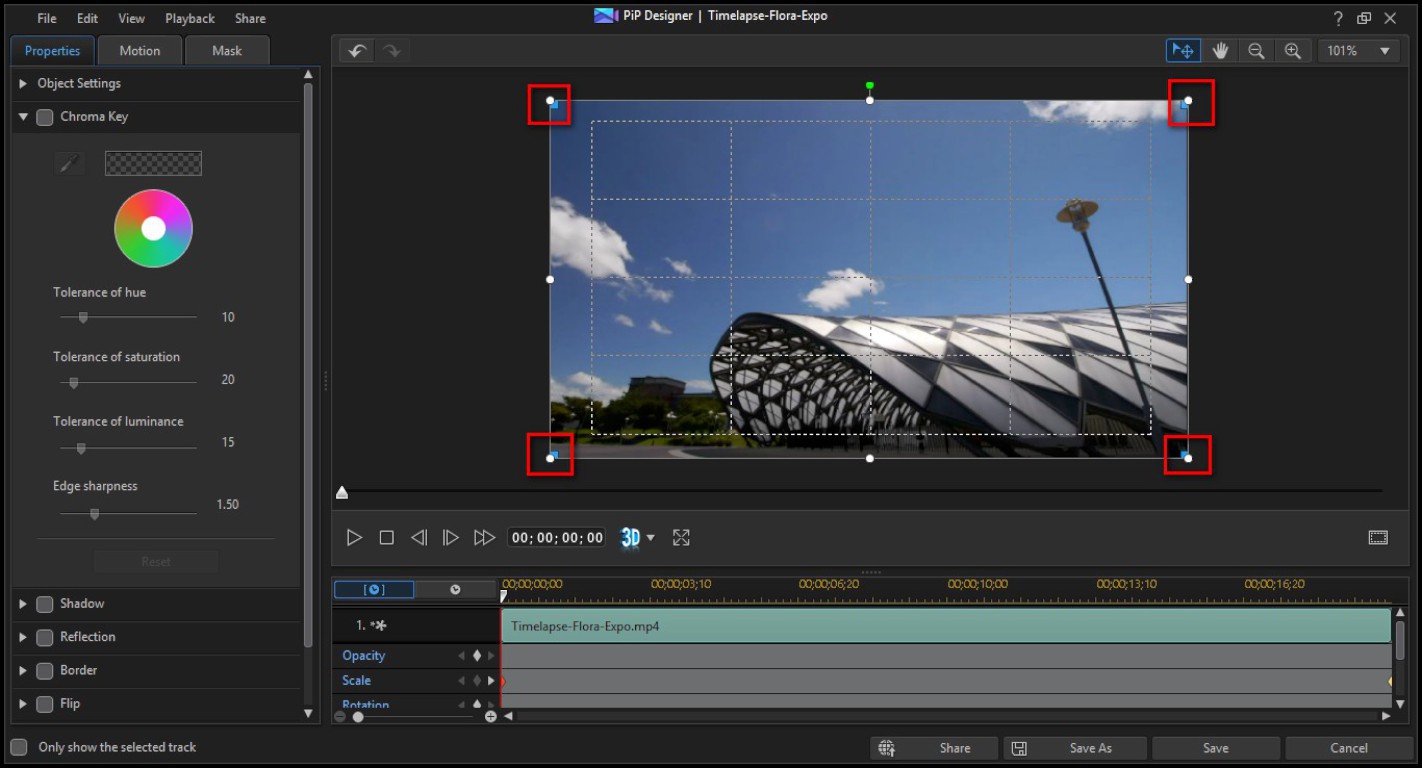
4. Select the beginning keyframe, and enlarge the scale of clips size in the first keyframe by drgging  on all 4 edges.
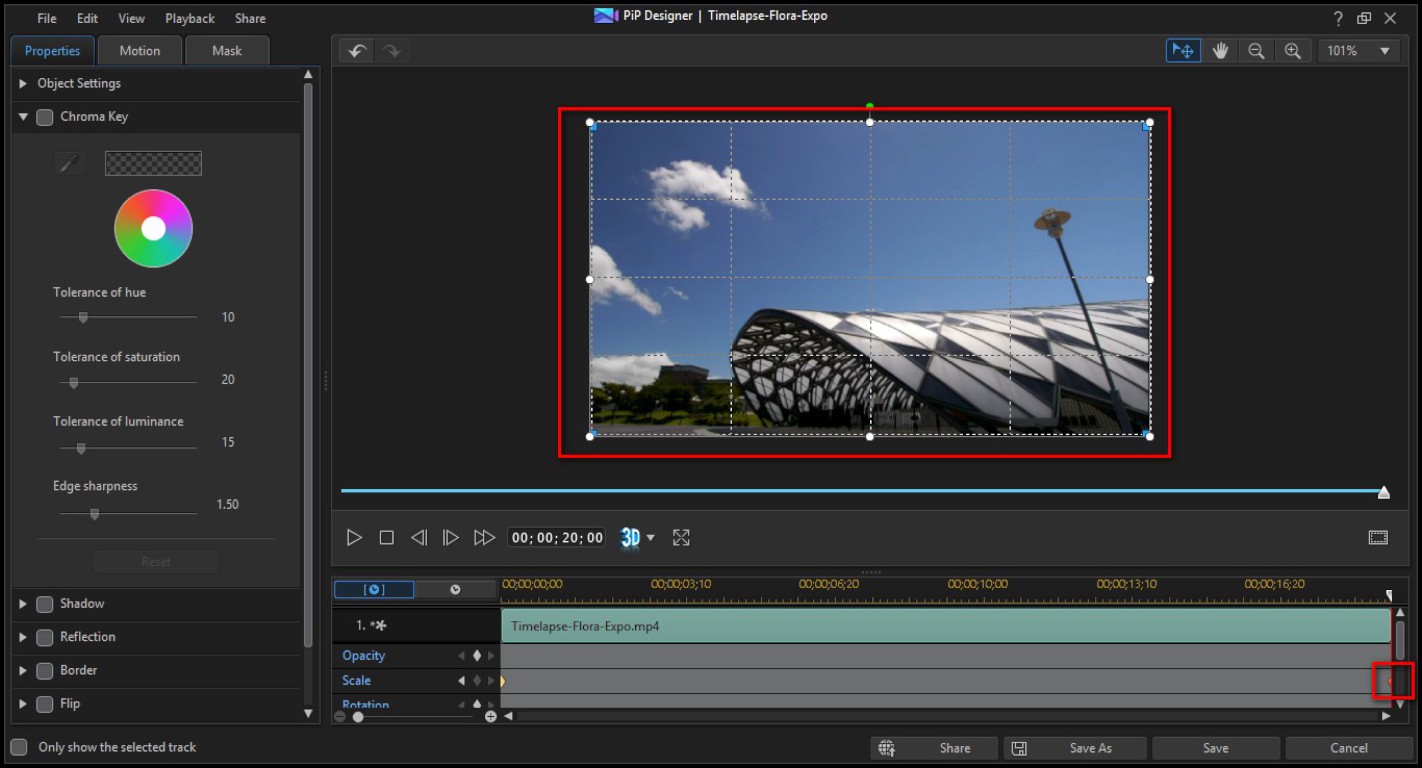
5. Drag to the last frame, and make sure the video is in original scale.
6. Click Save to go back to the timeline.
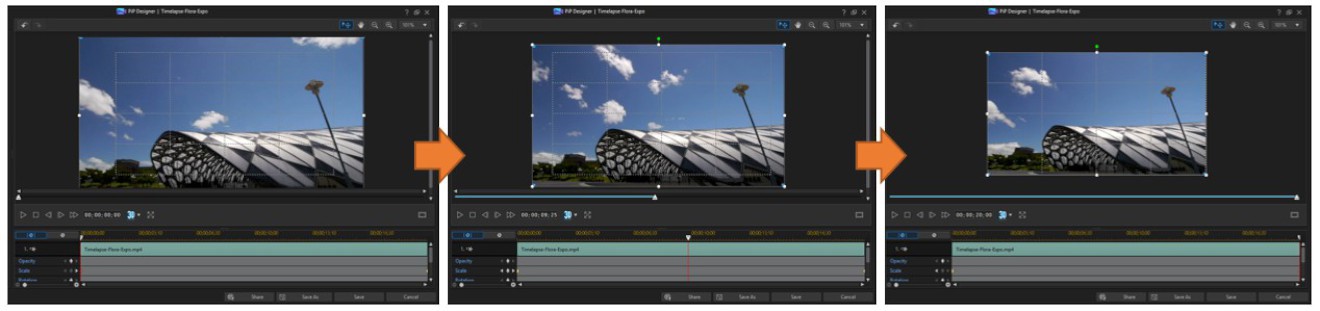
When you preview the video, you will see the scale of the clip changes over time. PowerDirector has already created central frames between the 2 keyframes at the beginning and ending of the clip.
Note
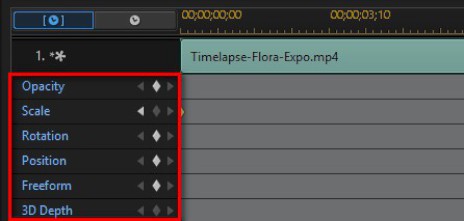
The same technique can be used to control the Opacity, Scale, Rotation, Position, Free Transform (distort or skew) and 3D Depth of clips.
Adding Blur Effect to Clip
In the demo video, we see the background is blurred at the beginning to avoid interferring overlayed objects and text. We will apply a video effect to the clip, and use keyframes to control the degree of the video effect.
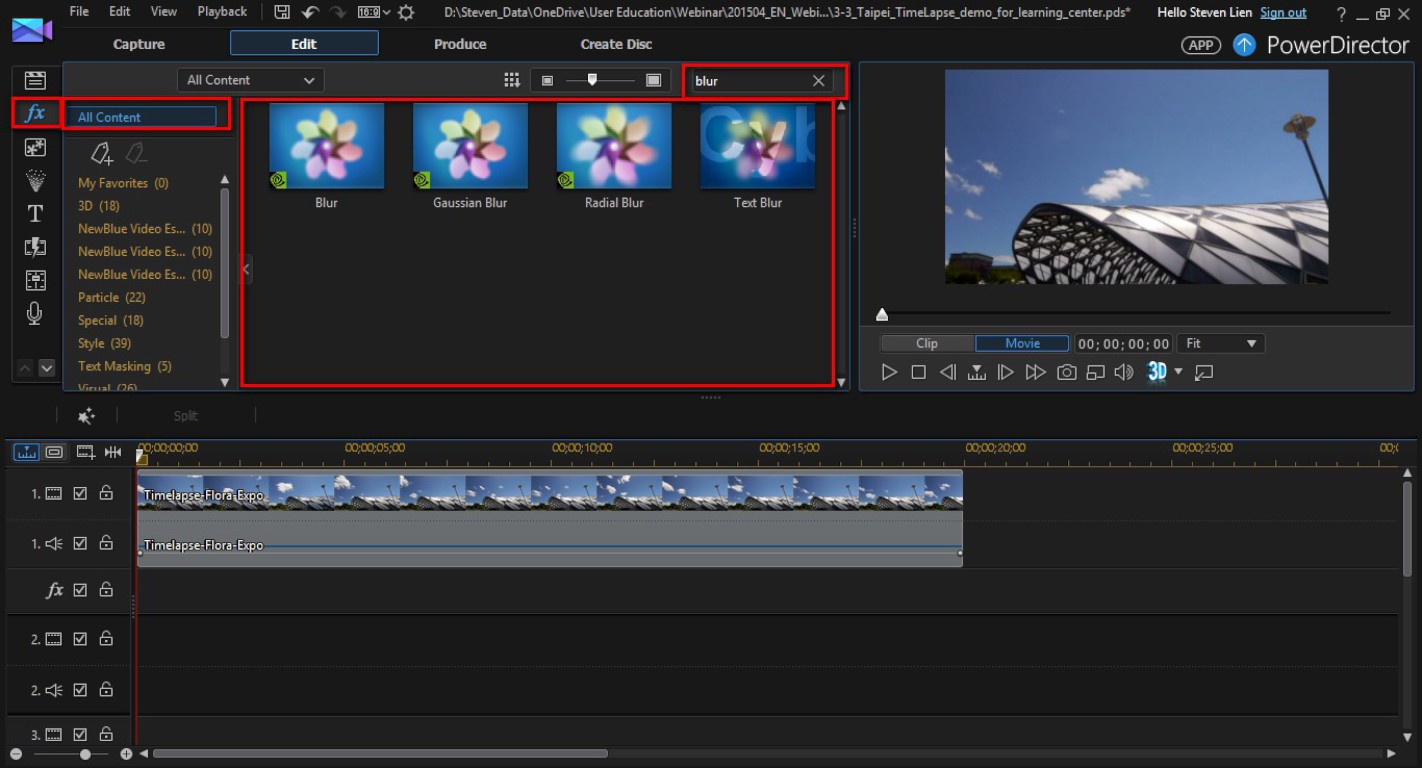
1. Click on  to enter effect room.
2. Set filter to  .
.
3. To search a effect by name, type "blur" in  , you will see all effects named blur will show up in the effect room.
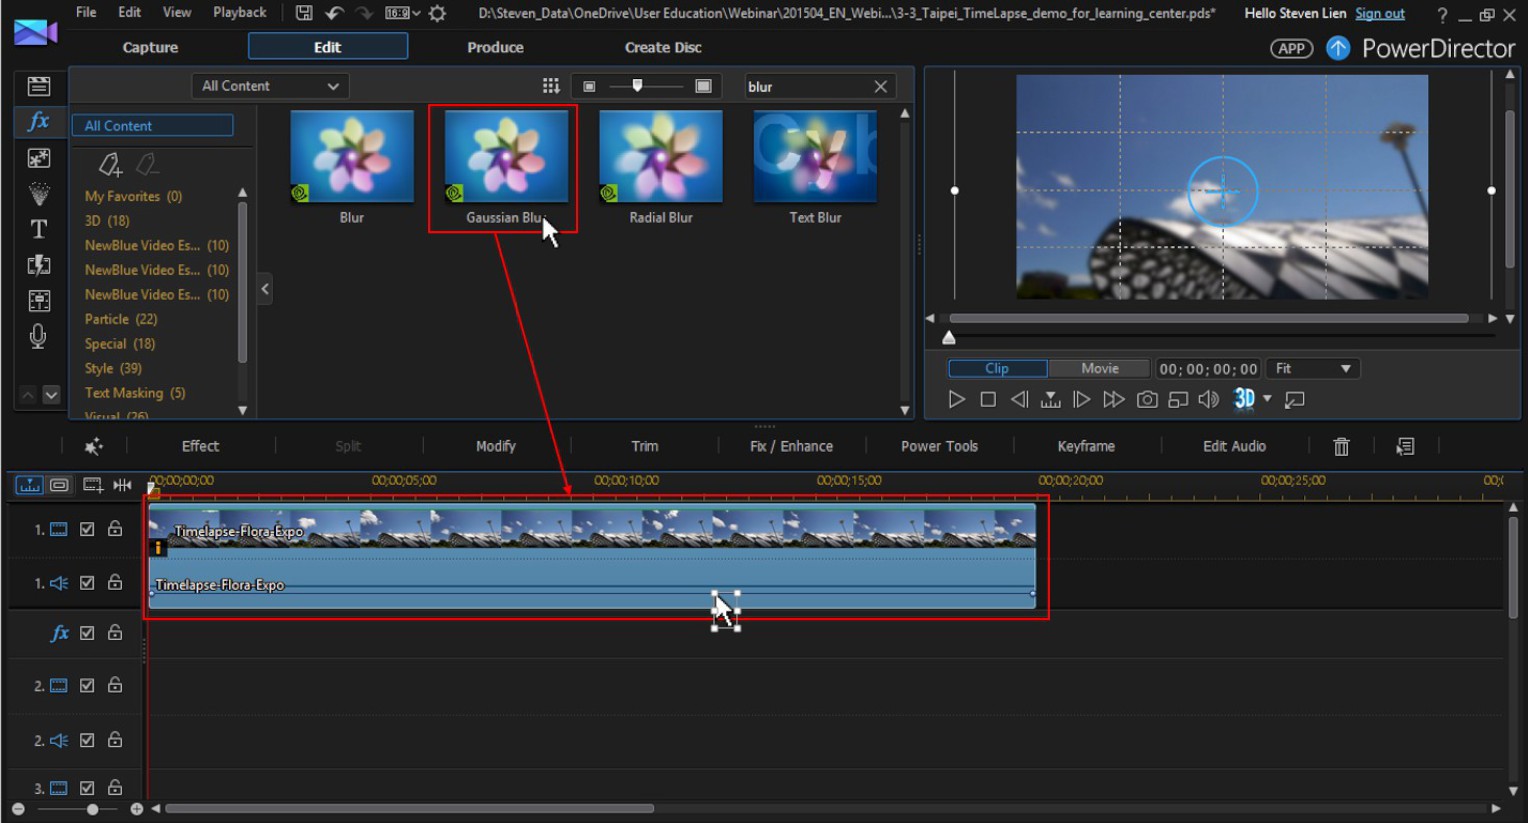
4. Add Gaussian Blur effect to the clip by dragging and dropping the effect onto the clip.
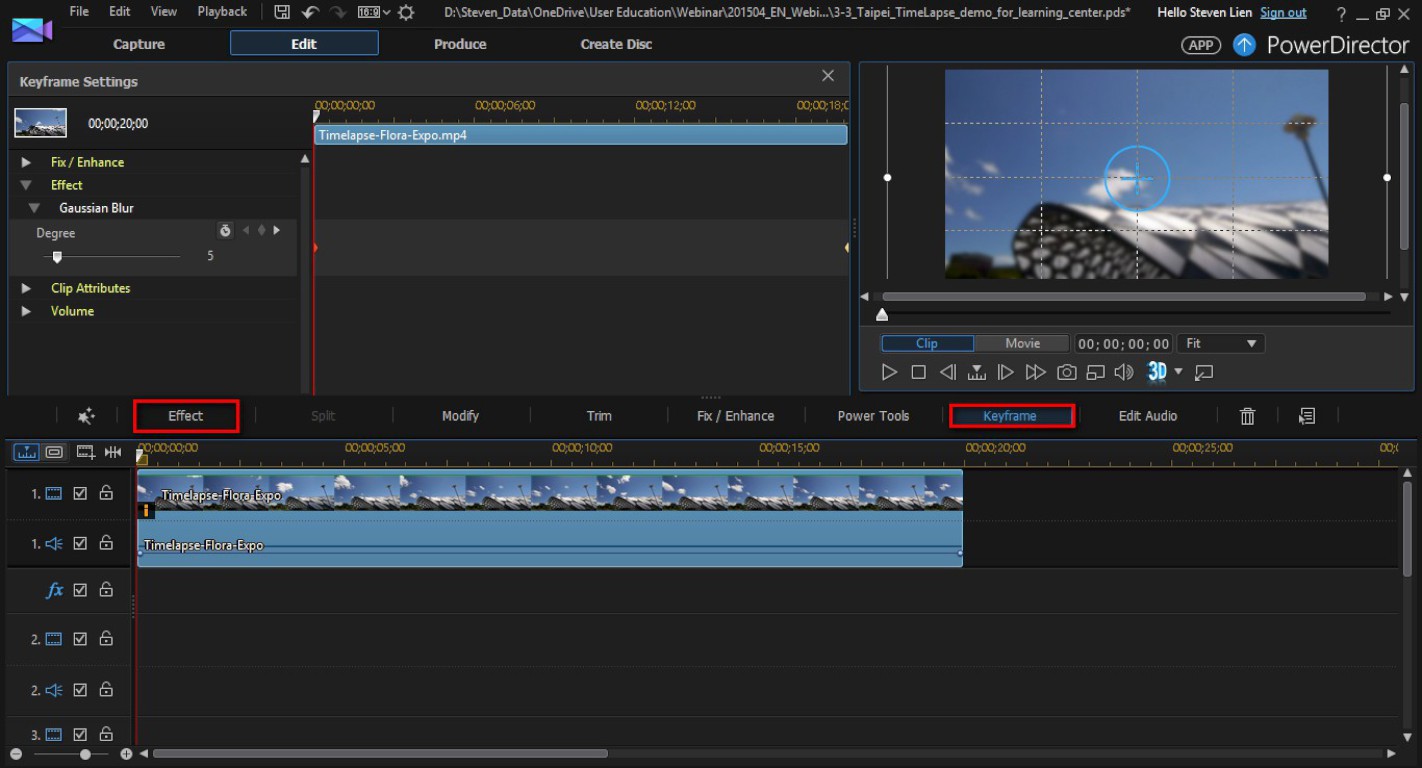
5. Select the clip on timeline and click on  .
.
6. Click on  to enter keyframe control room.
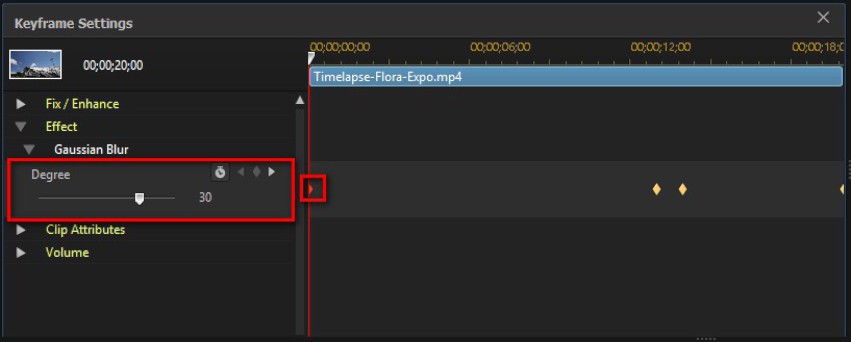
7. Follow the same logic to set the degree of the effect with the keyframes.
00:00:00 - Degree 30
00:11:00 - Degree 30
00:12:00 - Degree 1
00:18:00 - Degree 1
In this way, we will get the video to remain blurred from the beginning to the 11 second mark, and then gradually turn clear from 11 to 12 seconds as seen in the demo video.
Adding an Animated PiP Object
At beginning of the demo video, you can see a animation of turning globe, you can find this PiP object in PiP Designer* room.
Note
*The "All Over the World" PiP template is included in PowerDirector 13 Ultra and higher version.
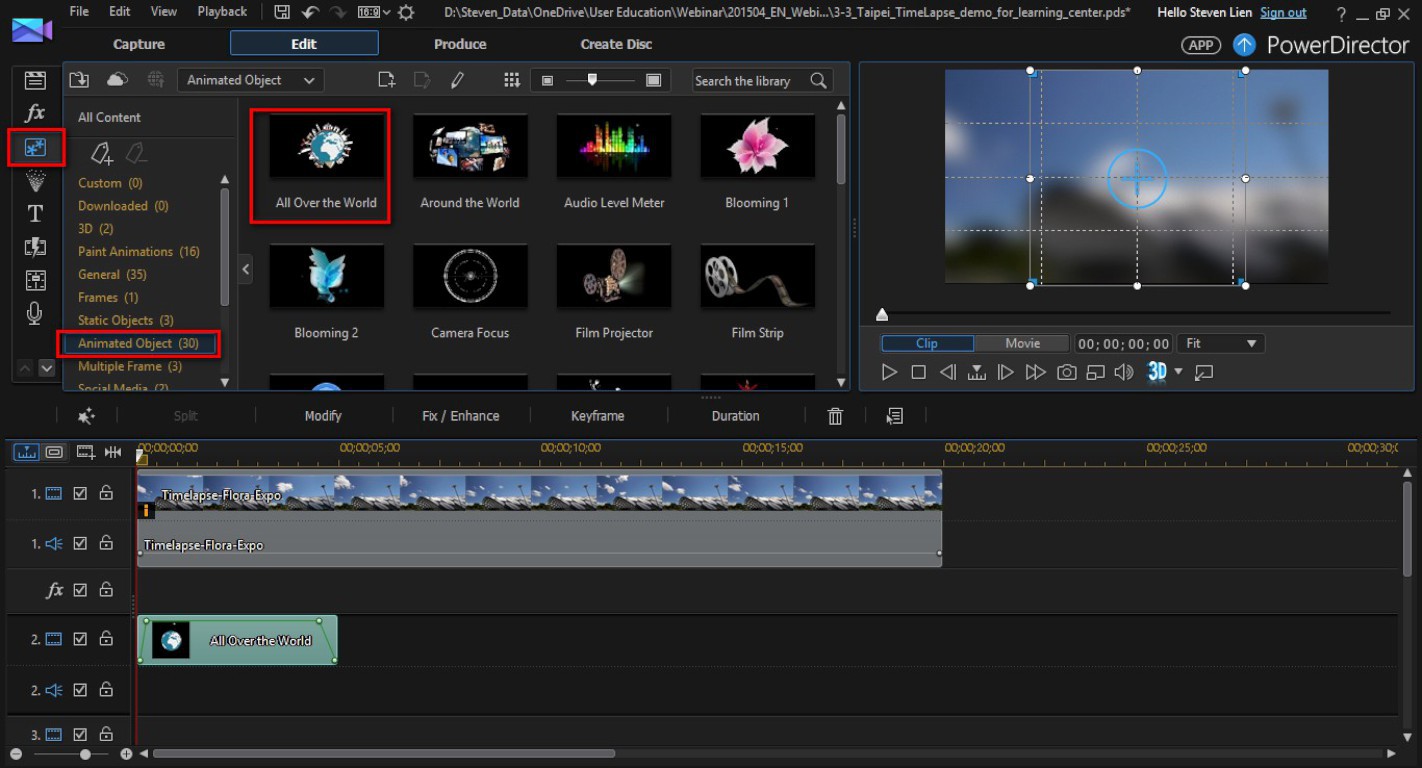
1. Enter PiP Object Room by clicking on  .
.
2. Find "All Over The World" template under Animated Objects.
3. Drag and drop PiP template to track 2
1. Enter PiP Object Room by clicking on .
2. Find "All Over The World" template under Animated Object.
3. Drag and drop PiP template to track 2
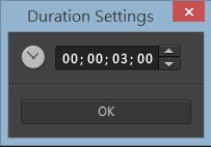
4. Click on  .
.
5. Change duration to 00:00:03:00 and click OK.
Note
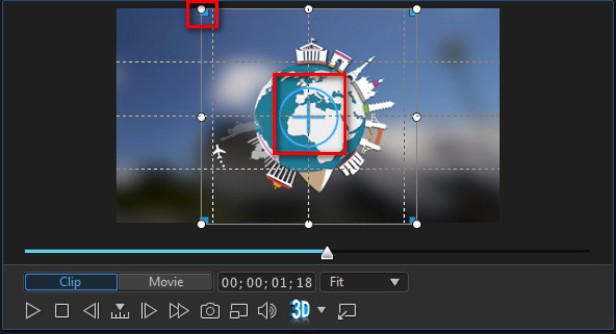
If you want to change the size and position and size of a PiP object, you can select it on the timeline track, and change it in the Preview Window. Change the position by dragging  and change size by dragging
  .
.
Adding 3D-Animated Title with NewBlueFX Titler Pro
NewBlueFX Titler Pro is a plug-in, available in PowerDirector 13 Ultimate and higher version. Titler Pro provides a wide range of templates, transition effects, and parameters to define 3D animated text.
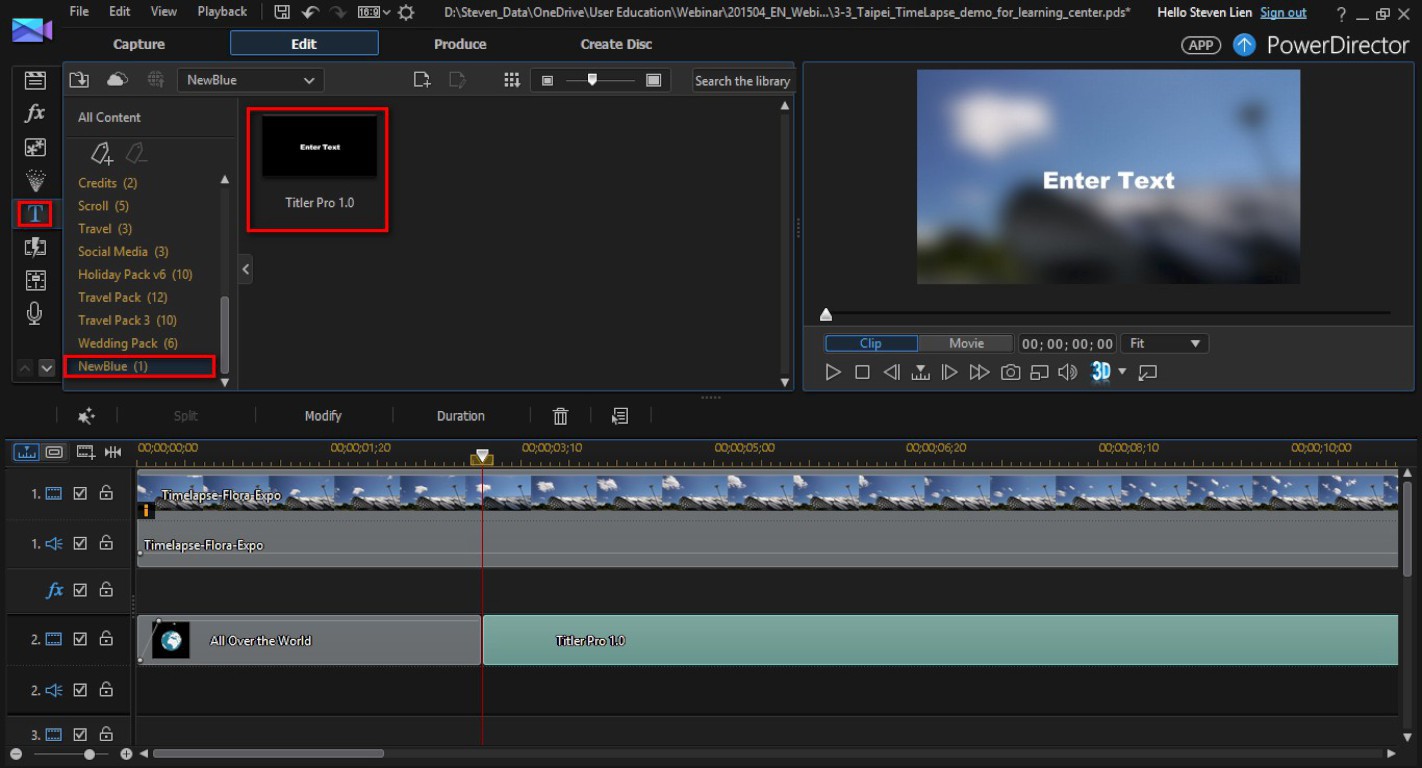
1. Click on  to enter Title Room.
2. Go to NewBlue > Titler Pro 1.0
3. Drag and drop Titler Pro 1.0 onto timeline track 2.
4. Double click on the Titler Pro Object on the timeline track to launch the Titler Pro editing interface.
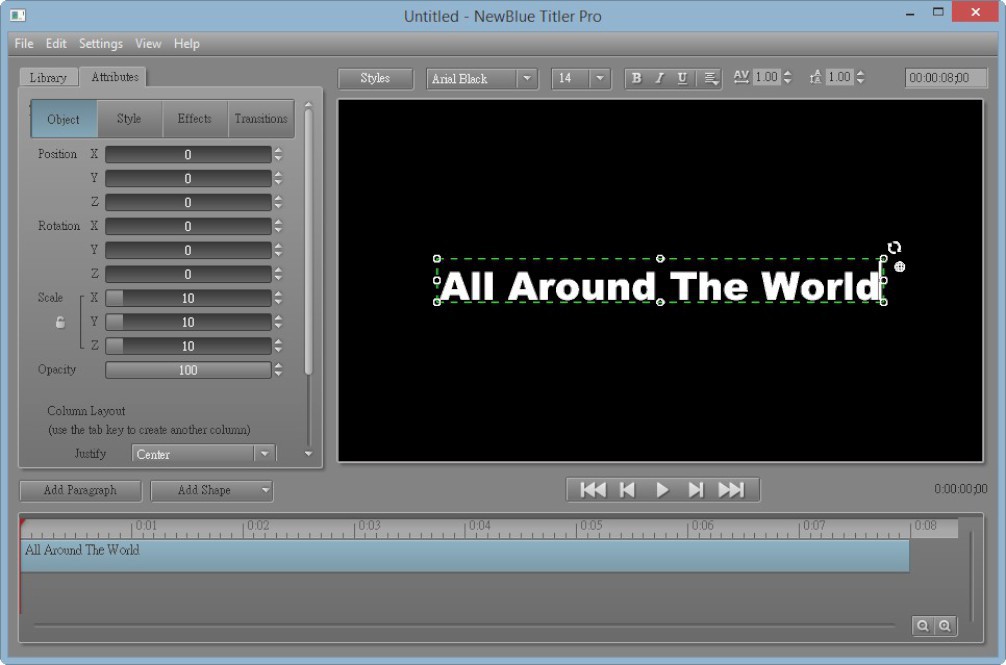
5. Type in the text you want in  area.
area.
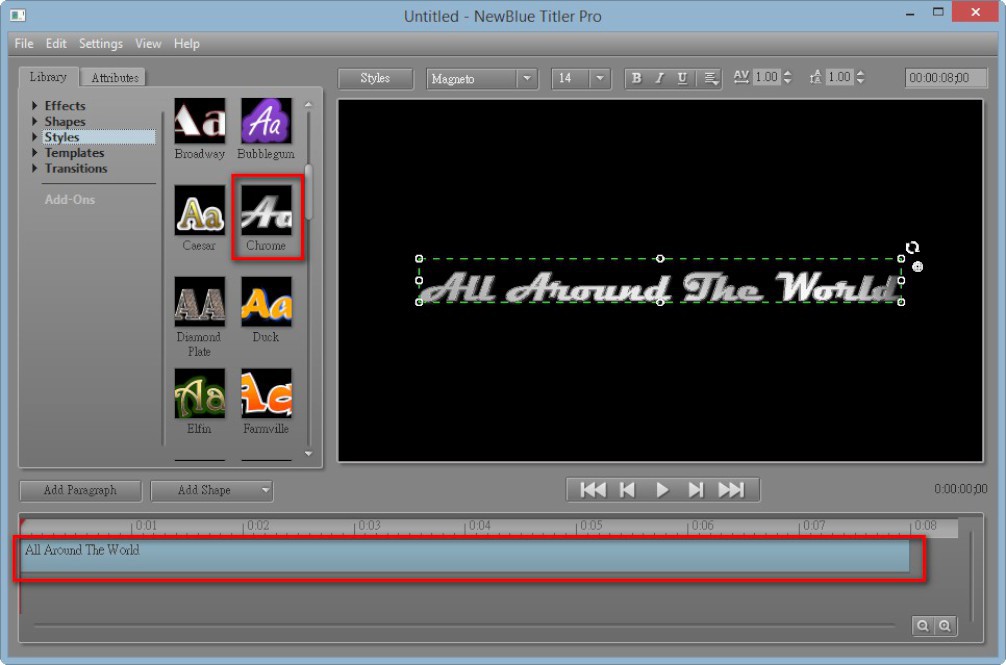
Setting Font Style
6. Go to Library > Styles.
7. Select Chrome style, drag and drop it onto the timeline track's text object to apply the effect.
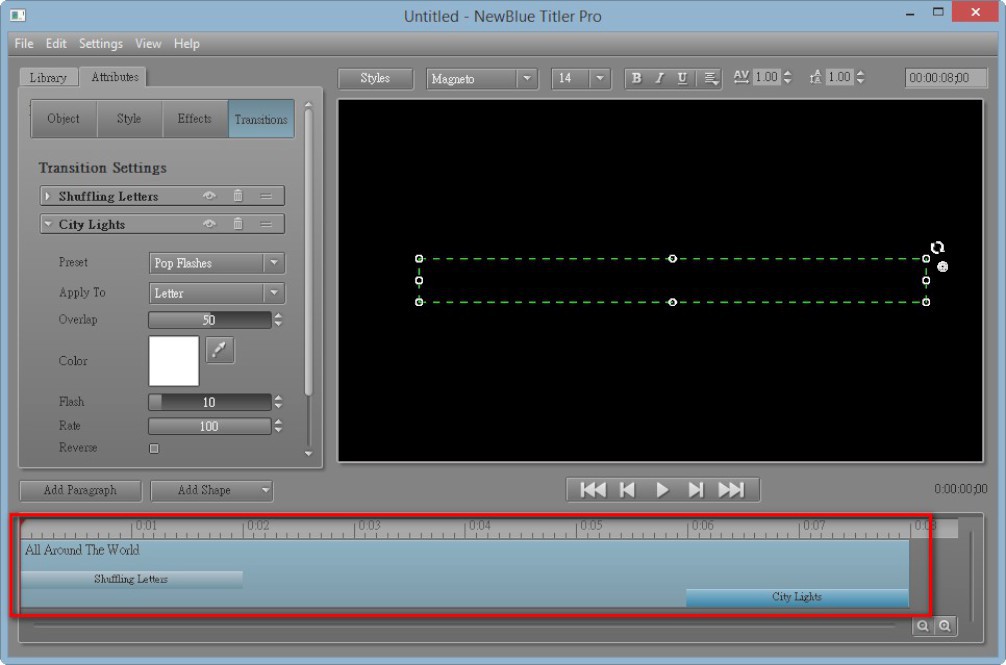
Setting In/Out Transition Effect
8. Go to Library > Transitions > Animations > Shuffling Letters.
9. Select Shuffle and drag and drag it to the beginning part of timeline object.
10. Go to Library > Transitions > Animations > City Light.
11. Select Pop Flash and drag and drag it to the ending part of timeline object.


Setting Animation Effect on Entire Title
12. Go to Library > Effects > Turn.
13. Select Slow Turn and drag and drag it to the timeline object.

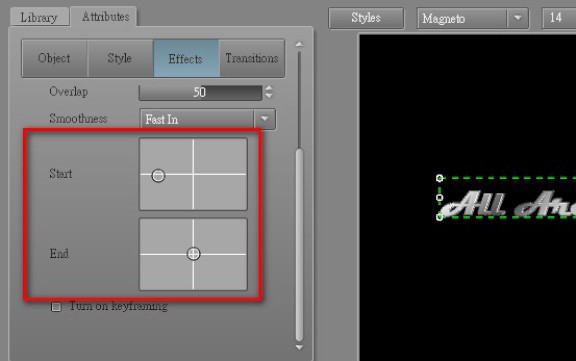
Change the Animation Behavior
14. Go to Attribute > Effects.
15. Setting Start from Left and End at Center
16. Click on  to exit Titler Pro Editing interface.
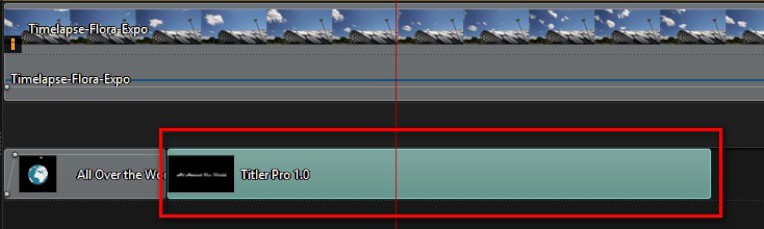
The edited Titler Pro object will be broguth back to the timeline.
Let's take a look at the video produced
Get PowerDirector 365 Essential for Free
Take your videos to the next level with the best video editor for Windows PC
