Create Your Own BB-8 Droid Animation Video
With the release of Star Wars Episode 7, the lovable droid BB-8 has become one of this season’s hottest gifts, and has even earned the title “cutest droid in the universe”.
In spite of all the merchandising, BB-8 hats and purses might not be your thing. If that’s the case, you might want to create your own BB-8 animation instead. We’ll show you here how easy it is, and you will be wowing your friends with your mad video editing skills in no time.
Our animation is comprised of just three images and a music track. For the background, we will use a plain desertscape image. Note that you could also use a different background scene like a forest or jungle. For this project we are using a stock desert photo:


Then we need an image of BB-8’s body. Find an image in png format with a transparent background.

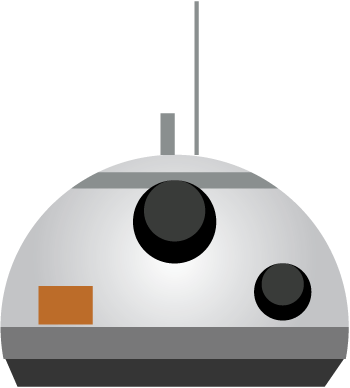
Then import an image of the droid’s head, also in png format with a transparent background:
Once you have imported the three image files, put them on the timeline as shown below, stretching each one out so that they are all the same length you want your animation to be. Our example is a short clip, about five seconds in length.

Resize your background image so that it fills the screen, and then shift the background image to align the left. Save your changes. NOTE: The resize and reposition features are found in the PiP designer, which launches automatically when you double-click an image on the timeline. If you are not familiar with the PiP designer, this tutorial video from the CyberLink Learning Center will quickly bring you up to speed.

Resize and reposition the head and body as shown.

Now set the motion path for the body. In the PiP designer window for the body image, click the “Motion” tab, and then select “Custom Paths.” Add a starting keyframe by clicking the diamond on the position line. Drag the slider to the end of the track, and then click the diamond again to add the ending keyframe. Then click on the dot at the center of the image, and drag a path to the right side of the screen as shown.
Set the rotation counterclockwise to around 2100 degrees (Note: It is easier to just key the number directly into the field than to try to use the slider bar to set the number.)
Lastly, tick the box for Motion Blur, and set the blur length to about 1.30 and the blur density to 22. Click “Save,” and then close the PiP designer. The motion blur effect will make your PiP object looks realistic during movement.

Next, use the same steps to add the motion path for the head. However, you will not need to set a rotation. For the motion blur, set the blur length to 1.44, and the blur density to 24.

Now you just need to scroll the background in the opposite direction. Open the background image in the PiP editor, and zoom out so that you can see the entire image within the window:

Set a custom motion, moving the background image to the right until the left side of the image is flush with the left side of the viewing window.

Lastly, if you want to make the movement of BB-8 more realistic, here’s one more trick: Go to Effects, and add a “Quake” effect onto both the body and head by simply dragging and dropping the effect onto the timeline object. This effect will make BB-8 look like he is rolling over rocky ground – with a slight movement-induced shake.

Now let’s see what the video looks like after it is produced.
Get PowerDirector 365 Essential for Free
Take your videos to the next level with the best video editor for Windows PC


