
How to Create your own Virtual Ensemble or Orchestra

PowerDirector provides you with all the tools you need to create virtual concert music videos. You just need inspiration and a little help from your friends.
With sporting events and concerts currently postponed and city nightlife closed down for the past few months, a lot of us have turned to the virtual world for entertainment. Video streaming services such as Netflix and YouTube have become more popular than ever and with the current social distancing restrictions. We are seeing a completely new reality of how we approach entertainment.
Not all of us are just watching though, as some of the best new content created on YouTube lately has been created by everyday people just like you! With the current social restrictions, user generated content is more popular than ever with people looking for ways to pass the time, stay creative, or looking to connect with others with similar interests.
One of the latest and most popular trends on YouTube currently is virtual concerts. Whether it be artists streaming live by themselves or piecing together performances from different locations, home videos on YouTube have never been this creative and entertaining – it’s perhaps a new medium born out of this crisis.
This article will review several different ways you can make your own virtual concert video with PowerDirector and also provide tips for ensuring the audio in your video is sounding its best.
If you haven’t done so yet, please go download the Essential version of PowerDirector for free now so you can try creating your own virtual concert video today.
Recording Video and Refining Audio
How you will record the video for your virtual concert video is completely dependent on the type of video you are creating and the equipment you have access to. You may record yourself multiple times with a single camera or once with multiple cameras to get the best results.
If you’re creating a virtual concert video with other people spread over many different locations, you will most likely get many types of video with varying qualities of audio. This is where AudioDirector comes in handy to ensure the audio in your video is consistent and of the best quality between sessions.
With AudioDirector you can remove any unwanted background noise such as hums, hisses, or clicks. You can also boost the audio for those videos that were recorded at too low of a level or fix the audio in places where it becomes distorted because it was recorded at too high of a level. Check out all of the available tutorials for AudioDirector to learn what audio fixes are available for your video.
Download AudioDirector Essential to test out for free how it can improve the overall quality of your concert audio.
Creating Virtual Concert Videos
Now that you have all the video and audio captured, it’s time to combine everything together and create your virtual concert video. With PowerDirector, you can be the star of the concert or you can be part of an ensemble that will take people’s breath away. Let’s look at some fun ways to create a virtual concert video in PowerDirector.
- Create a virtual concert with multiple musicians
- Create with MultiCam Designer for your solo concert
- Create with Video Collage Designer for your solo concert
1. Creating Virtual Concert Video With Multiple Musicians
Virtual concert videos featuring multiple musicians from remote locations all over the world have been nothing short of spectacular. It’s incredible to see people come together to create during this time, especially with something as complex as synchronized music performances. To get an idea of what’s involved, check out this virtual orchestra concert video created in PowerDirector by one of our users:
Interested in creating your own virtual concert? All you have to do is get your friends to record their separate parts of a song. Once you’ve done this, here’s how you can create your own virtual concert video in PowerDirector.
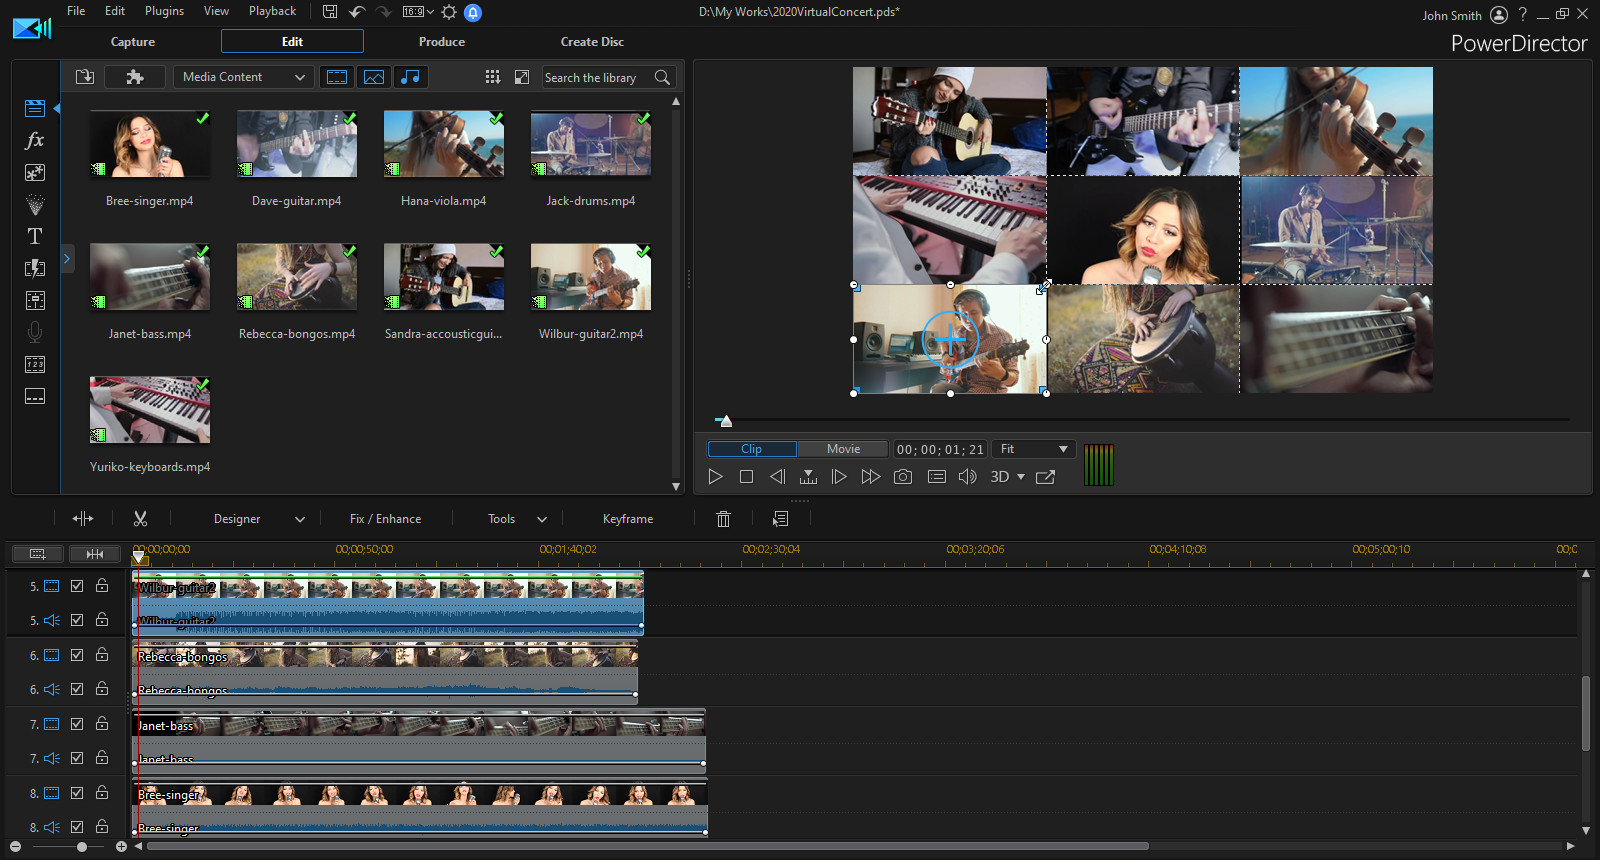
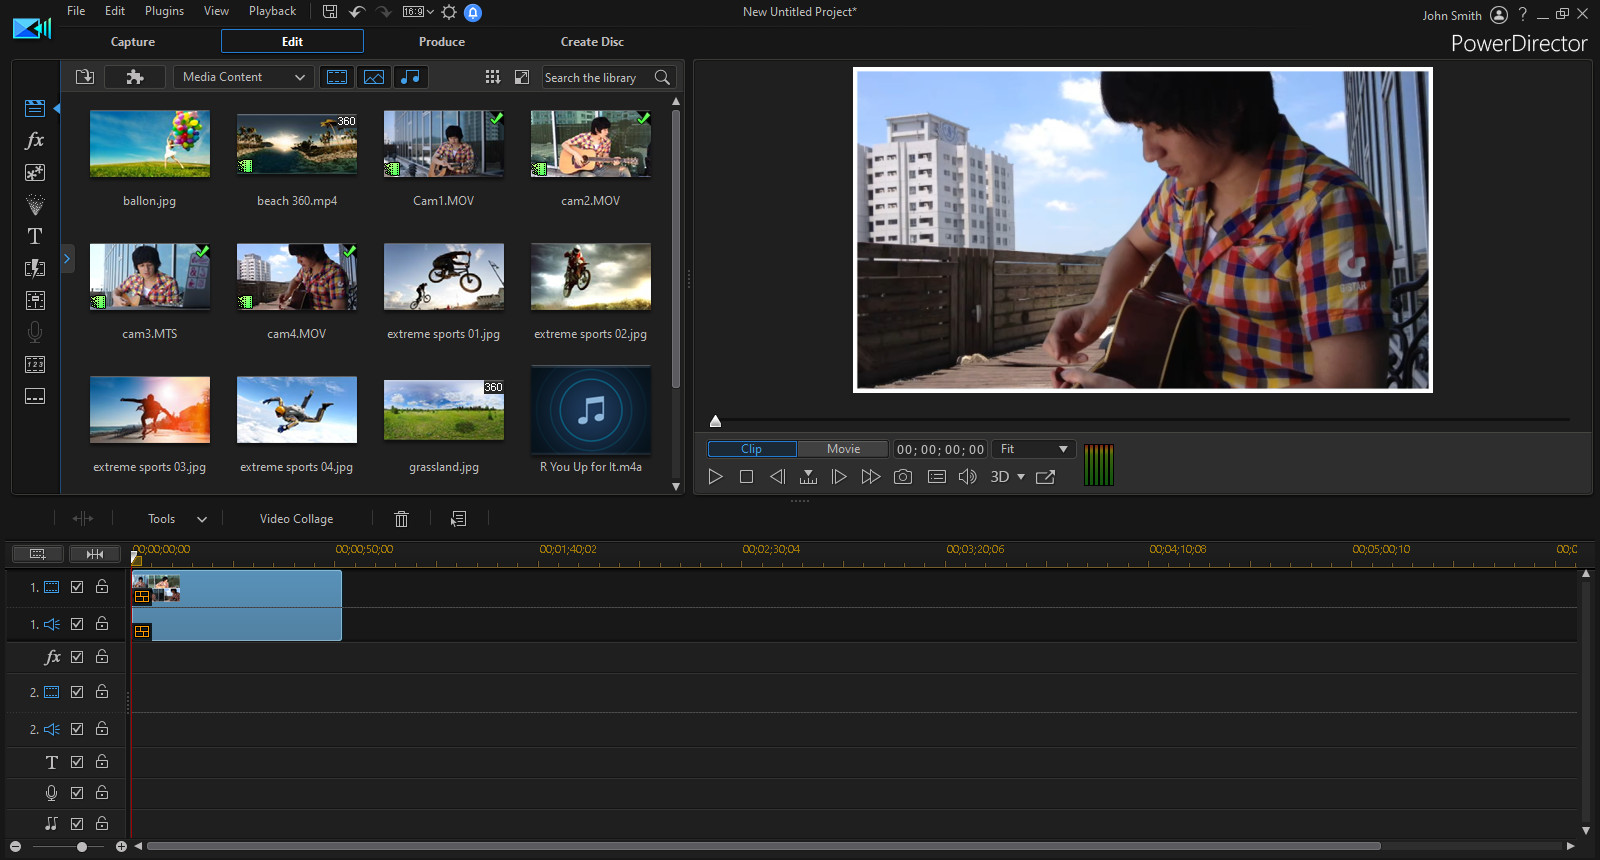
Importing, Adding and Arranging the Videos
The first step is to import the videos, and then add and arrange them in the preview window.
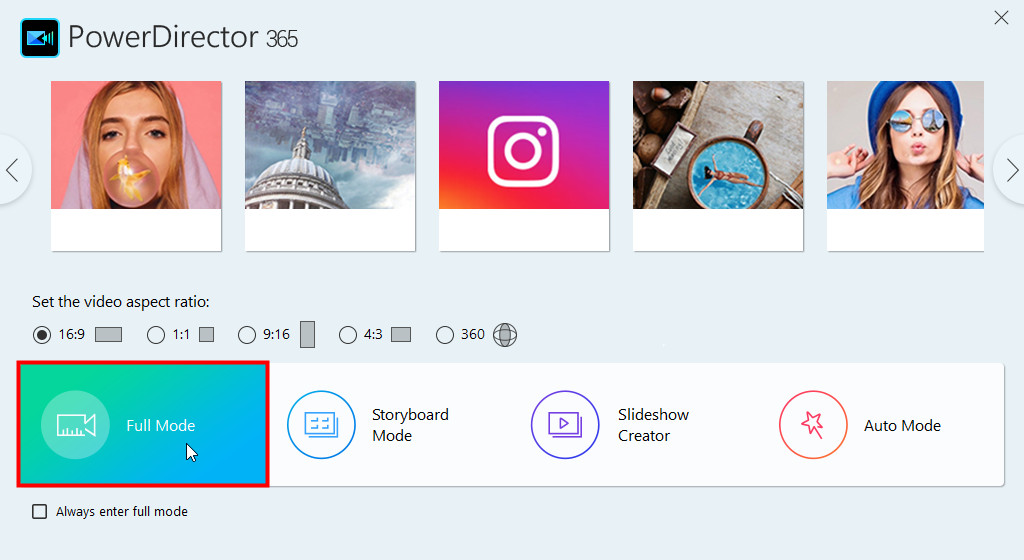
1. Launch PowerDirector 365 and then select Full Mode.
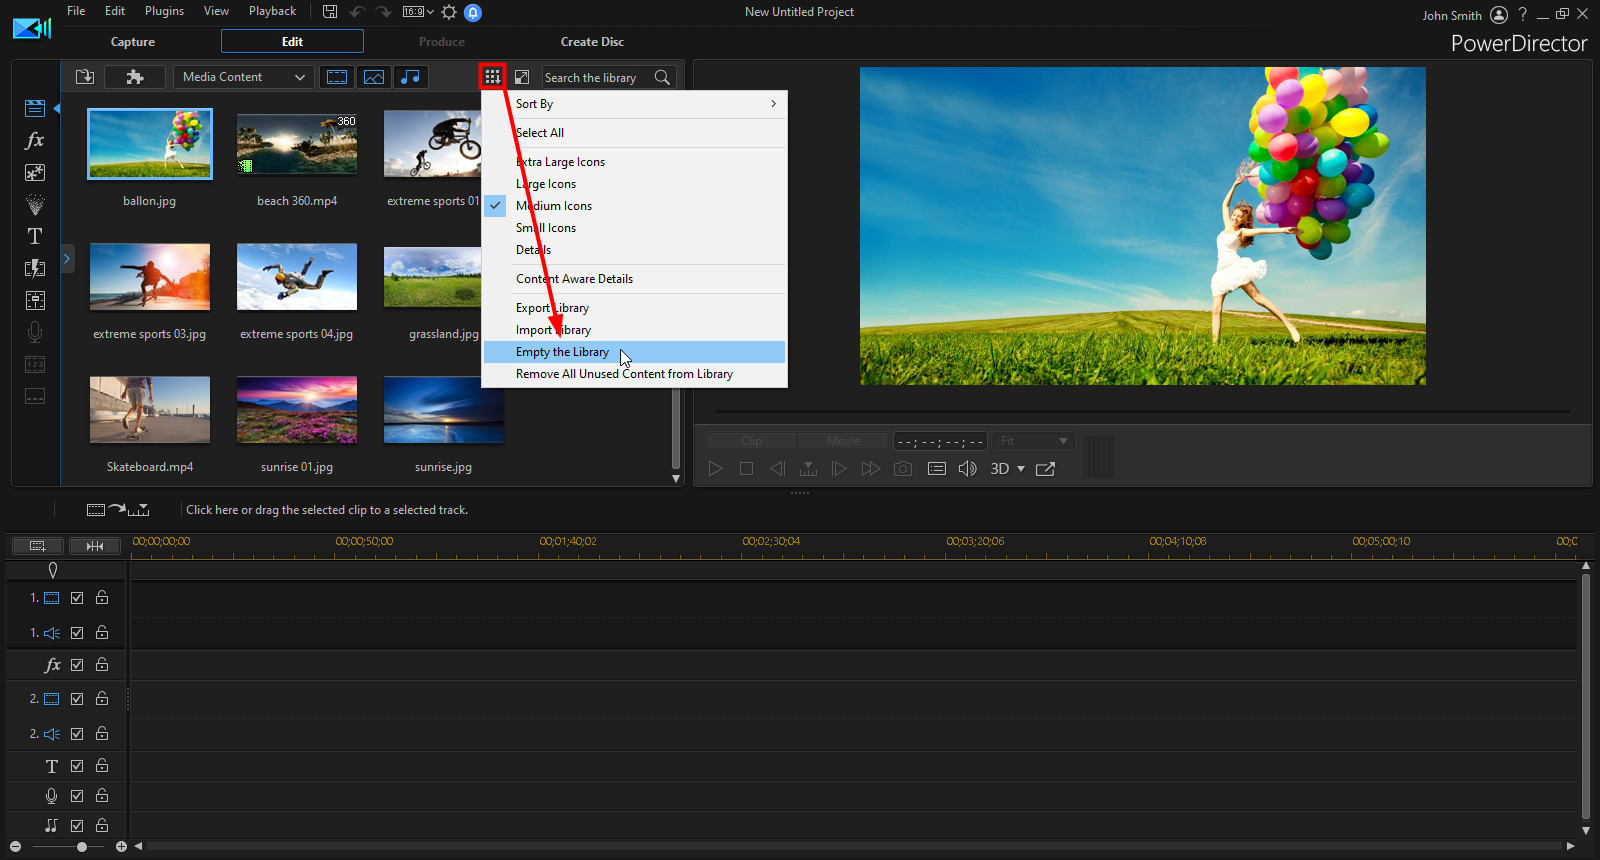
2. Click the  button and then select Empty the Library to remove the sample media files so you can easily find your video files.
3. Click the  button and then select Import Media Files to import all the recorded videos files.
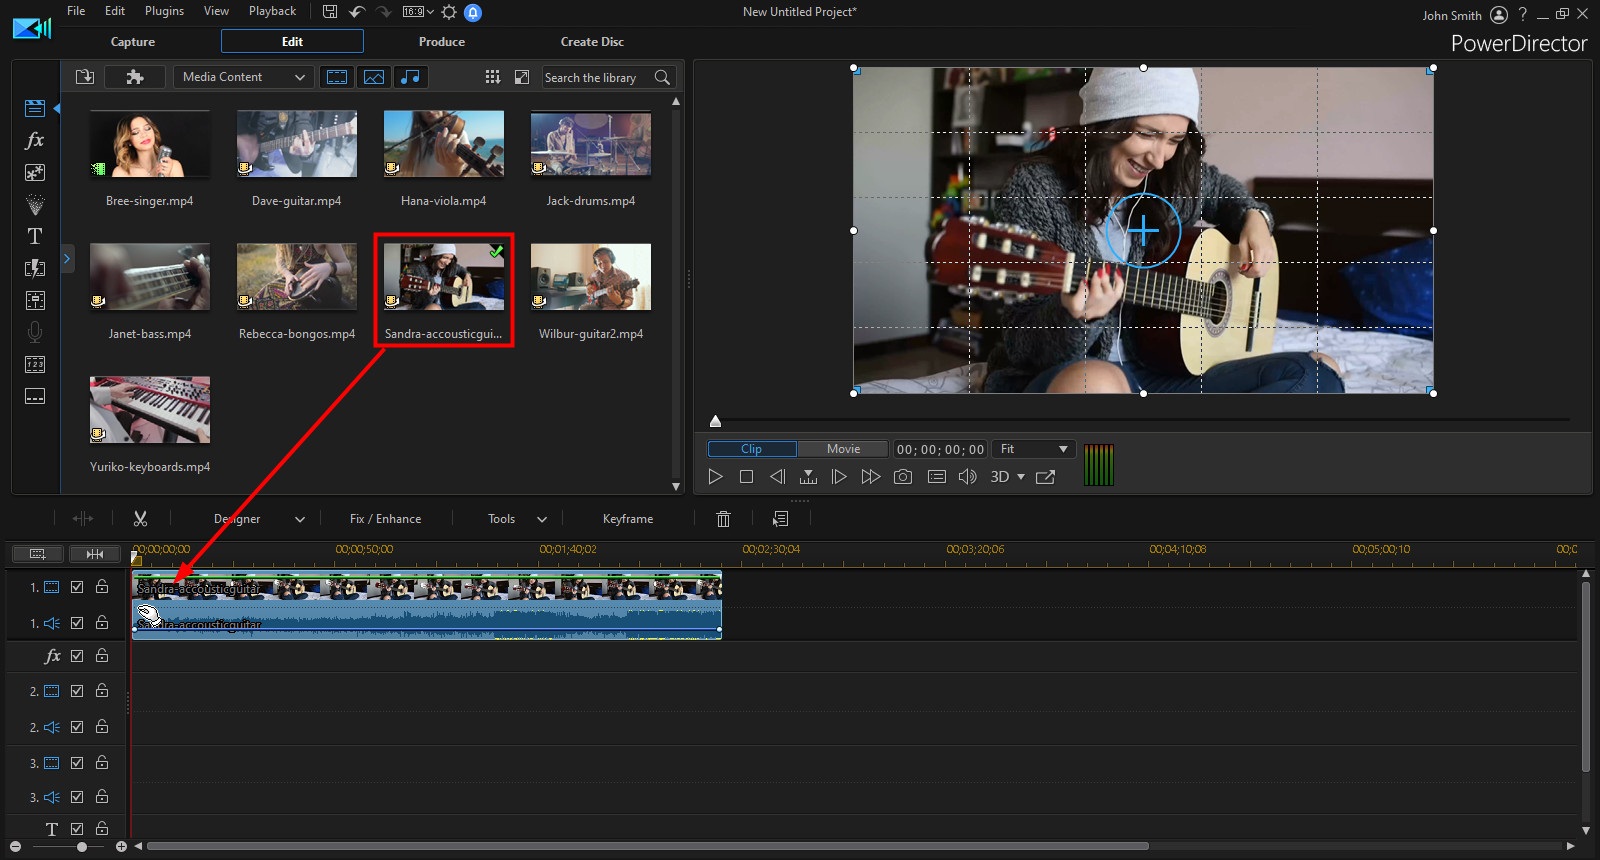
4. Add one of the videos to the video timeline.
5. Click on the  button underneath the preview window and then select Grid Lines.
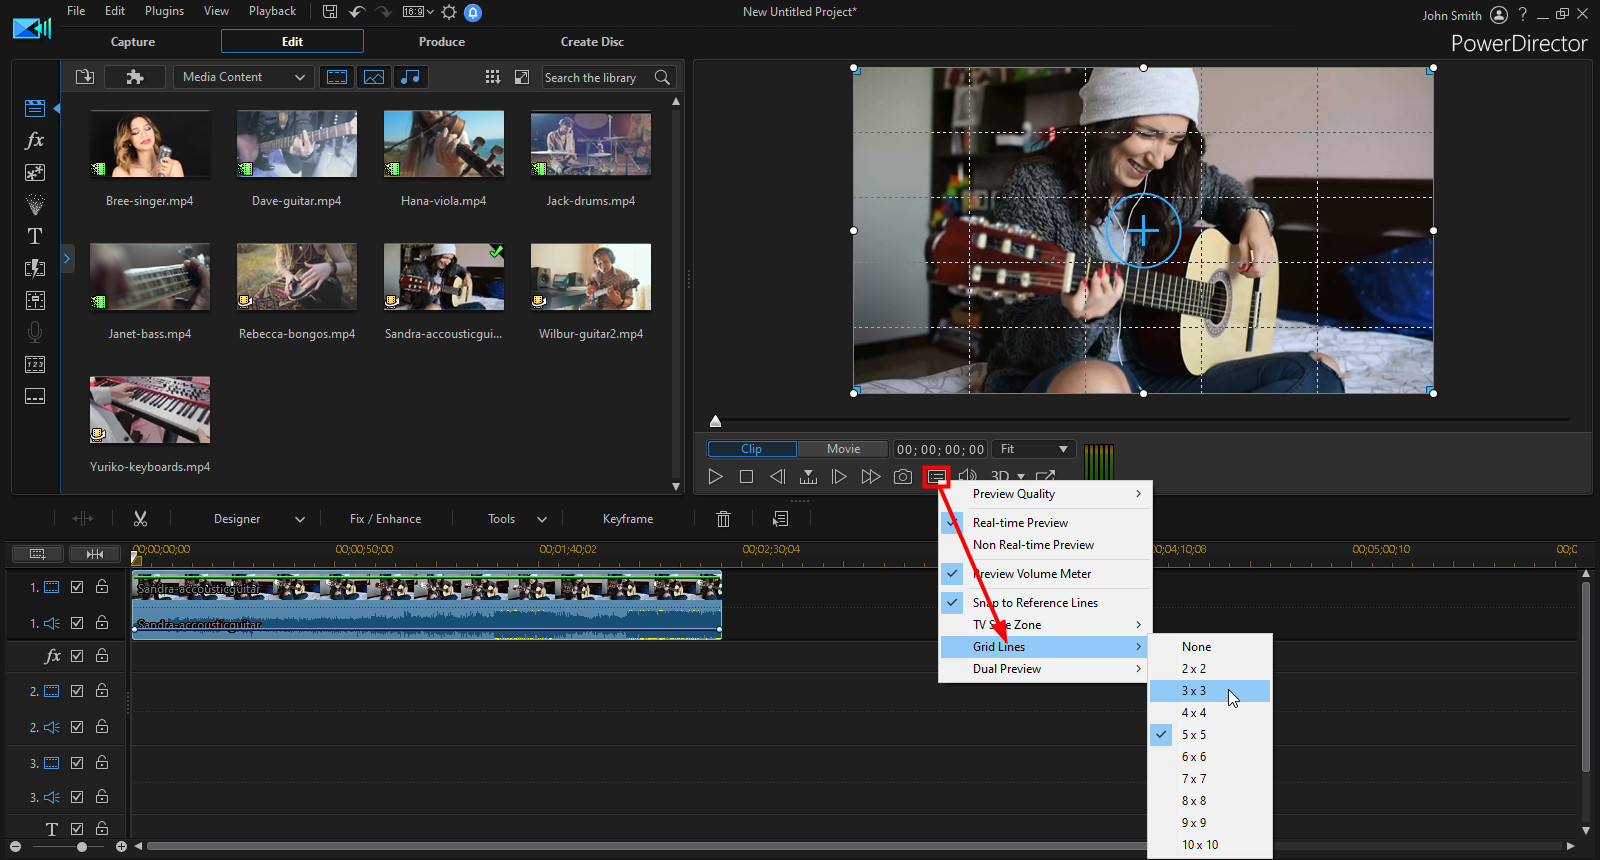
6. Next, select the grid lines that will match the number of videos you have. It will make the placement of each video in the video window a lot easier. In our example, since we have 9 videos, we will select 3X3.
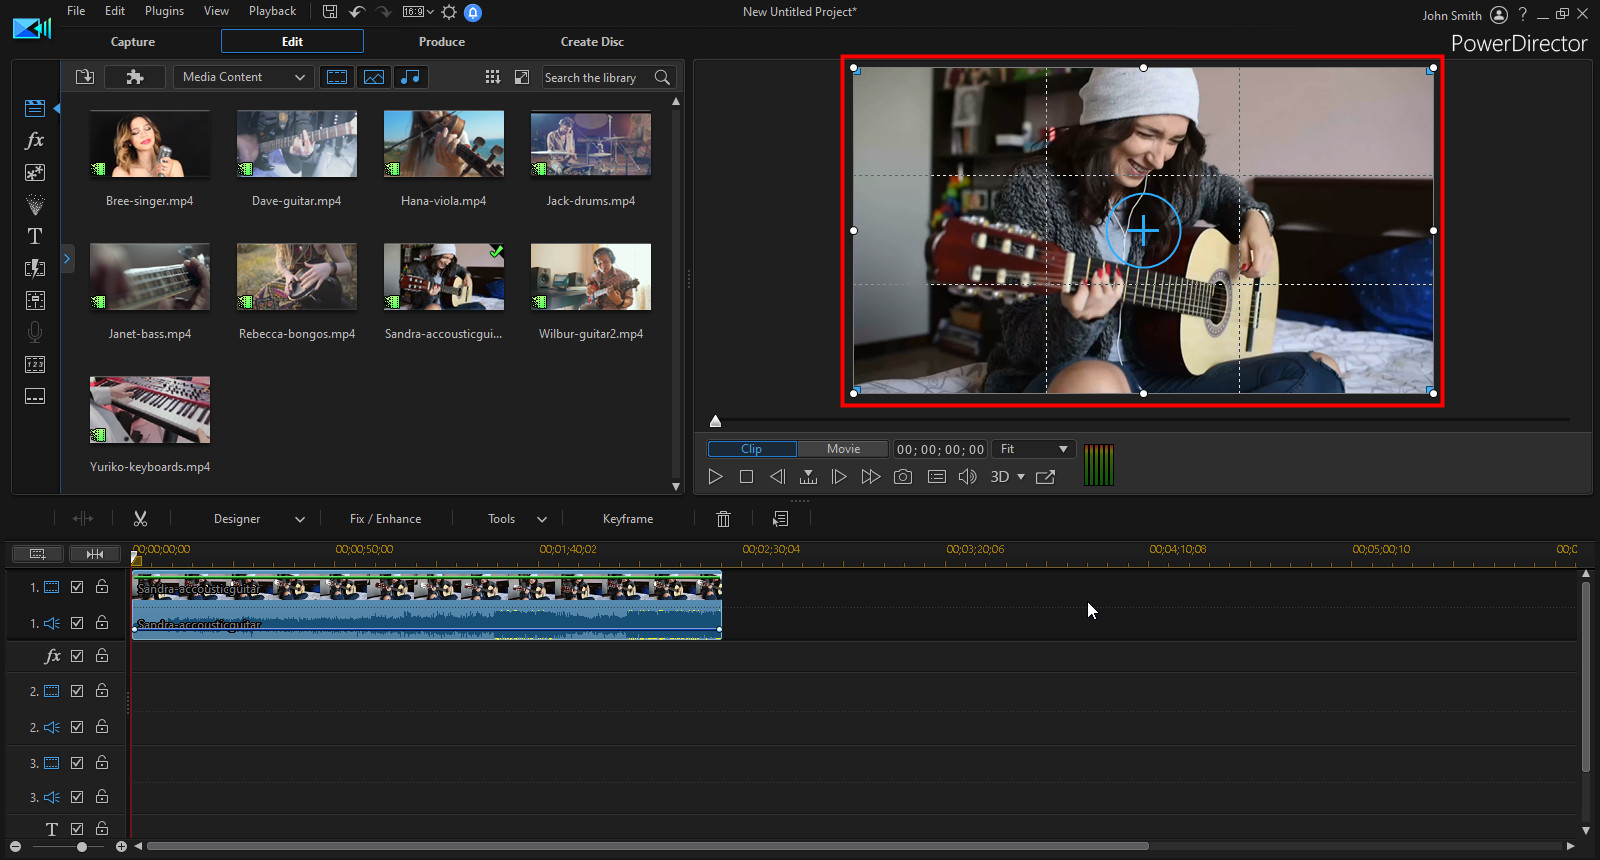
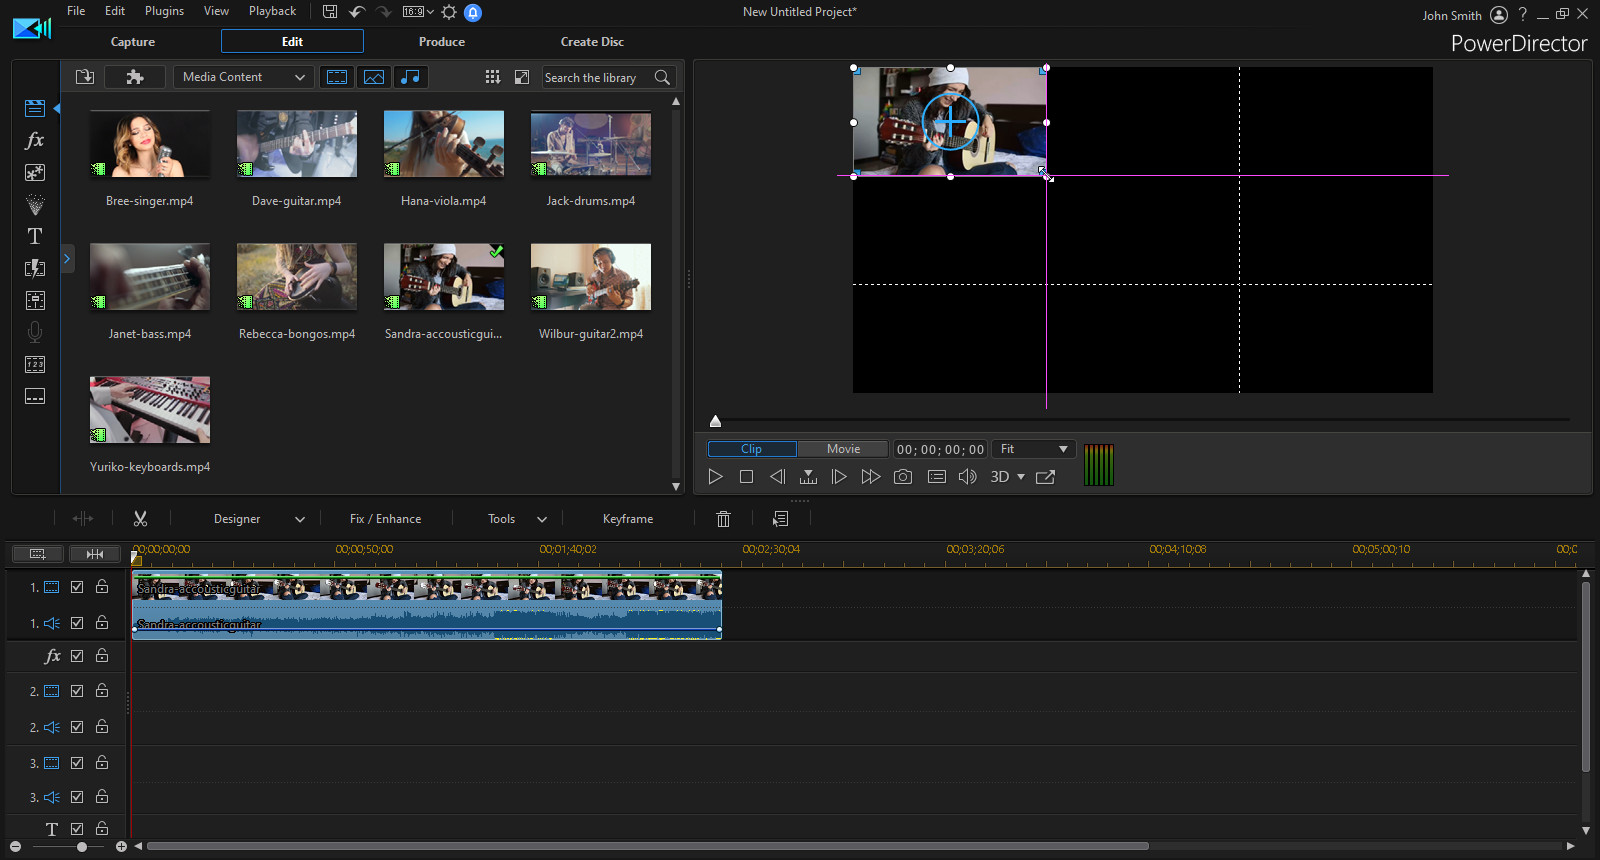
7. Adjust the size of the first video so that it fits in one of the grid line boxes.
8. Repeat the same process, adding all of your videos underneath the first video on the video timeline.
Aligning Videos and Syncing Audio
Now that you have all of your videos in the video timeline, you’ll want to align them and sync the audio to construct the song. How you will do this depends on the song and how the videos were recorded. Below we have outlined some PowerDirector features that will be helpful for this.
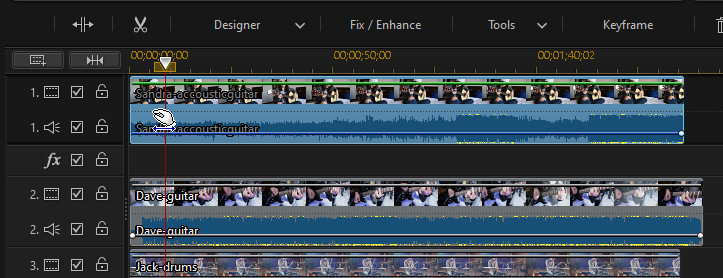
Trimming Clips
Trimming Clips Since these recordings are coming from different sessions, there will no doubt be a need to trim the video clips, especially the starting points. You can easily do this directly in the timeline by clicking and dragging the edges of the clips. Finding a beat or matching point in the song will also help align the tracks to make finding a synchronized starting point easier.
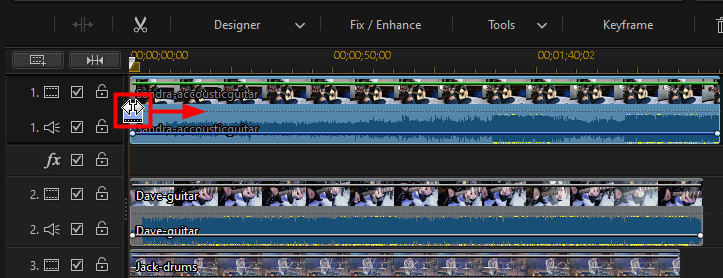
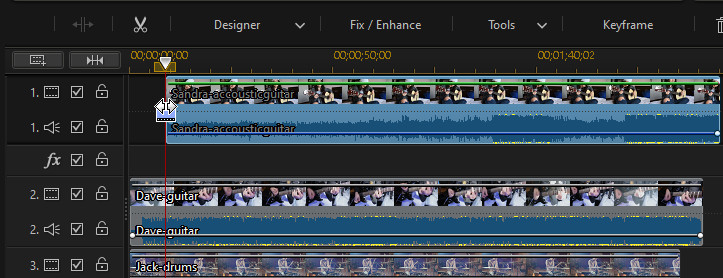
Since the video clip we trimmed in our example is the first video we want in our final video, we need to then drag the clip left to the start of the video timeline.
Timeline Markers
In most songs, not all of the instruments start playing immediately, so there will be a need to stagger the starting points of the videos. You can use timeline markers to help you do this with the more precise placement of video clips on the video timeline. Once added, media clips snap to the timeline markers, allowing your media to appear in your video production at the exact moment you want it.
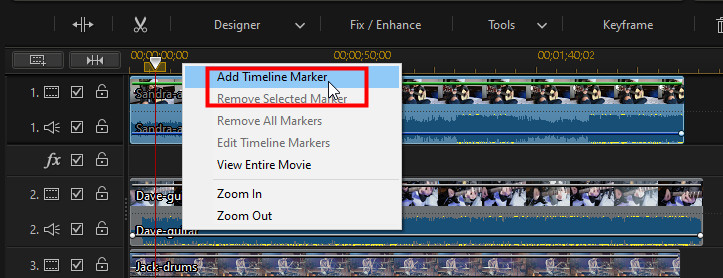
Preview your video to find the precise timecode you want the next video to come in. In our example, we want the drums to start at precisely 12 seconds and 16 frames. To add this timeline marker, right click on the timeline ruler and then select Add Timeline Marker.
In the Add Marker dialog, adjust the marker time to match the exact timecode you need and then click OK.

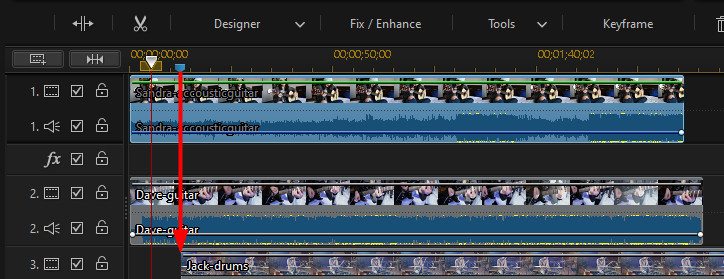
Once the timeline marker is added, drag the video you want to come in at that time to it and it will snap into position.
Using Sync by Audio
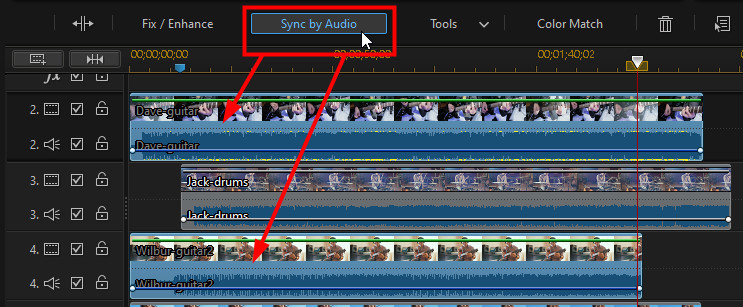
Some of your video clips may have the same audio, for example if you have two rhythm guitars playing the exact same part. This is where you can use the Sync by Audio feature to sync the two clips using the audio.
To use Sync by Audio, hold down the Ctrl key on your keyboard, select all of the video clips in the video timeline you want to sync and then click the Sync by Audio button above the timeline.
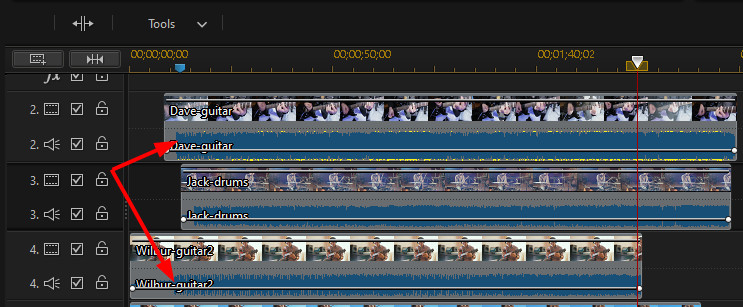
PowerDirector will analyze the audio and then sync the clips in the timeline.
Setting Audio Levels
Once you have aligned and synced all of your video clips, the last step is to set the audio levels. The last thing you want is the audio from one of the clips over powering all the other audio tracks.
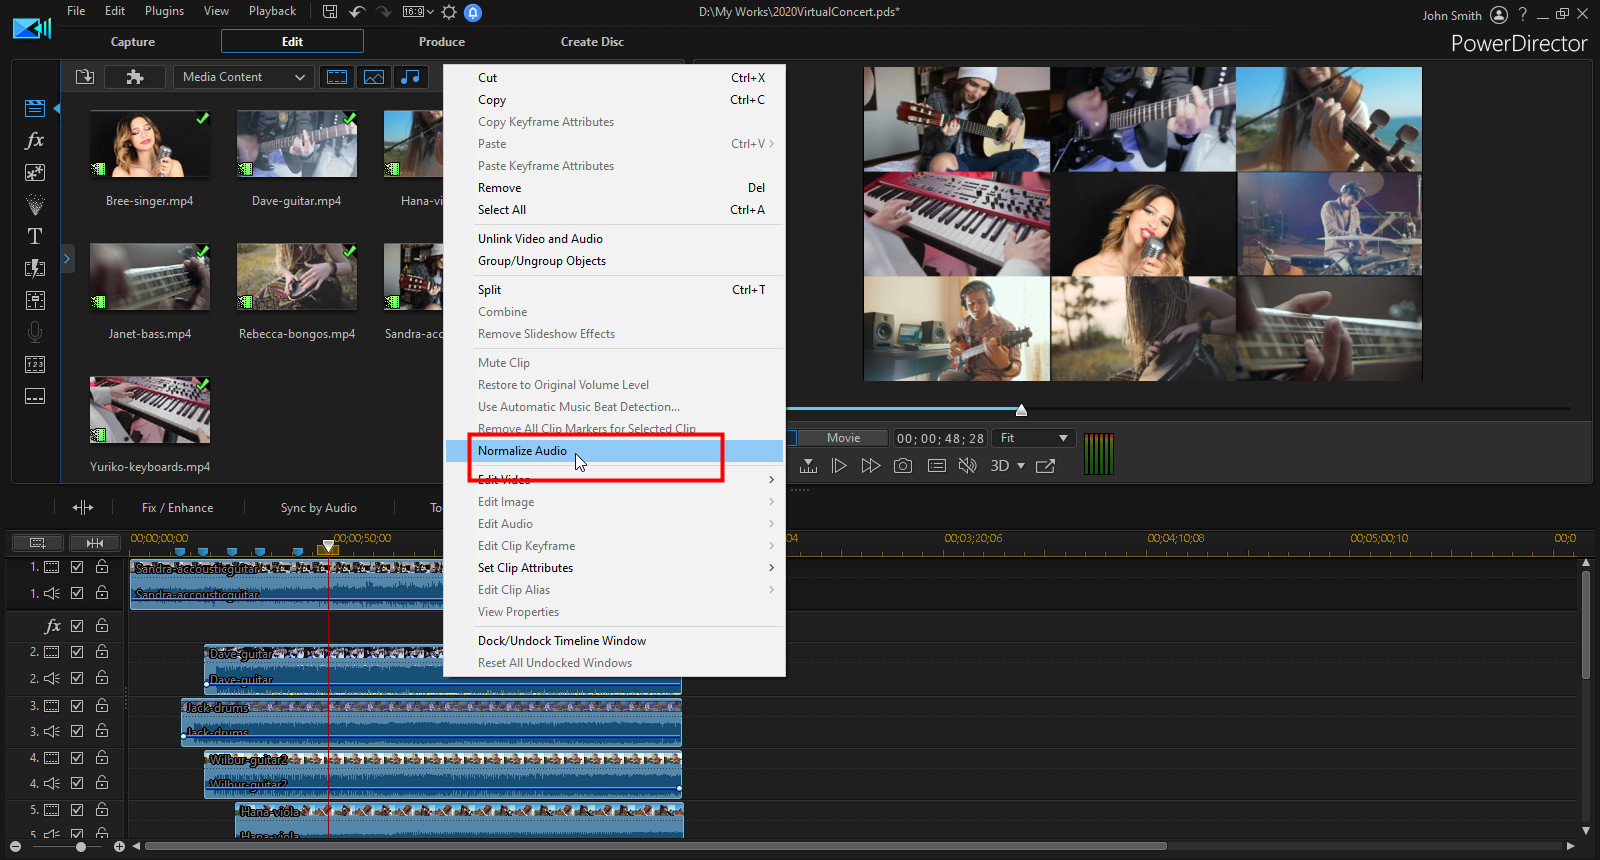
The simplest way to do this is to select all of the video clips, right click on the timeline, and then select Normalize Audio. Doing this will set the audio output for all of the selected clips to the exact same level.
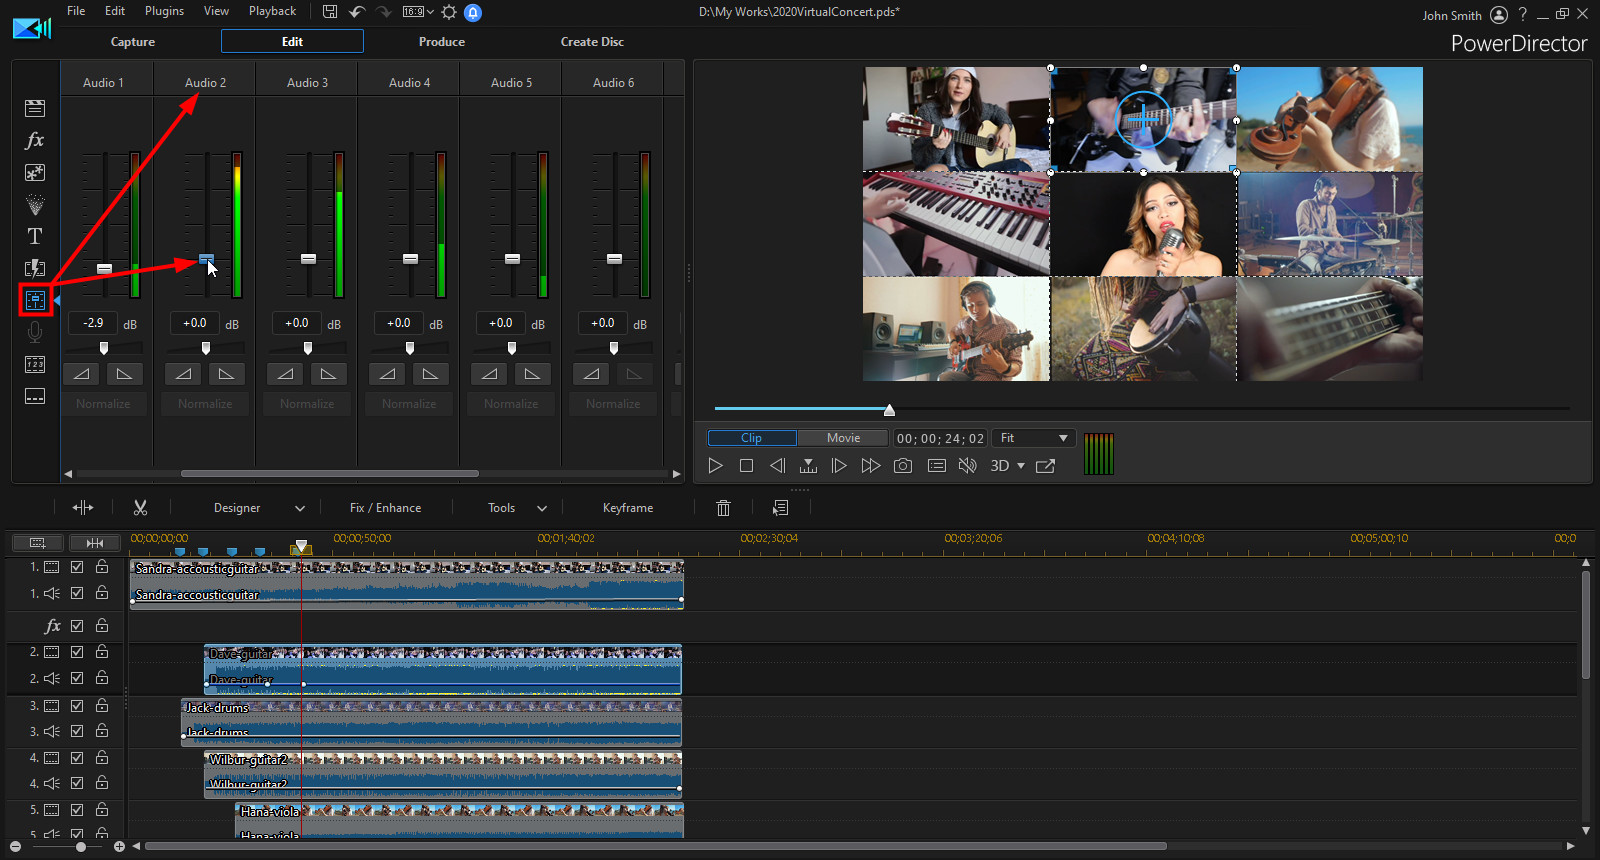
If you want more control over the volume of the audio on each track, you can adjust the levels of each video in the Audio Mixing Room. Just enter the Audio Mixing Room and then manually adjust the levels using the available controls
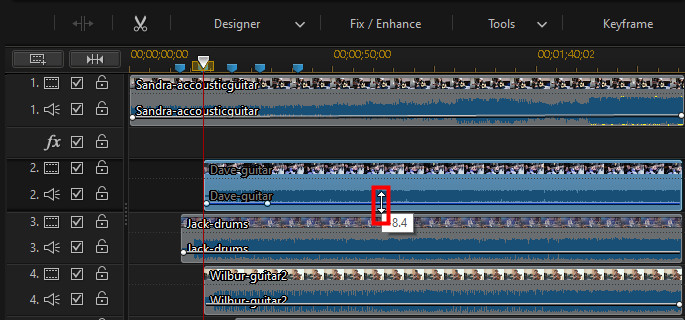
You can also adjust the audio level of a video clip right in track by dragging the volume key up or down as required.
The virtual concert video is now ready to be produced and shared on YouTube.
2. Create a Multi Camera Video with the MultiCam Designer
If you are considering recording just yourself in front of a single camera, there might not be any need to edit a video. However, we have some suggestions and ideas to help add a little production value and make your video stand out from the rest.
One idea would be to borrow multiple family members’ smartphones to record your video from multiple angles. Just adding a second or third angle raises the visual impact tremendously. You can then use PowerDirector’s MultiCam Designer to create a professional looking virtual concert video with up to four video tracks from various perspectives. Multi cam editing lets you seamlessly edit footage of an event from multiple cameras, simulating the use of a live camera switcher.
Check out the tutorial Editing Music Video Using Multicam Clips for recommendations on how you can set up your cameras for recording and a whole lot more.
Once you have your footage from multiple cameras, here is how you can edit it in PowerDirector:
1. Launch PowerDirector 365 and then select Full Mode.
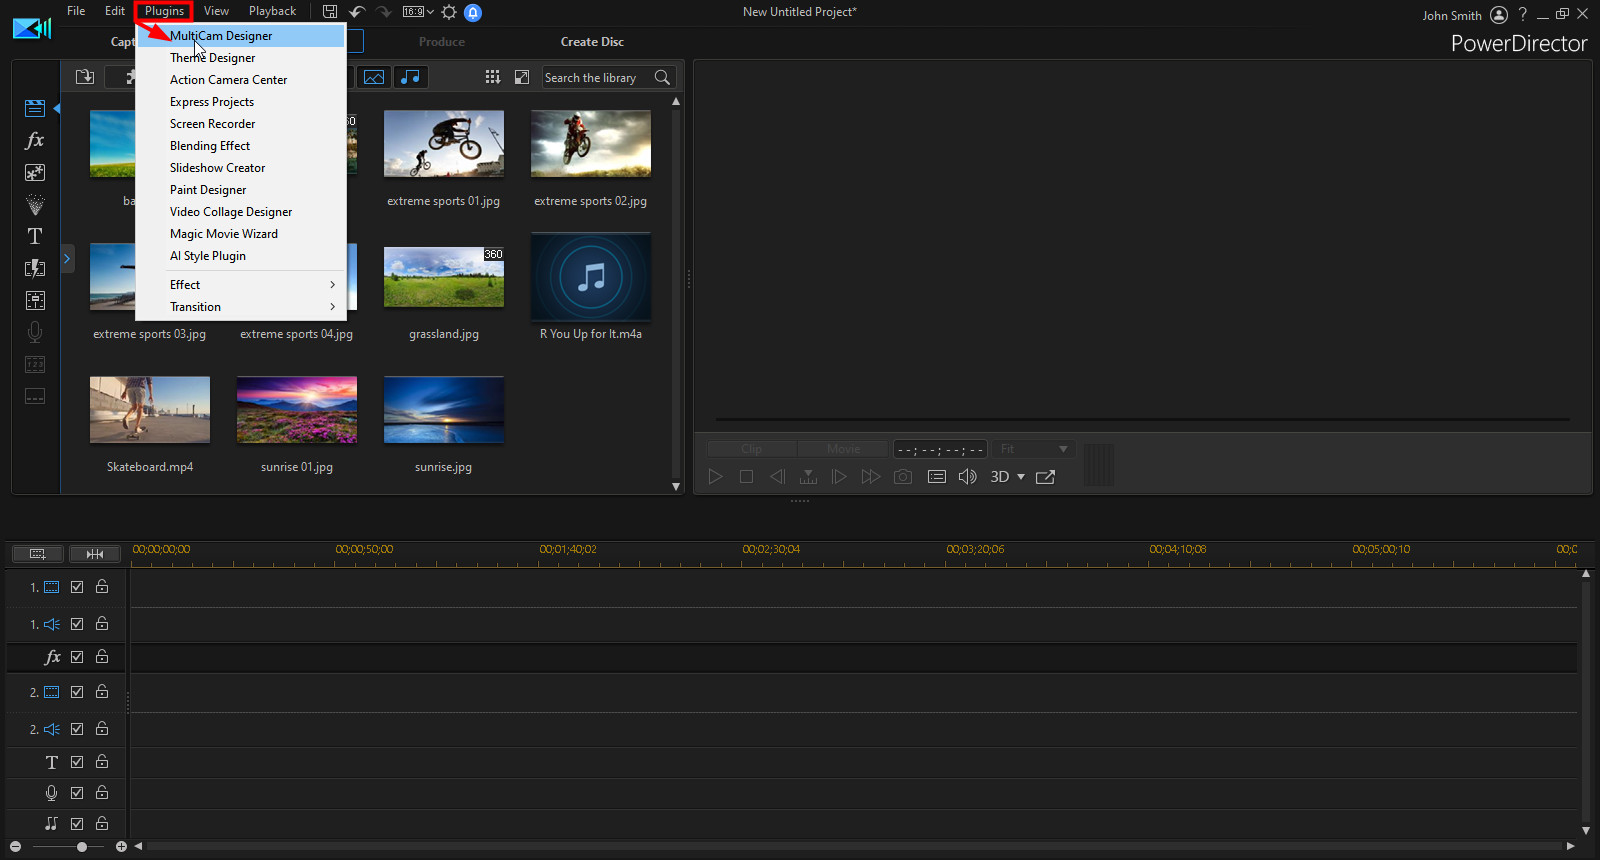
Select MultiCam Designer from the Plugins menu item.
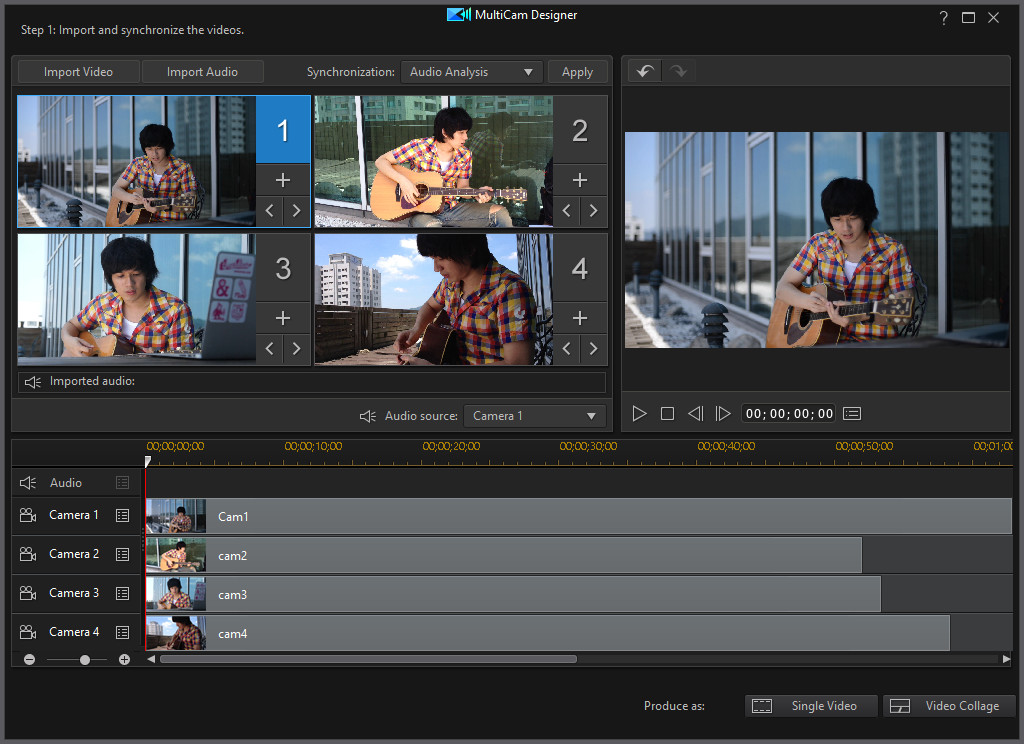
3. In the MultiCam Designer, click the Import Video button and then select Import From Hard Drive.
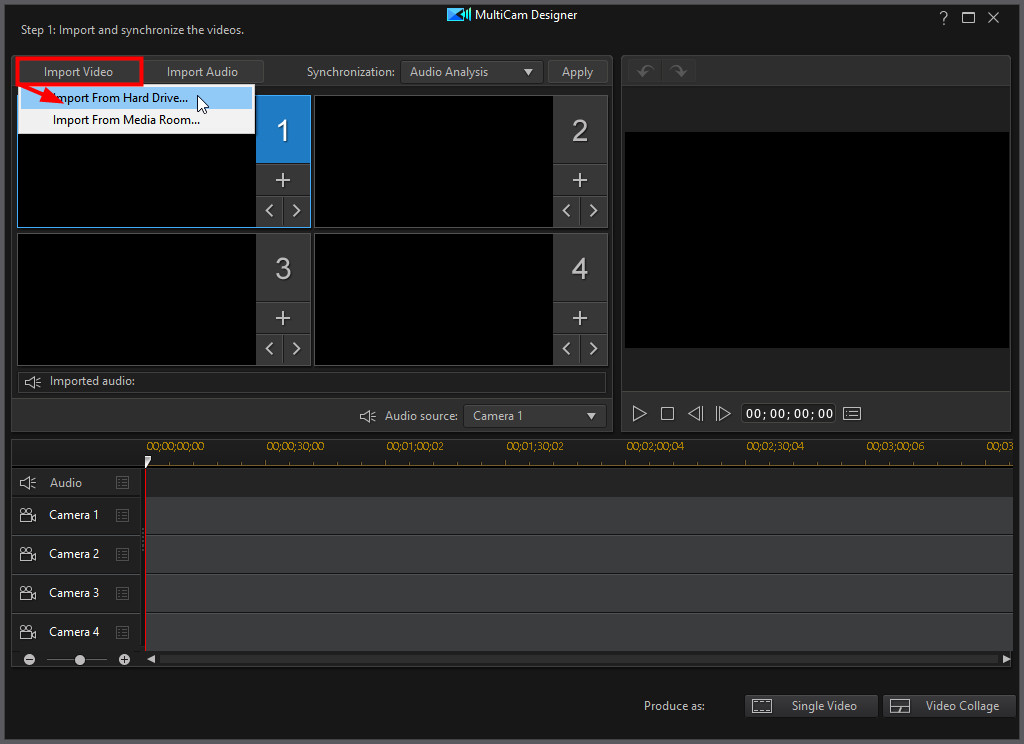
4. Select all of your recorded video files and then click Open to import them.
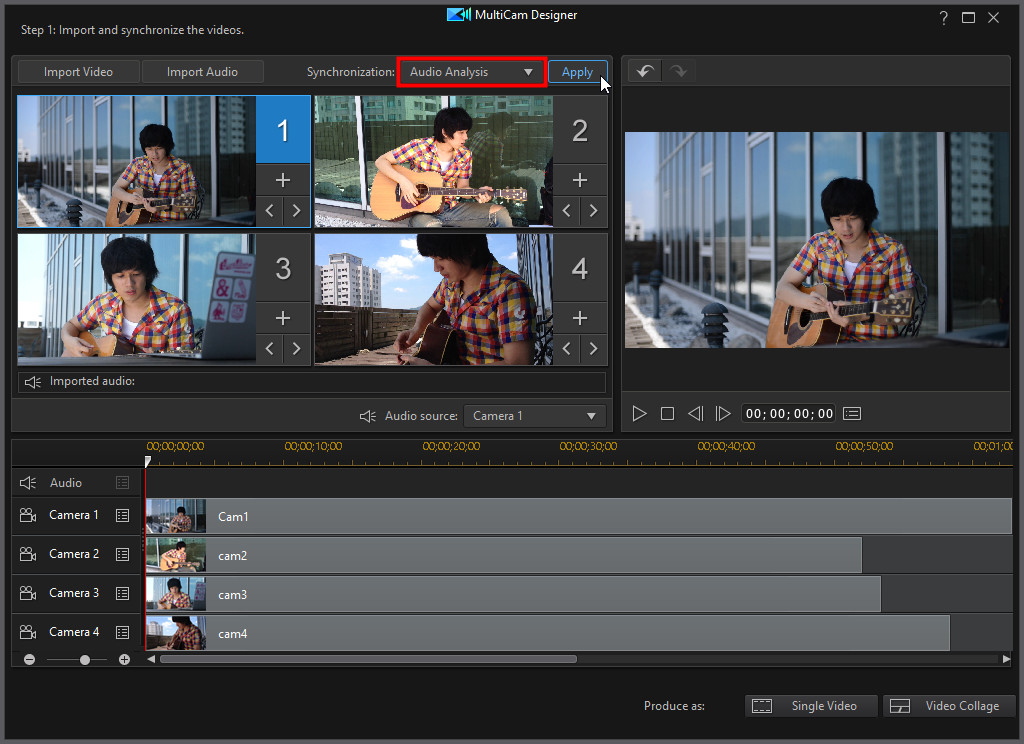
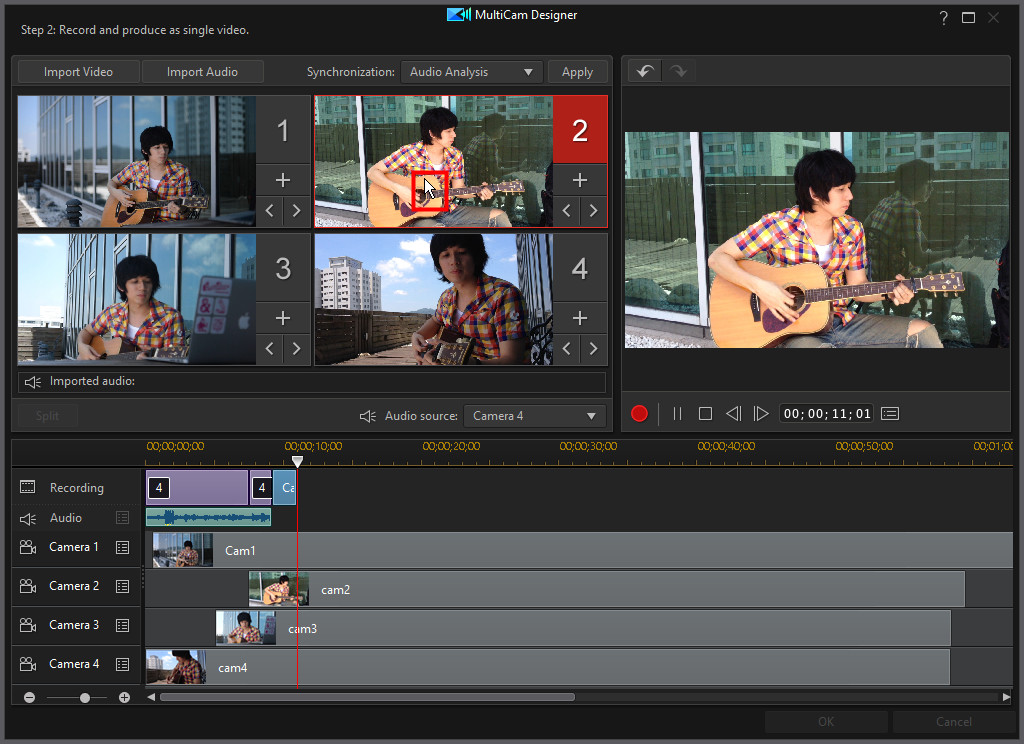
5. Sync the audio in the imported videos by selecting Audio Analysis from the Synchronization drop-down and then clicking Apply.
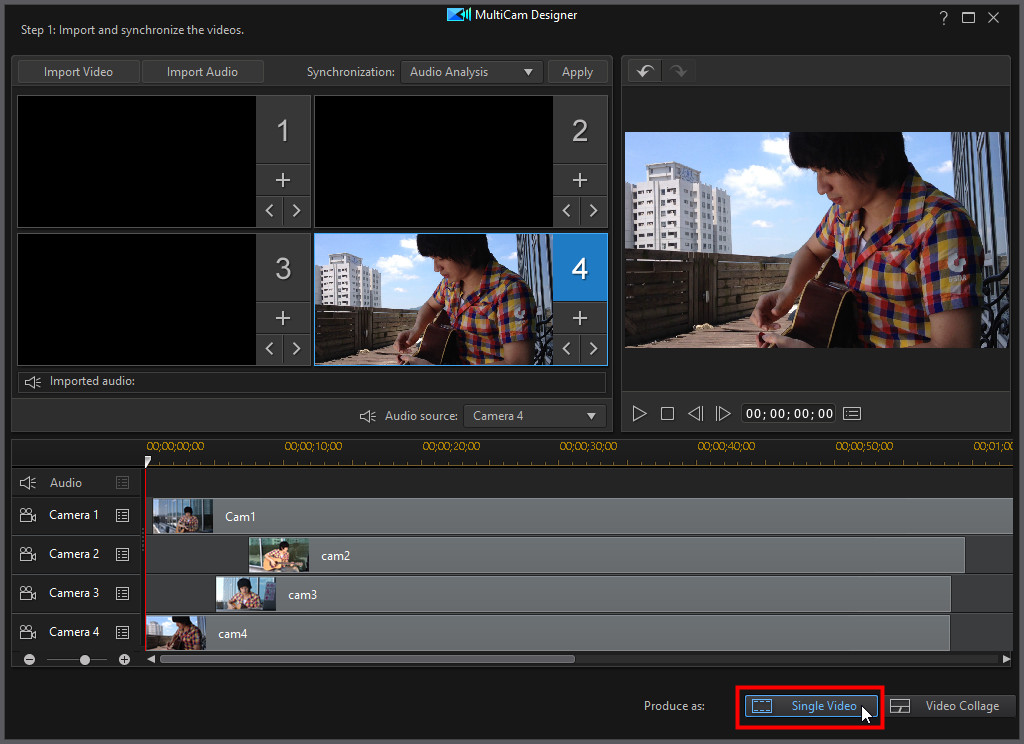
6. Select the camera you want to start the recording from by clicking on it, and then clicking the Single Video button.
7. Click the record button to start recording.
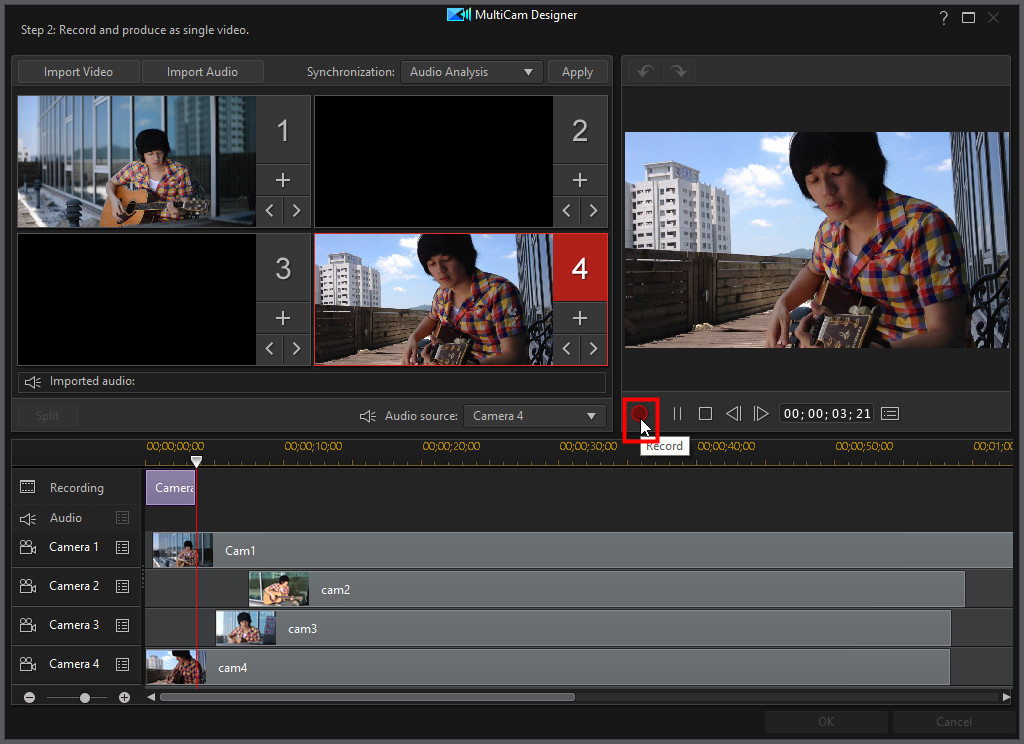
8. Click on another camera to add footage from that camera to the recording.
9. Continue until you have used all of your footage,
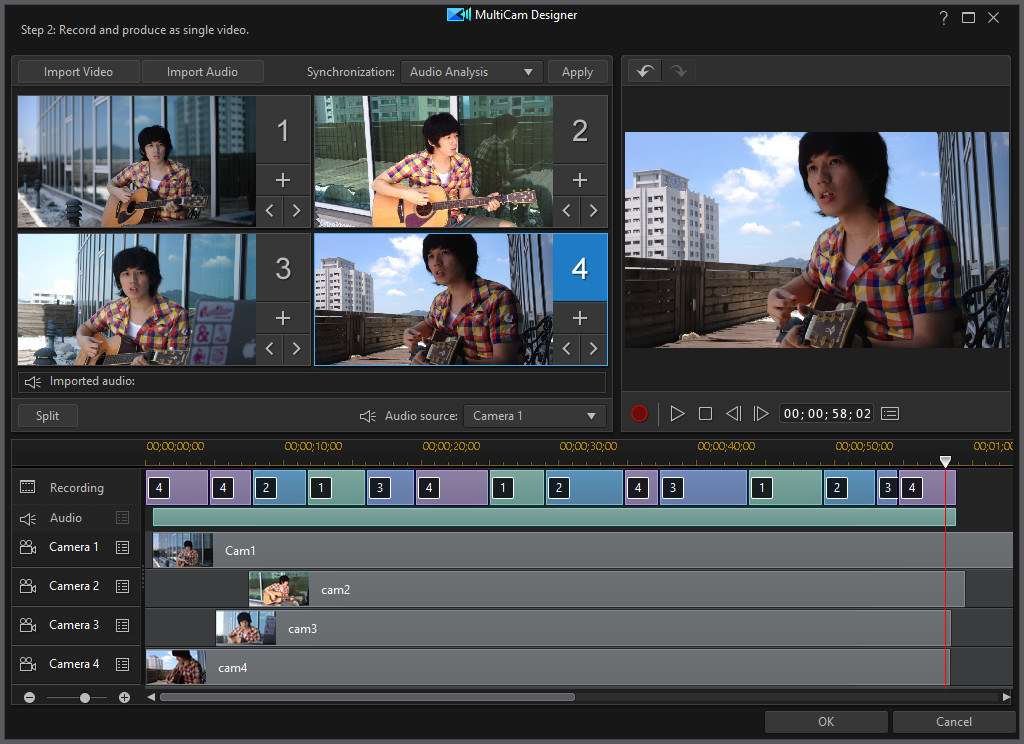
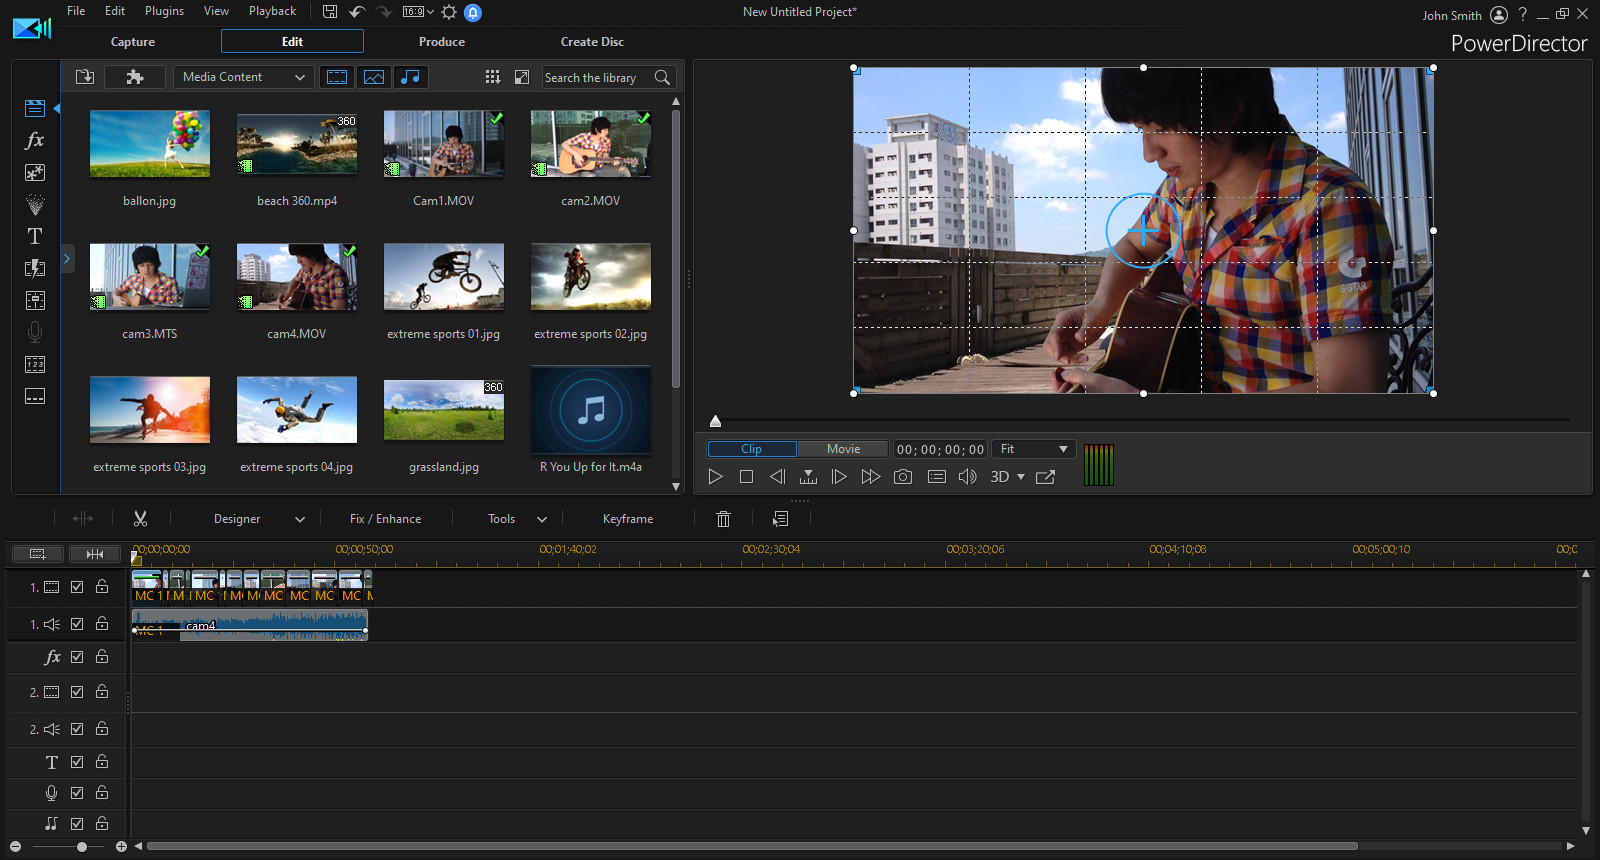
and then click OK to import the edited video into the PowerDirector video timeline where you can add title text and more before producing it.
Once you have your recorded video footage, it’s that easy to make an impressive looking video. Check out the tutorial we mentioned earlier for more in depth steps and tips on creating a multi camera video in the MultiCam Designer.
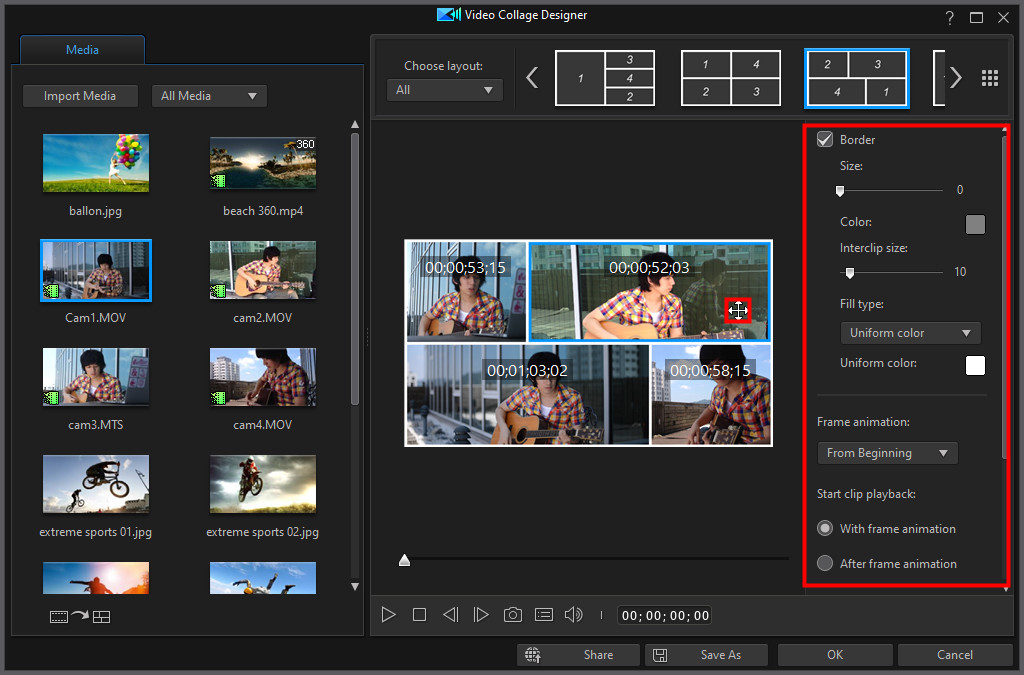
3. Create Even More Impressive Multi Camera Videos with the Video Collage Designer
If you want your video to be even more outstanding, you can use the Video Collage Designer to combine up to seven video clips into a single customizable collage, complete with animated openings.
1. Launch PowerDirector 365 and then select Full Mode.
2. Select Video Collage Designer from the Plugins menu item.
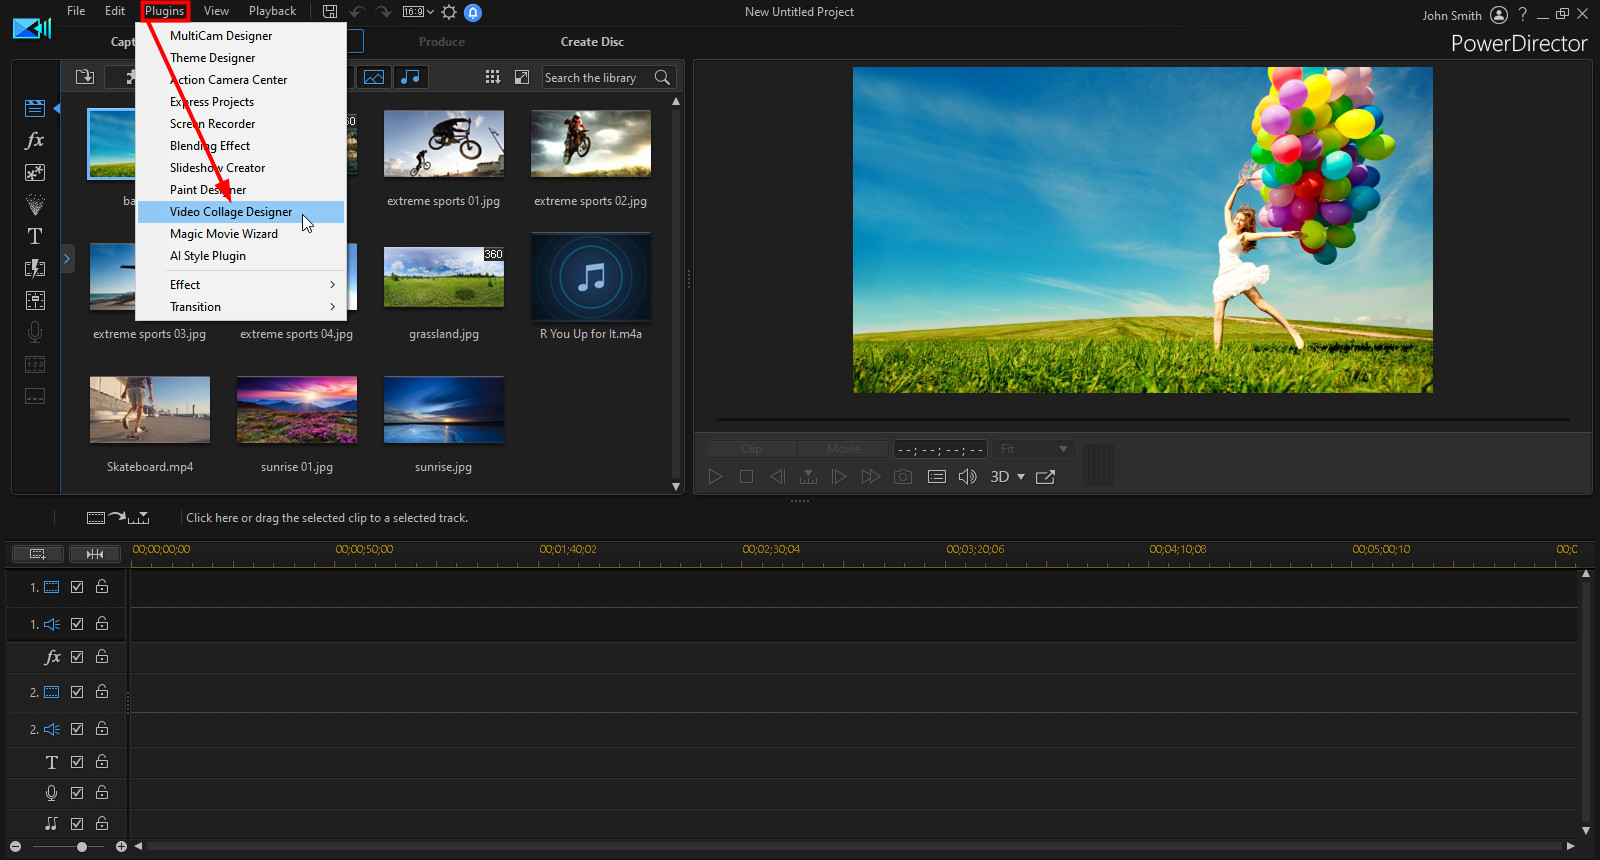
3. In the Video Collage Designer, click the Import Media button,
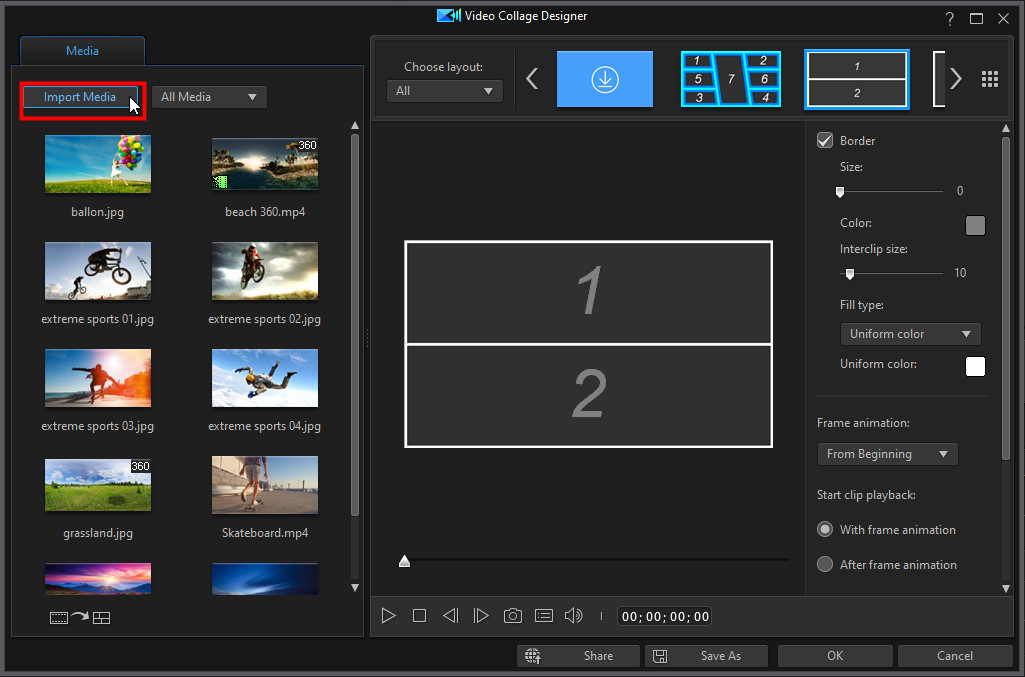
and then import your recorded video clips.
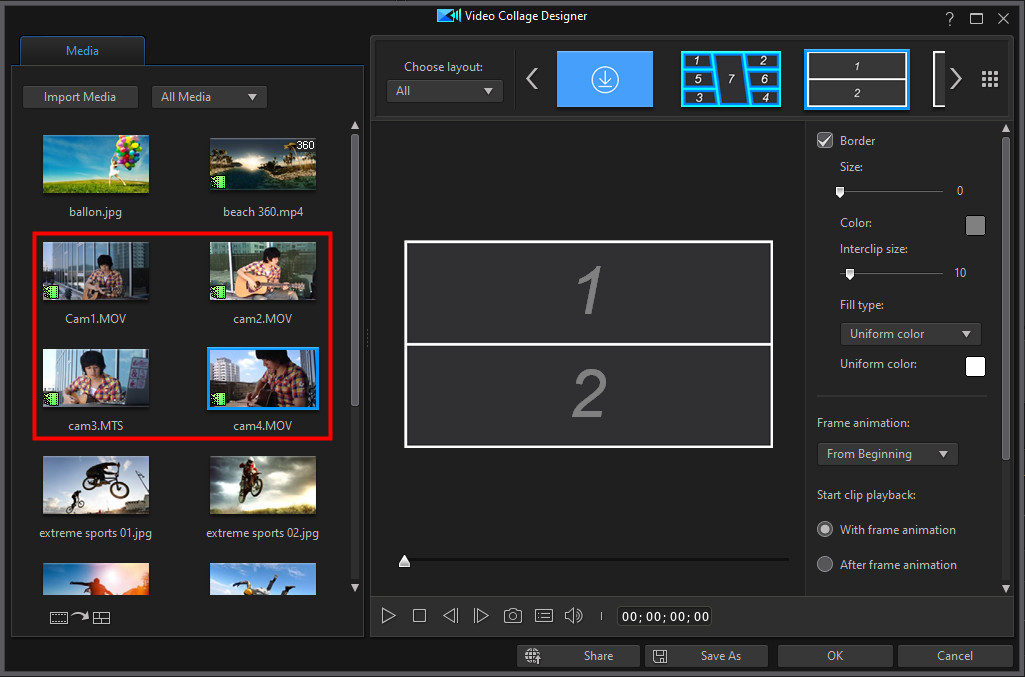
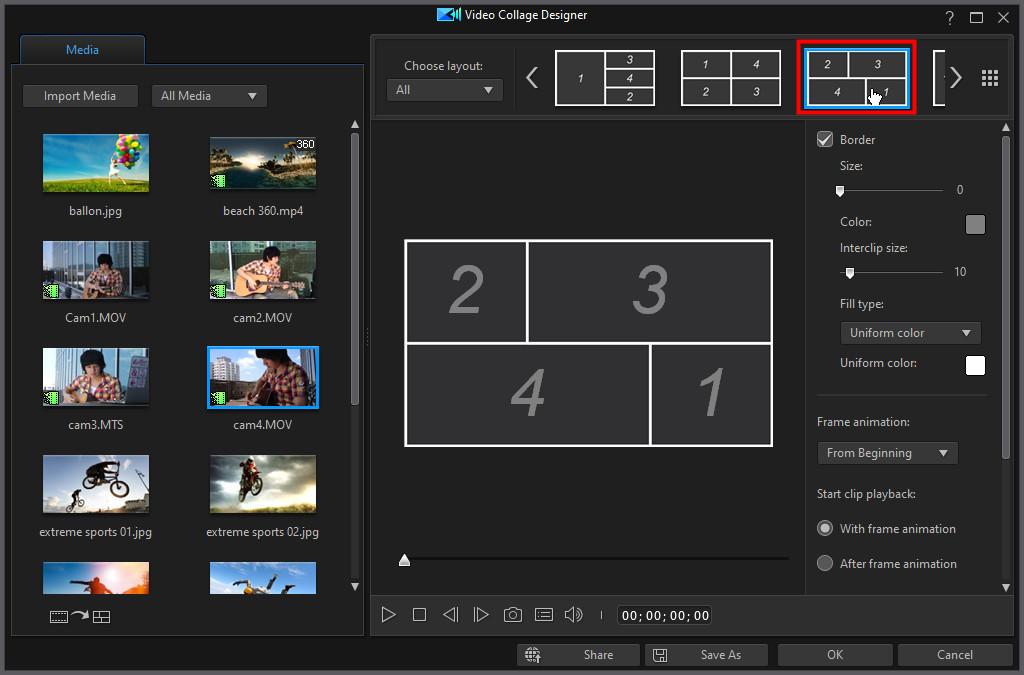
4. Select the collage layout you prefer and one that matches the number of clips you have.
5. Drag your video clips to the collage frames.
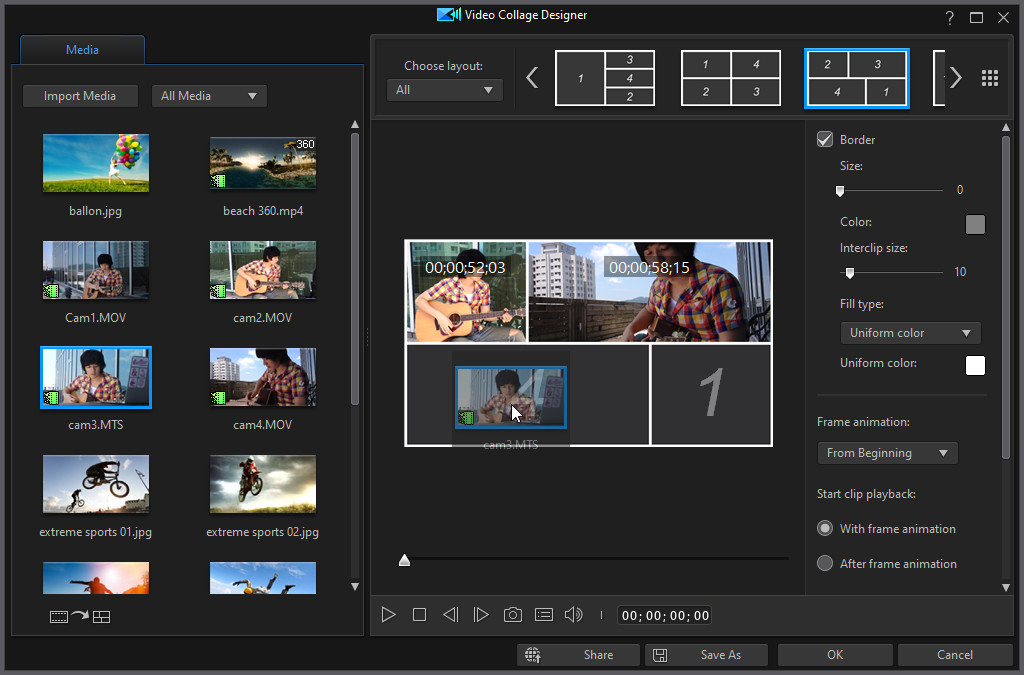
6. Preview the video collage and then adjust the videos and the collage settings as required.
7. Click OK to save the new video collage and add it to the video timeline.
For more information on creating this video collage in PowerDirector, check out this tutorial.
Become the Next YouTube Sensation
Go download the free version of PowerDirector now to get started on your virtual concert video. You can also take a look at all the available video tutorials for PowerDirector if you are curious as to what other features are available in the software – you might be surprised by what you can make!
PowerDirector provides you with all the tools you need to create the next viral YouTube music video. All you need is the inspiration and possibly a little help from your musician friends. Rock on!
Get PowerDirector 365 Essential for Free
Take your videos to the next level with the best video editor for Windows PC
