
How To Make a Stop-Motion Video [Windows, Mac, App]

Have you ever watched behind-the-scenes footage of a stop-motion feature film and thought it looked almost impossible to pull off? Animators used to work for years on these projects with pain-staking precision and patience.
Today it has become easier than ever to create your very own stop-motion masterpiece. In this article, you will learn valuable tips for making stop-motion videos, from prep to shooting and editing.
- What Is Stop-Motion?
- How to Make a Stop-Motion Video?
- How to Prepare for a Stop-Motion Shoot?
- How to Shoot Stop-Motion?
- What to Do Before Starting to Edit Stop-Motion Video?
- How to Edit Stop-Motion on iOS and Android?
- How to Edit a Stop-Motion Video on Windows and Mac?
- How to Make Stop-Motion Videos Better with Editing Apps?
- Stop-Motion Video Editor Free Download
- Stop-Motion Animation FAQs
- How Long Does It Take To Make a Stop-Motion Video?
- How Many Photos Does It Take To Make a 1-Minute Stop-Motion?
- What Are Some Creative Stop-Motion Ideas?
- What Are the Best Stop-Motion Apps on iOS and Android?
- What Are the Best Stop-Motion Software on Windows and Mac?
- What Are Good Examples of Stop-Motion?
- What Features Should I Look for in a Stop-Motion Video Editor?
What Is Stop-Motion?
Stop-Motion is an animation technique where inanimate objects appear to come to life through a series of still photos. Objects in the frame are subtly moved between every shot, and when strung together, they seem to move on their own.
Stop-Motion animation used to be found primarily in children’s films such as Tim Burton’s The Nightmare Before Christmas, Wallace & Gromit, and Christmas Claymation movies like Rudolph the Red-Nosed Reindeer. However, in recent years stop-motion has grown in popularity and has been used for everything from marketing campaigns to tutorials.
Stop-Motion animation does not require any prior experience, is free to create, and is fun for adults and kids.
How to Make a Stop-Motion Video?
How to Prepare for a Stop-Motion Shoot?
The set-up is the most essential part of any stop-motion shoot. The better the set-up, the less work you will have to do editing the video afterward.
Step 1: Decide what to shoot and then make or gather your characters and backgrounds.
Step 2: Decide how long you want your completed video to be and how many shots you need to make that happen. This is important to do ahead of time, so you know how long it will take to make your video and help manage your expectations of the finished product.
Step 3: Storyboard or make notes of the different shots you need. Then test the movements of your objects to make sure they can handle your vision.
Step 4: Make sure your phone or DSLR camera is fully charged, plugged in, and has enough storage space to take hundreds of pictures.
Step 5: Set up your scene. Do this near an outlet so you can keep your camera charging during the shoot. You don’t want it to die halfway through or to jostle it by plugging it in.
Try not to set up near a window or rely on natural light, as the shadows and lighting will change during the day.
Step 6: Set up the camera on a tripod, selfie stick, stand, or anything to keep it still during the shoot. Using a remote camera trigger or intervalometer is the best way to ensure your camera doesn’t move and ruin your shots.
If you don’t have a remote camera trigger or intervalometer, test hitting the shutter button and ensure your camera rigging is secure.
Step 7: If using a DSLR camera, change all settings from auto to manual, so they don’t change during the photoshoot, such as white balance or crop sensors.
Step 8: Take a few test pictures to ensure the framing is perfect.

How to Shoot Stop-Motion?
Now that you're set up, it’s time to start shooting. Remember to stay relaxed and have fun. This can be a long process, but the results will be worth it.
Step 1: Set the intervalometer setting on your camera or stop-motion app, allowing enough time for you to change the position of your characters/objects in between each shot.
You can skip this step if you plan to use a remote trigger or push the shutter button yourself.
Step 2: Take a photo of your initial scene.
Step 3: Move your character(s) very slightly—the smaller the movement, the smoother the animation.
Think about how the object moves typically. For instance, if you made a person out of clay, simulate how a person walks by swinging the arms with each step or changing facial expressions.
Try not to move the background or bump anything else in the shot while moving your characters.
Step 4: Take another shot and then move your characters again.
Do this as long as it takes for your video to be done. If you figure out frames per second ahead of time, you will know how many shots to take for the preferred length of your video.
What to Do Before Starting to Edit Stop-Motion Video?
After shooting, you will need to use a video editing software or app. For this, we recommend PowerDirector. It’s free to download and an incredibly easy video editor to use. In addition, it’s available on both mobile devices and computers.
Make sure your footage is organized all in one place. For example, make a dedicated album if it is on your phone.
If you plan to edit on your computer, import all your images, then put them in a single folder or separate folders for each scene.
How to Edit Stop-Motion on iOS and Android?
Here’s how to edit a stop-motion video on your iPhone or Android device using the PowerDirector app:
Step 1: Open the PowerDirector app and hit New Project.
Step 2: Name the project and choose the aspect ratio.
Step 3: Click on Photo to add your photos to the timeline.
Add each photo in the correct order by clicking on the plus sign in the middle of the image.
Step 4: Tap on the clip on the timeline to highlight the photo and tap the Pencil icon.
Step 5: Scroll to the clock icon that says Duration.
Use your finger to scroll the toolbar and choose when you want each photo to appear onscreen. You probably want about a 10th of a second for stop motion videos—the smaller the time, the smoother the video.

Step 6: Turn on Apply to all photos, then OK.

Watch your video back to make sure you like the length and adjust as necessary.
You can now save your video or continue editing by adding titles, special effects, or sound effects.
How to Edit a Stop-Motion Video on Windows and Mac?
Here’s how to edit a stop-motion video on your desktop using PowerDirector:
Step 1: Import your photos into the Media Room, then drag all your photos to the timeline in the correct order.
Step 2: Set the duration of the video. Highlight all the photos at once. A toolbar will appear above the timeline. Click on the Clock icon and set the time you want each image to appear onscreen.
You probably want about a 10th of a second for stop motion videos—the smaller the time, the smoother the video.

Step 3: Watch playback to ensure clips are in the correct order and the stop-motion plays smoothly.
Step 4: Save and Produce video, or continue editing by adding titles, music, and effects.
It’s that easy to make a stop-motion video.
How to Make Stop-Motion Videos Better with Editing Apps?
Making your stop-motion video look more polished and professional can be done with a few simple steps in the PowerDirector app.
1. Add Titles
Titles make a video feel complete. Use a ready-made template or create your own. Add in an animated title page or static subtitles. Finally, make a credits sequence and thank those who made your film possible, all with these easy steps:
Step 1: Hit the icon that looks like two squares on top of each other on the left side. This will bring up the Text Menu.
Step 2: Choose a text style from the top menu.
Choose from Speech Bubbles, Quote Titles, Colorful, Cool Effect, Minimalist, TV Broadcast, Interactive Titles, Social Media, Vintage, Expressive Titles, or Classic.
Step 3: Choose a specific text template in your chosen style by hitting the + button.
The text will be added to your timeline. Move it to the front, middle, or end of your video, wherever you need it.
Step 4: Click the Pencil icon to edit the text.
A menu bar will appear along the bottom and allow you to change the text, font, color, and more.

2. Add Effects
Add a cool effect over your video like Glitch, Fish-eye, or Mirror. Your stop-motion film will look like it was made in a Hollywood studio instead of on your phone in a matter of seconds.
Step 1: Touch your timeline to highlight your video and hit the Pencil icon.
Step 2: Scroll over and tap FX.
Step 3: Scroll through the effects and choose the one best suited for your video.

3. Add Transitions
If your stop-motion video contains more than one scene, use a transition to make it flow smoothly. The PowerDirector app has hundreds of transitions to choose from, such as Paper Tear, Seamless, and Slideshow.
Step 1: Tap the box in between your two scenes. This will bring up the transitions menu.
Step 2: Choose a transition style from the menu, and then choose a specific transition within that style.

4. Sound Design
Since stop-motion videos are silent, adding sound is crucial in the editing process. PowerDirector has sound effects options and a royalty-free music library right on the app. You can even import your music or sound effects to use.
Step 1: Click the Import Media icon under the Home icon in the menu on the left.
Step 2: Hit Music or Sound FX.
You can import your own music/sound effects or click on the stock library.
Step 3: Find the music/sound effect you want and click the + button to add to your project.
Step 4: Hit your video on the timeline to bring up the Pencil icon.
Step 5: Choose Audio Tool.
In Audio Tool, you can choose Voice Changer, Denoise, Voice Over, and Extract Audio.
Step 6: Bring up the Pencil icon again and choose Audio Mixing.
In Audio Mixing, use the toolbars to change the volume of your dialogue, music, and sound effects separately.

5. Color Correct
Manually adjust the brightness, contrast, saturation, and more of your stop-motion video, or simply add a pretty filter.
Step 1: Click on your video in the timeline and tap the Pencil icon.
Step 2: Open Adjustment.
Step 3: Choose the color tool you need.
Use your finger to move the color bar up and down until the correct look has been reached.
You can also choose Filter and choose between tons of ready-made color filters.

Stop-Motion Video Editor Free Download
Make a professional-looking stop motion video with only a few clicks using PowerDirector’s powerful editing software.
PowerDirector makes it easy to drag all your photos at once and in the proper order onto the editing timeline, which automatically becomes a video. Then, simply adjust the speed, and you’re finished.
For a more cinematic touch, use the editing tools available from PowerDirector to add titles, music, sound effects, special effects, backgrounds, green screen, and many more effects to your stop-motion video.
Download for free on Windows or Mac, or try the free PowerDirector app on iOS and Android.
Stop-Motion Animation FAQs
It depends on how long you want your final film to be and how smooth you want your motions.
To make a rudimentary 10-second stop-motion video only takes about 5 minutes.
Now let’s say you want to make a 5-minute stop-motion video with multiple characters and backgrounds with super-smooth movements. Prep alone could take several hours at least, and shooting could take several days to a week.
A typical film is 24 frames per second, but a stop-motion film should be about 10-15 frames per second. That means 600-900 shots for 1 minute of film.
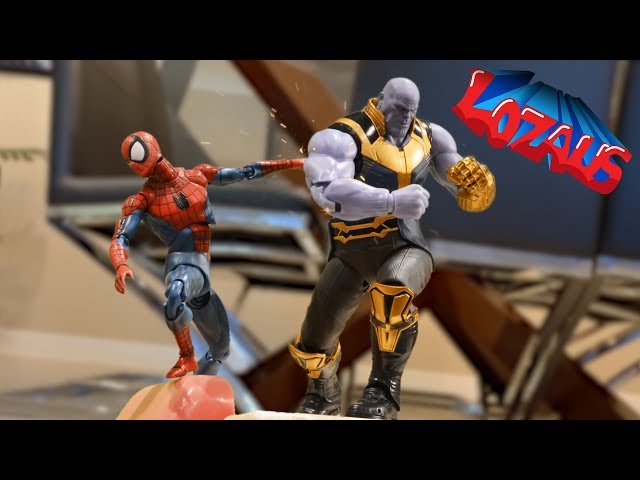
Toys Come Alive
One of the most popular types of stop-motion is when toys come alive. Toys make easy stop-motion subjects because you don’t have to build them yourself as you would with paper cut-outs or clay. Action figures are a great choice because they have moveable joints and are easily poseable.
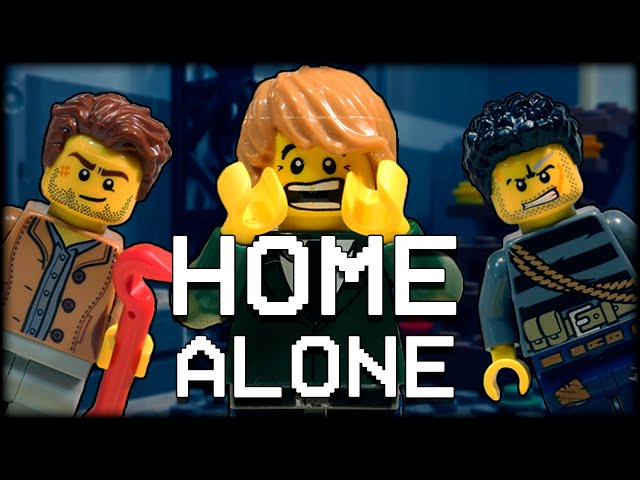
LEGO and Re-enactment
LEGO is another tool often used for stop-motion. You can build anything out of the popular bricks, including backgrounds and famous landmarks, and the mini-figures have changeable heads with different facial expressions.
The video below combines two favorite stop-motion techniques, LEGO and re-enacting a movie or TV show. Using an existing soundtrack and re-creating a scene shot-for-shot is an easy way to create stop-motion by eliminating some creative guesswork.
Paper
Cut paper is an easy way to do stop-motion animation. It can lie down and easily be moved. You can draw anything and change out facial expressions.

Origami is another creative stop-motion idea, although harder to pull off than cut paper.

Food
Post a recipe that will stand out amongst the millions available on Pinterest.
Stop-motion with food could be playing with food, showing food coming to life, or cooking an actual meal in an unforgettable way:

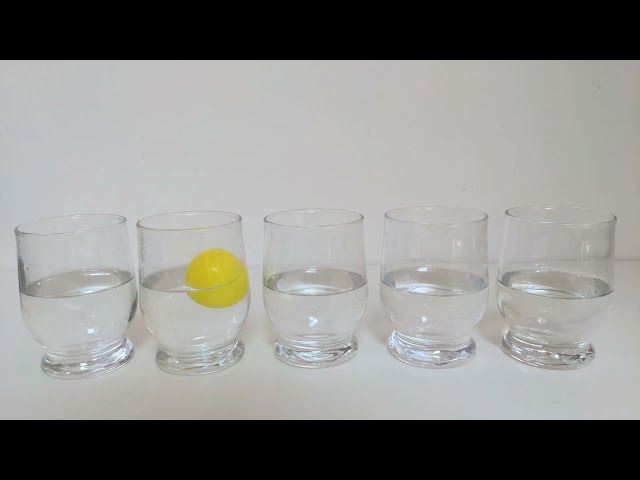
Household Objects
Stop-motion videos using simple household objects don’t require much prep work. And shooting them is easy because of the simple movements and lack of expressions.
This video showcases many different stop-motion ideas for household objects moving independently.
Clay
Claymation films are the most popular of the stop-motion feature-length films. Clay is the best material for filming stop-motion and the most complex and time-consuming.
Using clay (or plasticine or play-doh) means the sky's the limit. You’re not limited by movement or expression like you are with household items or toys. And unlike paper, your clay creations can stand on their own.
The best stop-motion apps available on your smartphone are:
- PowerDirector
- Stop Motion Studio
- Clayframes
- iMotion
- Life Lapse Stop Motion Maker
- PicPac Stop Motion & Time Lapse
- I Can Animate
- Stop Motion Maker
- iStop Motion
- Frameographer
For a more in-depth look at each of these apps, visit 10 Best Stop-Motion Apps in 2026.
The best stop-motion software on Windows and Mac are:
- PowerDirector
- Stop Motion Studio
- Boinx iStopMotion
- Eclipse - Stop Motion Pro
- Dragon Frame
- Heron Animation
- IKITMovie
- Stop-Mojo
- Frames
- Monkey-Jam
For a more in-depth look at this stop-motion software, visit 10 Best Stop-Motion Software in 2026.
To see stop-motion at its best, check out the Henry Selick-directed films The Nightmare Before Christmas and Coraline, Nick Park’s Wallace and Gromit, Shaun the Sheep, and Chicken Run or any of Will Vinton’s Claymation holiday films.
Many classic Christmas films were made using stop-motion, such as Rudolph the Red-Nosed Reindeer, Santa Claus is Comin’ to Town, and The Year Without a Santa Claus.
1. Edit Frames on Timeline
Adding hundreds of photos to an editing timeline could mean some get placed out of order. The ability to move frames around is vital, as one frame out of place would ruin the whole look of your film.
You also need to delete frames if necessary. A common mistake when shooting stop-motion is getting a hand in the shot. If you took enough photos, one of these missing frames wouldn’t make much difference. If it does, hopefully, your editing software comes with masking tools, in which case you can save the shot and remove only the hand.
2. Soundtrack
Since stop-motion videos are comprised of still photos, any dialogue, sound effects, or music need to be added to the editing process.
Make sure your stop-motion video editor will allow you to add Voiceover. It should also have sound effects and music stock libraries so you can easily add royalty-free music that won’t get you kicked off YouTube.
3. Color Correction
Because every shot in your stop-motion video needs to be identical, color correcting rogue frames is essential. Your video editor should allow you to fix one pesky frame or the whole film.
4. Speed Control
The most critical element to creating a stop-motion video is controlling the frame rate. The more frames-per-second, the smoother the video will be. Unfortunately, the default of editing software is typically way too slow for a stop-motion film. The stop-motion creator needs to speed up the film and test different frame rates until satisfied.


![7 Best Alternatives to Pinnacle Studio in 2026 [Windows, Mac]](https://dl-file.cyberlink.com/web/content/b1602/l_Thumbnail.webp)