Easy Ways to Stand Out in Your Photos with Blur Effects

Blurring your photo is a simple way to create a focal point to drive attention to your photo's subject. No longer is complex photo editing software necessary; now, you can easily blur pictures using iPhone or Android devices
Ready to blur your photo to help you stand out? Let’s get started.
- Steps for How to Blur Photo on iPhone
- How to Blur Pictures with Free Photo Blurring Apps
- Download PhotoDirector – The Best App to Blur a Picture
- Common FAQs for How to Blur Photos With PhotoDirector
Steps for How to Blur Photo on iPhone
First, did you know you are able to create blur effects while you are taking pictures on an iPhone? Follow this simple step-by-step process to instantly stand out in your photos, before you even snap any shots.
- Open your Camera app. Then, navigate to ‘Portrait’ mode in the sliding menu above the photo trigger button.
- Click the lowercase ‘f’ button in the top-right section of your screen.
- Move the slider to adjust how much background blur you’d like to add.
- Take your picture with these pre-selected blur effects.
There is another app to make blurring a photo even easier, and the blur effect can even be customized – PhotoDirector.
PhotoDirector is an all-in-one photo editing app available for iOS and Android with a user-friendly interface to help you blur photos like a pro. It offers multiple styles of blurring, and you can customize the blur focus area and intensity.
Some special easy-to-use features in PhotoDirector include Bokeh filters, to blur and soften the background of your pictures to help you stand out even more.
How to Blur Pictures with Free Photo Blurring Apps
There are a few useful apps to help you edit your photos. The best free blur photo app is PhotoDirector. It combines powerful photo-editing tools in an easy-to-use interface to transform pictures like a pro.
1. Download Photo Director – The Best Blur Photo App
Adding blur photo effects is a quick and easy way to make pictures look more professional. No need for expertise or niche knowledge; all you need is an excellent photo editing app with blur photo features. Download PhotoDirector free for iOS and Android to find how to blur a picture with just one tap.
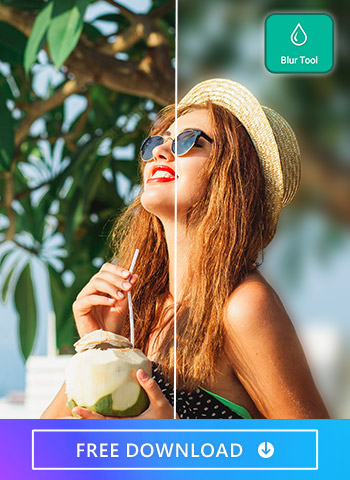
2. Tap “Edit” and Choose a Photo to Blur
For how to blur the background of a picture, open PhotoDirector and tap “Edit”. Browse your photo library for one you’d like to blur. You can also choose from our library of stock images provided by Shutterstock, Unsplash, and iStock.
3. Go to “Effect” and Choose “Blur Tool”
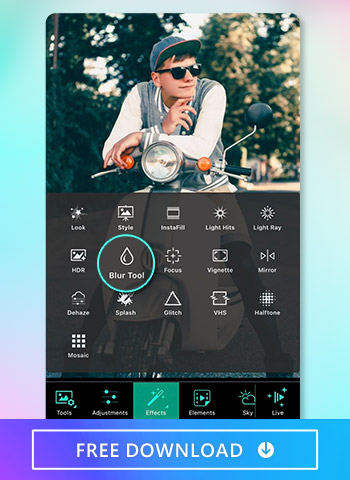
Once you’ve chosen an image, navigate to “Effects”. Then, tap on the “Blur Tool” icon, which looks like a water droplet.
4. Use the Blur Tool That Fits Your Needs
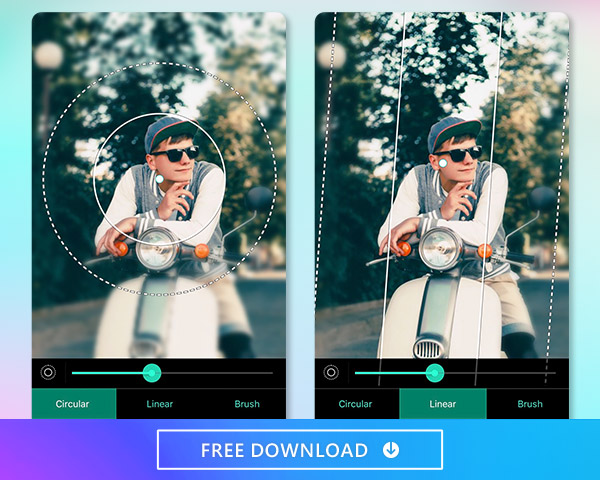
Choose from Circular, Linear, and Brush blur styles. Experiment with each to find a good match for your style. Try the Circular style to create focal points around people or other main photo subjects. Or, try the Linear style to blur specific photo regions. Or, the Brush tool can draw precise areas to apply blur photo effects.
Adjust the focus area size with two fingers. To move the focus area, press the point in the area's center to move it freely.
5. Select a Blur Type for the Background
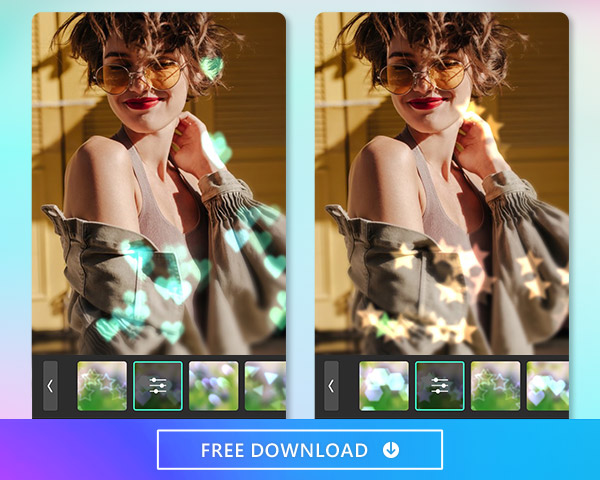
Choose from five blur effect options: Soft Focus, Focal Zoom, Radial Blur, Heart, and Star. Choose whichever one best fits your needs. For example, the Heart blur effect might best attain the full impact of a romantic picture.
6. Move the Slider to Adjust Blur Strength
An adjustment bar is embedded in each blur type option. Found at the bottom of the screen, drag the bar right to strengthen the blur effect, and drag left to soften it.
7. Save to Your Camera Roll
Once satisfied, click the top-right checkmark to save your image to your camera roll.
Download PhotoDirector – The Best App to Blur a Picture
PhotoDirector is the best photo editing app for creating blur photo effects. You can quickly apply blurring effects and choose from various styles to match your own. Plus, you can create animated Bokeh effects and export animated photos as GIFs to share with friends and followers.
If that’s not enough, PhotoDirector features dozens of photo editing tools to help create unique content for social media. With AI-powered tools designed to save time and edit your photos with just one tap, this is the one app you need to elevate your picture game.
Available for iOS and Android, you can use PhotoDirector on the go. And, if you prefer to use your computer, you can get the Mac or Windows desktop version to reap the benefits of photo editing on a large screen.
Common FAQs for How to Blur Photos With PhotoDirector
Applying blur photo effects with PhotoDirector is surprisingly easy. Even so, it’s still natural to have questions. Here are the most common questions we get about the blur tool.
Yes - the “Brush” Tool allows you to blur precise areas, and the adjustment bar can change the blur intensity of each brush stroke.
Yes! You can still blur the background in pictures with stickers and animation. The Bokeh style blur photo effect even allows you to change the animation’s speed. Here’s how to blur a picture with animation using PhotoDirector:
- Tap “Edit” and Choose a Photo
- Go to “Elements” and Choose “Bokeh”
- Choose the Bokeh Style and Adjust Animation Speed
- Save as an Image or Video
Open the PhotoDirector app on iPhone or Android. Tap “Edit” and choose an image from your camera roll. You can also choose one from the hundreds of pre-saved images in the app.
Once you’ve chosen your photo, go to “Elements” and select the “Bokeh” option.
Using the Bokeh tool, you’ll find different styles and shapes. Choose from the 25 Bokeh shape lights available in the app. Customize the effects’ intensity, amount, and rotation using the adjustment bar. Then, click the “Enable Animation Effect” checkbox to see the animation. Adjust the speed and animation style to fit your preferences.
Experiment with the blur brush using trial and error to have more control over the photo’s section you’d like to blur. Adjust the settings to match your preferences. Once happy with the result, save it as a video or GIF file to start sharing your new animated photo wherever you want.



![Top 5 Free Tattoo Removal Apps to Erase Tattoos from Photos [2026]](https://dl-file.cyberlink.com/web/content/b3731/Thumbnail.jpg)