

How to Easily Stabilize Video For Free [Windows, Mac]

A shaky video is a telltale sign of an amateur video project.
In an ideal world, you’d have all the equipment you need at a shoot to keep your videos stable, including gimbals, tripods, and perfectly optimized camera settings. However, not every shot is going to be perfect. Plus, if your role is strictly the editor, you might not have control over the video equipment or shooting conditions.
If you find yourself with some shaky footage, all hope is not lost. In this guide, we’ll show you the best options to stabilize video that you can use in post-production, all for free!
Regardless of your skill level or editing hardware, we’ve got you covered. To get started, download the best video stabilization software, PowerDirector, for free, and follow the simple 3-step process of stabilizing footage below.
- What is Video Stabilization?
- Best Video Software to Stabilize Video
- How to Stabilize Video
- Download the Best Video Stabilizer for Free
- Stabilize Video FAQ
What is Video Stabilization?
Video stabilization takes unwanted camera movement out of video footage by tracking points in your video’s frame and slightly cropping while moving your image to keep it stable. This helps to eliminate jitteriness and blurriness captured in handheld or action footage. The results create a cleaner and smoother-looking video.
Best Video Software to Stabilize Video
PowerDirector has a built-in video stabilizer tool that can correct even the most unsteady video in a way that looks seamless and realistic. As the first Windows editing software to support 360-degree VR-footage, PowerDirector is the premier tool for video editors of all levels, with an intuitive interface that’s approachable for beginners while having all of the pro-level powerful features for more advanced users.
The options included with PowerDirector are unmatched. From intuitive motion tracking to dynamic keyframe controls, you’ll enjoy an entire suite of creative tools with precision control.
How to Stabilize Video
Ready to learn how to transform even the shakiest footage into buttery smooth shots? You can get these results in three easy steps.
- Import your shaky video into PowerDirector
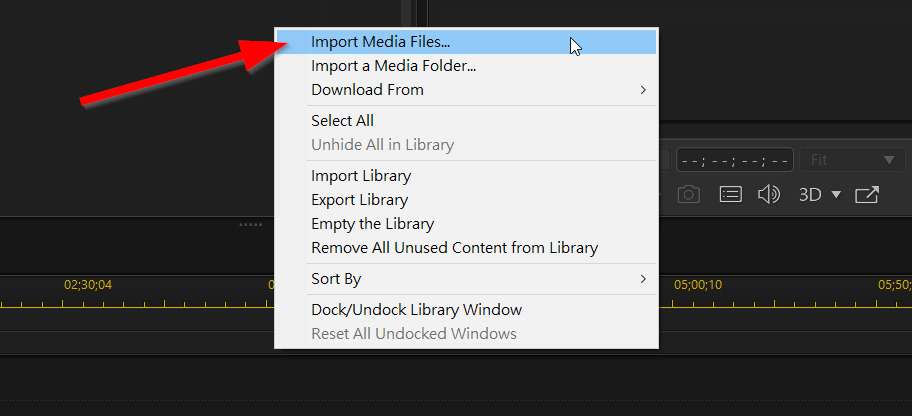
Open PowerDirector and import the video by right-clicking in the media library and selecting the option Import Media Files. Select the file (or files) you’d like to correct.
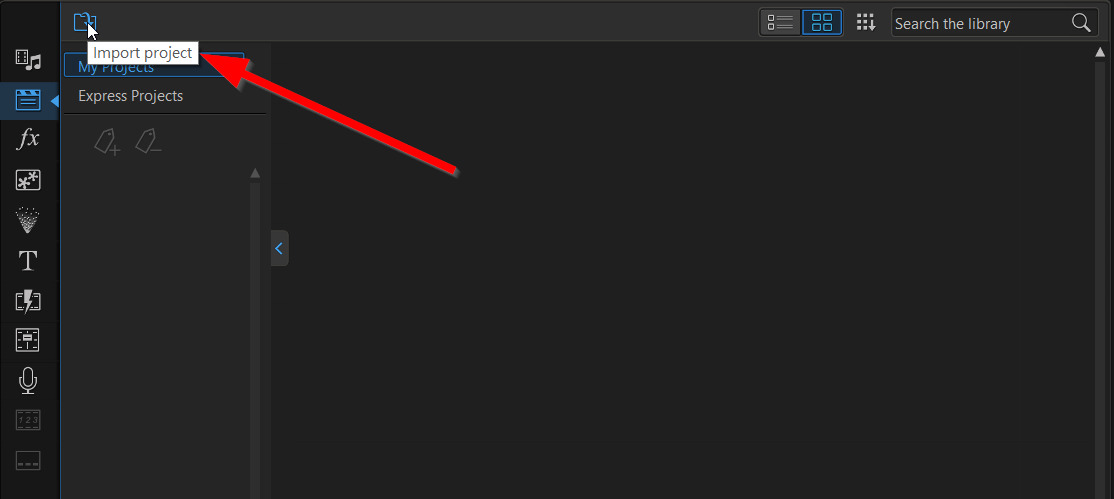
Another option is to click the Import Media icon and select the file or folder you’d like to import.
- Stabilize the Shaky Video
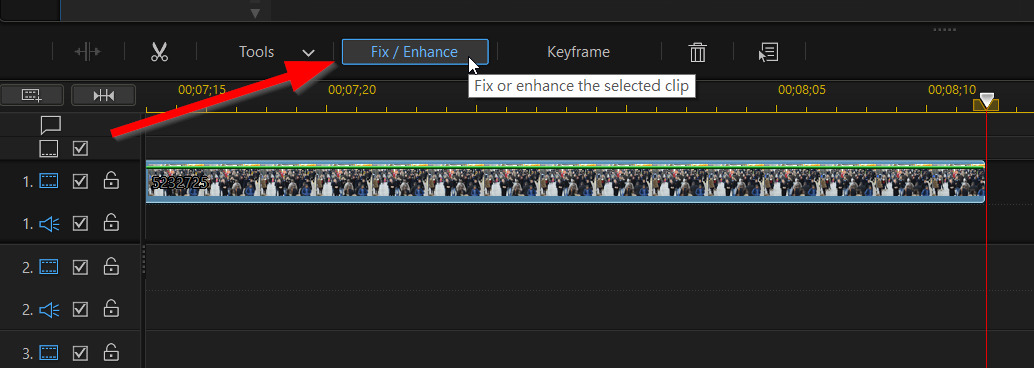
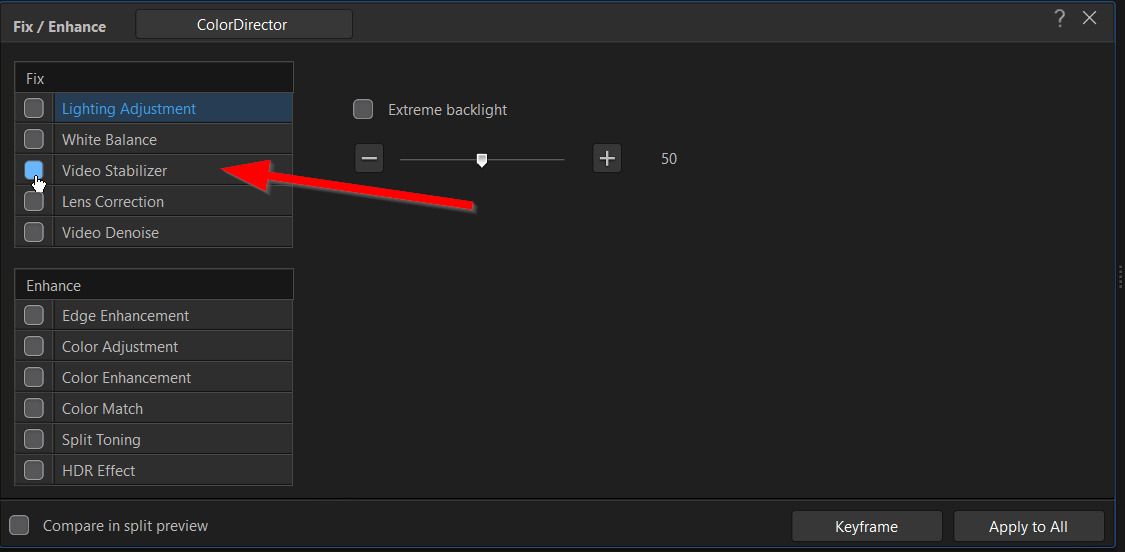
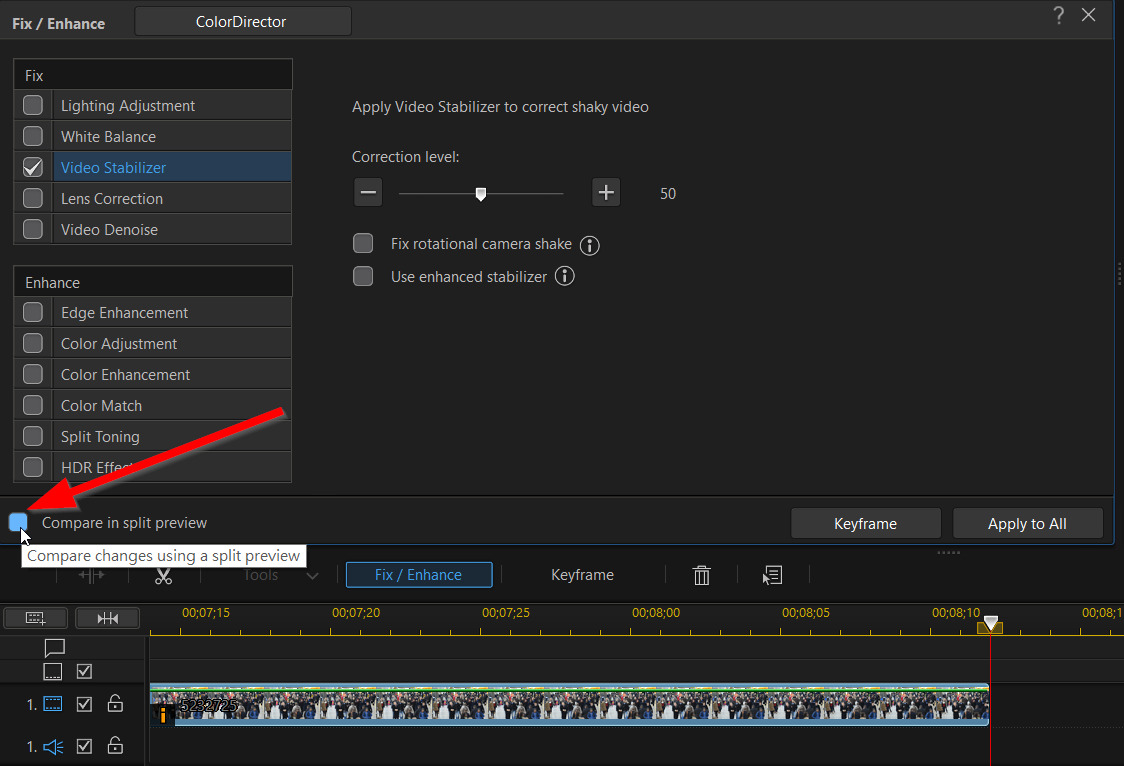
Drag the video you’d like to correct into the timeline. Open on Fix/Enhance and select Video Stabilizer.
Pro Tip: Select the option to Compare in split preview. By checking this box, you can view before and after videos side by side and make adjustments without having to go back to the timeline.
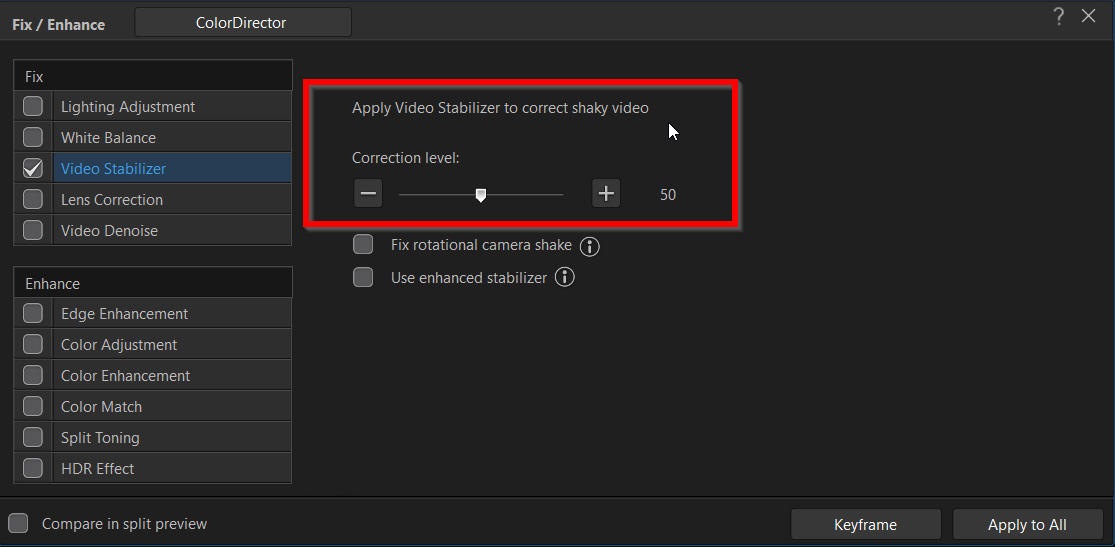
- Fine Tune the Stabilization Level
The default stabilization level is 50, and you have the option to fine-tune it. Though a higher number will theoretically enhance the stabilization, it will result in more cropping, which can compromise the frame of the video as well as the resolution. Use the compare in split preview tool to ensure that your video isn’t too cropped. Remember to compare the before and after side by side to get instant feedback about your results to find the perfect amount of stabilization and crop.
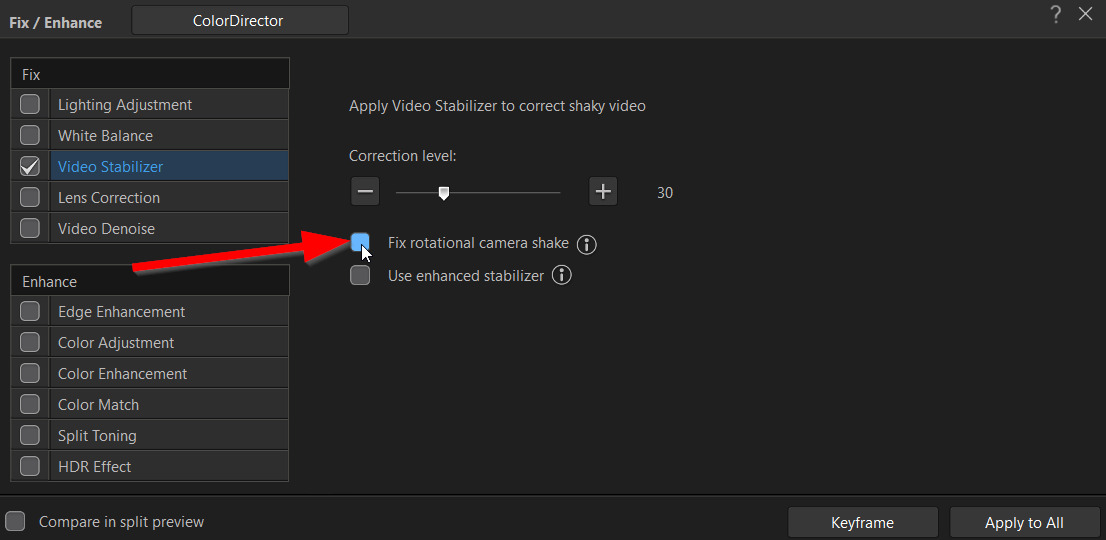
Because PowerDirector is such a robust tool, you’ve also got some other video stabilization options to explore. By selecting Fix Rotational Camera Shake, you can correct any shakiness that comes from handheld footage.
The final option in this step is to use the enhanced stabilizer, which fixes non-directional shakiness. This is particularly useful for clips that involve panning.
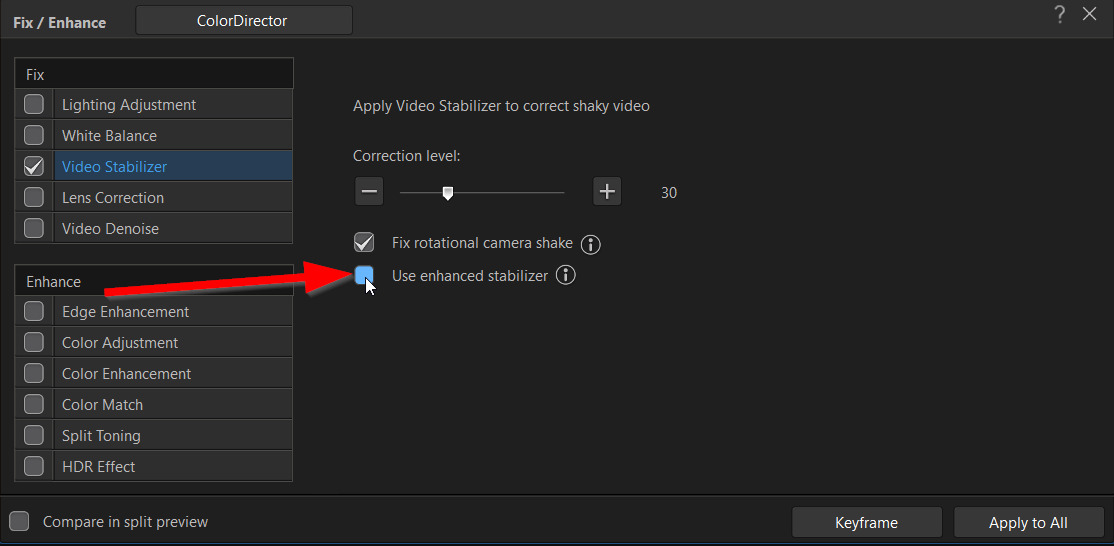
You won’t necessarily need to use all three of these video stabilizers, but we encourage you to experiment with these settings.
If you start to notice that the playback is glitchy when you apply these settings, it’s because video stabilization features eat up a lot of computing power.
To get a realistic real-time view, you might have to adjust the preview options. Change the setting from Real-time Preview to Non-real-time Preview. This setting will mute the sound, but at least you’ll have a preview of the stabilized video without so much lag.


Download the Best Video Stabilizer for Free
The video stabilization feature in video editing software helps eliminate jerky motions and the nausea-inducing directional movements and zooming that make videos unbearable to watch.
Having the power to stabilize a video after it’s been filmed is a powerful tool. Not only is it useful for correcting spontaneous videos shot on mobile devices and action-oriented clips, but it can also enhance vintage camcorder footage. The possibilities are endless!
Plus, you don’t need fancy equipment or expensive software to smooth out your videos and make them look more professional. Sometimes the best things in life really are free! So download PowerDirector and start making your videos more stable.
If you're an aspiring editor looking to create cool videos, head on over to our complete guide on video editing effects.
Stabilize Video FAQ
In addition to topping the list of the best video stabilization software for video editors on Windows devices, PowerDirector also caters to editors on the go toting Android or iPhones.
Here’s a quick overview of how to easily stabilize a video using the PowerDirector app.
- Import your video to the PowerDirector app
- Stabilize the video
Create a New Project, then select the video you’d like to edit and add it to your project.
Tap on the pencil icon to open your editing options. Select Stabilizer. The default motion level is set to 50. You can adjust that number up or down as desired.
Another free video stabilization software for Windows is Windows Movie Maker.
- Add the shaky video(s) you’d like to stabilize
- Stabilize the video
- Preview your changes and Save
As soon as you open Windows Movie Maker, you’ll see a prompt that says, Click here to browse for videos and photos.
Make sure the clip is selected and click Edit from the top toolbar. Click Video Stabilization and select whether you would like Anti-Shake or Anti-Shake and Wobble Correction. If your video moves from side to side as well as shakes up and down, you’ll want to add wobble correction.
You’ll also notice that there’s a low and high option. To preserve CPU power during the editing process, start with low first and see if that’s sufficient.
Windows Movie Maker doesn’t have many options for stabilizing video, so what you see is what you get.
iMovie comes pre-installed on Mac computers, and it can be downloaded for free for iPhones and iPads.
- Import the shaky video you’d like to stabilize.
- Stabilize the video
- Adjust the settings
Add the shaky video to your media library by clicking File > Import Media, or drag and drop the file you’d like to edit from your Finder window and into your media library. Then drag the clip to your editing timeline.
At the upper portion of the toolbar, you’ll see a video camera icon with lines on the top and the bottom that simulate shakiness. Select that icon and click the checkbox that says Stabilize Shaky Video.
From here, you can adjust the percentage you’d like to stabilize the video by and preview changes in real-time.

The CyberLink Editorial Team is composed of product testing specialists and content creation experts with over 20 years of hands-on experience and rigorous research in the multimedia editing industry. As the official voice of CyberLink, the team consistently delivers practical, easy-to-follow tutorials across video, photo, and audio editing, while highlighting AI innovations, product insights, and emerging industry trends. Their work empowers millions of creators worldwide each year to elevate their content. Beyond the blog, the team actively shares editing tips and product updates across YouTube, Facebook, Linkedin and Pinterest.
😎 Outside of their work, they enjoy capturing travel moments and meticulously editing photos and videos for their social channels.


