
5 Best Free Time Lapse Apps in 2026 [iOS & Android]

A time lapse video offers an accelerated view of the world. Video is captured at a lower frame rate than you view it, making it appear much faster.
Newer versions of iOS and Android come with time lapse features in the camera app, but the features are limited and only allow you to create time lapse in specific ways. With a third-party time lapse app you will have more control and be able to edit your footage exactly the way you want.
In this article, you will learn the 5 best apps for creating beautiful time lapse videos on your phone.
- Top 5 Time Lapse Apps on iOS and Android
- How to Make a Time Lapse on iOS and Android
- Best Time Lapse App Free Download
- Time Lapse Apps FAQs
- What is a time lapse video?
- Should I pay for a time lapse app?
- How do I make a time lapse video from photos?
- How do I slow down a time lapse?
- How do I make a time lapse photo?
- What are some time lapse video ideas?
- What features should I look for in a time lapse app?
- What are the best time lapse softwares on Windows and Mac?
- How do I make a time lapse on Windows and Mac?
- How do I make a time lapse with DSLR?
Top 5 Time Lapse Apps on iOS and Android
1. PowerDirector
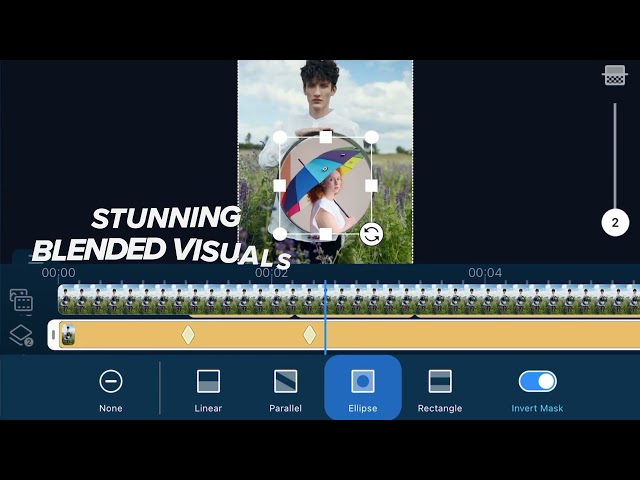
PowerDirector has all the tools needed for professional time lapse videographers, but is easy enough for a beginner to use. Pros can make precision edits to each frame of their time lapse video and choose an exact playback speed. Novices can choose from a variety of templates to make the editing process simpler.
There are countless effects options like chroma key, animated titles, motion graphics, keyframe controls, blending modes, and more. You can color correct by independently adjusting brightness, contrast, saturation, sharpness, and white balance. Even fix shaky handheld footage with video stabilization.
Choose between hundreds of options to smooth out the transitions between sped-up and normal video speeds. Finish your video by adding free music from the built-in royalty-free stock library.
When you are done with your cut you can export in 4K resolution or upload directly to Facebook or YouTube.
PowerDirector is available on both iOS and Android devices.
2. Lapse It Pro

Lapse It Pro is a video editing app specializing in the creation of time lapse and stop motion videos.
The Lapse It Pro camera has manual controls for exposure, focus, ISO, white balance, and more. You can also schedule a time for the capture to start and stop based on either time or the number of frames.
Import videos and images from other sources and use Lapse It Pro to edit them into a time lapse, choosing the speed of your video down to the millisecond.
Finish your time lapse with one of 50 stunning filters and add an audio track from your phone’s music library. Then quickly export into stunning 4K and share directly to social media.
You might need to brush up on your time lapse terminology in order to use Lapse It Pro. It can be confusing with all the manual options.
Lapse It Pro is available on both iOS and Android.
3. Hyperlapse from Instagram

The Hyperlapse app is for making time lapse videos while the camera is moving.
It creates stabilization for shaky hand-held videos taken while running, jumping or riding on a motorcycle.
The simple interface shows you how long you’ve been recording and how long your video will be (if sped up to the default 6x). You have the option to speed up to 12x, or down to 1x (normal speed). Then, upload directly to Instagram or Facebook, or save to your camera roll.
Hyperlapse from Instagram is a great choice for creating moving time lapses, but not ideal for traditional, static time lapse videos. The lack of customization options is easy for beginners to use, but not a good fit for professionals. Also, there are no video editing features, or the ability to speed up pre-existing video.
Hyperlapse from Instagram is only available on iOS.
4. Time Spirit

In a traditional time lapse, hundreds of stills are taken in succession and put together into a seamless video. Time Spirit (also known as Time Lapse Camera) offers Photo Lapse, a progression of photos to show change. In Photo Lapse, you take one shot of the same thing every few days or months (such as documenting a pregnancy or a flower growing).
Time Spirit also has Video Lapse (the app’s name for traditional time lapse) and Night Lapse, which shoots at high shutter speed for nighttime shoots.
Time Spirit has all the custom settings you need, like exposure control, custom interval times, and the ability to add your favorite music. With Video Lapse, you can choose how long to shoot (up to 12 hours), and the screen will automatically darken to save battery life.
Users have complained, however, that the app stopped recording mid-way through a time lapse, and Photo Lapse puts photos out of order.
Time Spirit is available only on Android.
5. Microsoft Hyperlapse Mobile

This is Microsoft’s answer to the iOS-only Hyperlapse from Instagram. Microsoft Hyperlapse Mobile also uses stabilization technology to smooth bumpy video recorded on the go. But with this app, in addition to recording, you can also import existing videos to turn into a time lapse.
Hyperlapse Mobile has facial recognition and the ability to trim at the beginning or end of a clip. Choose speeds from 1x to 32x and resolution of 720p or 1080p, then export directly to social media.
The Record function chooses lighting modes and ISO automatically, which is a good option for beginners, but a bad choice for pros who want manual options. The editing features are also limited to changing playback speed and trimming.
Microsoft Hyperlapse Mobile is available on Android devices only.
How to Make a Time Lapse on iOS and Android
Let’s take a look at how to speed up a video on your phone with our top choice PowerDirector.
Once you have downloaded and installed the app for free follow these simple steps:
Step 1: Open the PowerDirector app and tap “Create New Project.”
Step 2: Select your video from your phone’s library and add it to the video timeline. With the video selected open the Edit menu.
Step 3: Choose “Speed,” then drag the control slider up in order to speed up the video. If going from normal speed to fast speed in the same clip, tap “Ease in” or “Ease Out” at the beginning and end of your time lapse to create fluidity between the two speeds.
You can also shoot a video in the Time Lapse mode found in the Camera app of your newer iPhone or Android device.
On an iPhone:
Step 1: Open your Camera app and scroll through the options above the shutter button until you see “Time-Lapse.”
Step 2: Tap the red record button and hit it again when you’re done. Your time lapse video will be saved in your Photos app.
On Android:
Step 1: Open the Camera and switch to Video Mode by hitting “Video.”
Step 2: Find the Time Lapse button. Based on the model of your phone, it could be under “More,” “Video Resolution,” or “Manual.”
Step 3: Tap the Record button and tap again when you are done.
For a more in-depth look at shooting and editing time lapse on your phone, visitHow to Make a Time Lapse Video.
Best Time Lapse App Free Download
PowerDirector is the best choice for making beautiful time lapse videos. It’s a great choice for all skill levels and extremely user-friendly.
Whether you're wanting to turn a regular video shot on your phone’s built-in camera, or make edits to a hyperlapse video, PowerDirector is the best option for editing time lapse videos. You can alter playback speed with precision, customize color, stabilize shaky video, and add cool effects or music.
You can download PowerDirector for free from the Apple App or Google Play Store.
Time Lapse Apps FAQs
In a time lapse, video is captured at a lower frame rate than you view it, making it appear much faster. This can be achieved 3 ways: in-camera by using a smartphone with time lapse feature or app, from a series of still shots stitched together to show passage of time, or in editing by speeding up a video recorded at normal speed.
Time lapse is used to show something that takes a long time (snow melting, flowers blooming) in a few seconds.
The only scenario in which you wouldn’t need a time lapse app, is if you shoot time lapse on your phone and only need to do minor edits like trimming and cropping.
This requires planning ahead, because shooting a time lapse video usually takes at least 15 minutes and can be several hours or even days. Your phone would need to be fully charged and have enough space to accommodate that kind of footage, plus you won’t be able to use your phone while it's filming.
Even if you do the work and end up with a beautiful time lapse video, you can only trim and crop from your camera app. If you want to add music, effects, color-correct or control the speed and length of your video, you will need a third-party app. You also can’t speed up a video taken at normal speed without one.
To edit photos into a beautiful time lapse you will need video editing software. We recommend the Windows or Mac version of PowerDirector for this.
Once you have downloaded and installed PowerDirector import your photos into the Media Room and follow these steps.
Step 1: Drag the photos onto a Timeline Track.
Step 2: Select all photos and hit “Slideshow.”
Step 3: Click “Time-Lapse,” then “Next.”
Step 4: Click on the music note if you’d like to select background music, otherwise click “Customize.”
SlideShow Designer will pop up, allowing you to choose the duration of each frame. It will let you know how long your final video will be, so you can keep changing the frames per second until you have the length you want.
Step 5: Hit “Ok,” then “Next” to preview your timelapse.
You will have the option to save your final video onto a device, onto a disc, upload to the internet or send it to Advanced Editing to add effects.
Changing the speed of your time lapse can only be done in editing software, either on your phone or desktop.
To slow down you video in the PowerDirector app follow these steps:
Step 1: Add your video to the PowerDirector editing timeline.
Step 2: Open the Edit menu and choose “Speed.”
Step 3: You will see a control slider under your clip. Drag the slider down to slow down your video.
Step 1: Set up your camera on a tripod and switch all settings to “Manual.”
Step 2: Set the intervalometer to the correct speed, meaning how often you want the camera to take a picture (for example, 1 shot every 2 seconds).
Step 3: Choose how long you want the shoot to last. Depending on your camera, you might put a time (30 minutes), or a number of photos (500 photos).
Step 4: Click “Start” and your camera will begin taking time lapse photos.
The most popular are Nature and Travel, but there are endless possibilities for time lapse.
Nature videos could include weather (clouds rolling by, snow melting, flowers blooming) space (the moon rising and moving across the sky), or animals (the life cycle of a caterpillar, ants tunneling through an ant farm).
Travel videos could show the movement of people at a busy intersection.
Another idea for a time lapse video is showing DIY, crafts, or art being made at a fast rate. It’s a fun way to showcase a “before and after” besides using two photos side by side.
- Control playback rate
- Video Stabilization
- Export to a variety of media
- Cropping/Trimming/Cutting capabilities
- Ability to add music
- Customizable settings
- Video effects
- Instant playback
- Import existing videos
- Available on your OS
- PowerDirector 365
- Adobe Premiere Pro
- Final Cut
- LRTimelapse
- Adobe After Effects
For a full list of features and pros and cons of the software visit5 Best Free Time Lapse Video Makers in 2026.
To make a time lapse on Windows and Mac we recommend using PowerDirector.
Once you have downloaded and installed PowerDirector follow these steps:
Step 1: Open PowerDirector and drag your video into the “Media Room” and then onto the editing timeline.
Step 2: While holding down the Control button, left mouse click and drag the end of your clip to the left, making it shorter and therefore faster. Release both Control and the mouse.
Step 3: Watch the clip back to make sure you are happy with the length and speed of the video. Make any changes if necessary.
If you would like more control over the speed, go to the “Tools” menu and click on “Select Video Speed.” This opens the “Video Speed Designer,” which allows you to change the time and set the exact speed of your clip.
For more information on making a time lapse video on your desktop visit How to Make a Time Lapse Video.
Step 1: Set your DSLR camera on a tripod to get a still shot.
Step 2: Set your intervalometer.
You may need to buy an intervalometer, which releases the shutter automatically every few seconds for a specific period of time. Many cameras come with internal intervalometers, so check first before buying an external one. You can set how many seconds between shots, and for how long.
Step 3: Set your ISO, which is the setting that brightens or darkens your shot.
Make sure to set it to MANUAL and not AUTO. If you set it to auto, the camera will keep changing the brightness which will ruin your time lapse effect.
Make sure your camera is fully charged before attempting a time lapse video.
If your video will take hours/days/months to shoot, try to hardwire the camera to a permanent power source.
If using a memory card, make sure it has room for the hundreds of photos you will be taking.
You should also think about weather-proofing your camera, especially if you are planning to leave at any point during filming.
For more on shooting time lapse with a DSLR camera check out How to Make a Time Lapse Video.


