
Edit Like a Pro with the Best Video Editing Software for Beginners

Right now is a great time to start a new hobby, so why not do something productive AND creative like making something with all of the photos and videos you have stored on your smartphone, DSLR/video camera, and in various folders on your computer. Why let all of those awesome memories sit there in the dark when you can put them to use to create new slideshows or videos and learn a valuable new skill while you do it! Ready to learn video editing? Let’s go!
Why Video Editing?
There’s never been a better time to learn video editing. It’s not just a great way to organize your media, it will teach you a new invaluable skill you can use for the rest of your life and give you a new relationship with your memories as you browse through the media on your phone, camera, and hard drive.
With PowerDirector, the best video editing software for beginners, you can easily use these media files to create stunning videos that you can share with friends and family. Think of it as another way to help stay connected during these times of social distancing and home isolation– a fun digital arts project you can share with anyone and everyone!
In this article we will teach you:
- How to organize your photos and videos
- How to edit your first video
- How to produce and upload your video to YouTube
Before we get started, go here to download the Essential version of PowerDirector for free.
Organizing Your Photos and Videos
If you’re like us, you have hundreds of photos and videos on your smartphone, DSLR/video camera, and your computer. Whenever there is an opportunity to capture a slice of life we are quick to document it.
This is such a great benefit of today’s digital world, but then you end up with a pile of photos and videos, just the thought of organizing can seem like such a daunting task.
Well not to worry, as we have some tips for you to make organizing easy and efficient:
1. Centralize Your Photos and Videos
The first tip is to put all of your photos and videos in one place. The easiest location is on your computer, so you can quickly access them when wanting to make a video later.
To do this, you need to get all the photos and videos off your smartphone and DSLR/video camera and into folders on your computer. The process for doing this will vary depending on the type of device you have. Please check the documentation from your specific device manufacturer for details on how to transfer media files from your device to your computer.
2. Organize Your Photos and Videos in Labeled Folders
Now that you have your photos and videos on your computer, you should label the folders that contain your media. There are various ways you can label the folders, and ultimately the best way to do it is based on your personal preference.
Some suggestions are to use keywords that will be instantly recognizable, for example 2019 Summer Vacation, Billy’s 5th Birthday Party, etc. The more specific the folder naming you use, the easier it will be later to find the media files you are looking for later.

You can also simply label the folders by date taken, either by year or by month. It is all relative to what will suit you best later.
3. Back Up Your Photos and Videos on CyberLink Cloud
Backing up your media is crucial because the reality of hard drives failing or things being mistakenly deleted is very real – don’t let it happen to you! You don’t want to lose any of the precious memories you’ve been compiling for years without having a backup in your cloud storage. Most of us put this off, but now is a great time to upload them for safe keeping.
With a PowerDirector 365 subscription you get 50 gigabytes of storage on CyberLink Cloud. So don’t worry about centralizing your photos and videos in one place, as we will now show you how you can back them up.
1. Go to the following URL: https://cloud.cyberlink.com/login
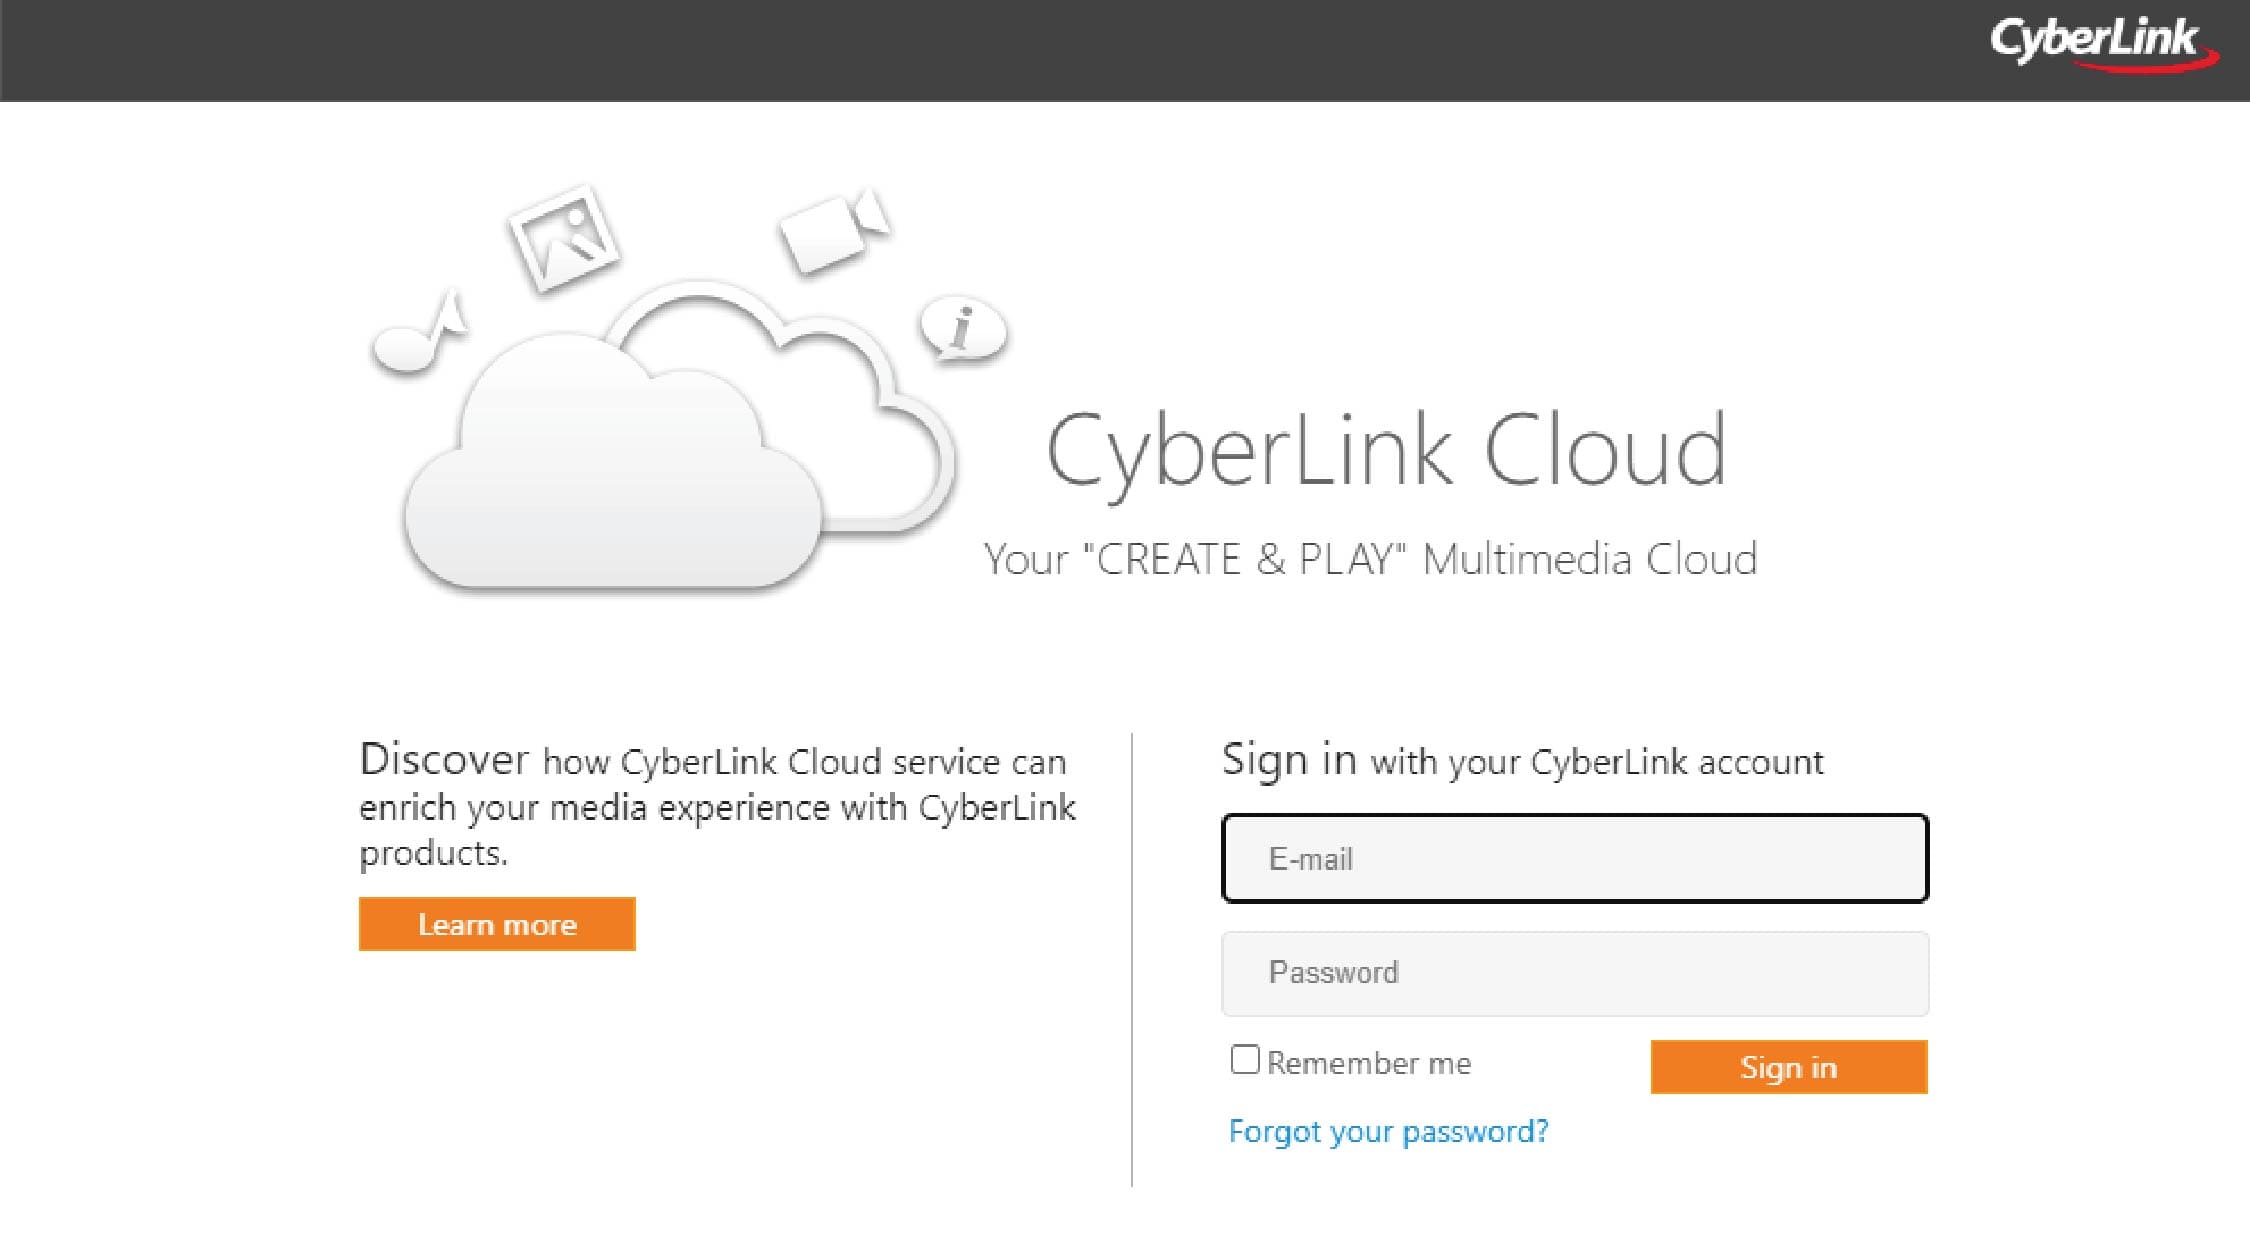
2. Sign in with your CyberLink account. The same account you will use to sign in to PowerDirector 365 once you have a subscription.

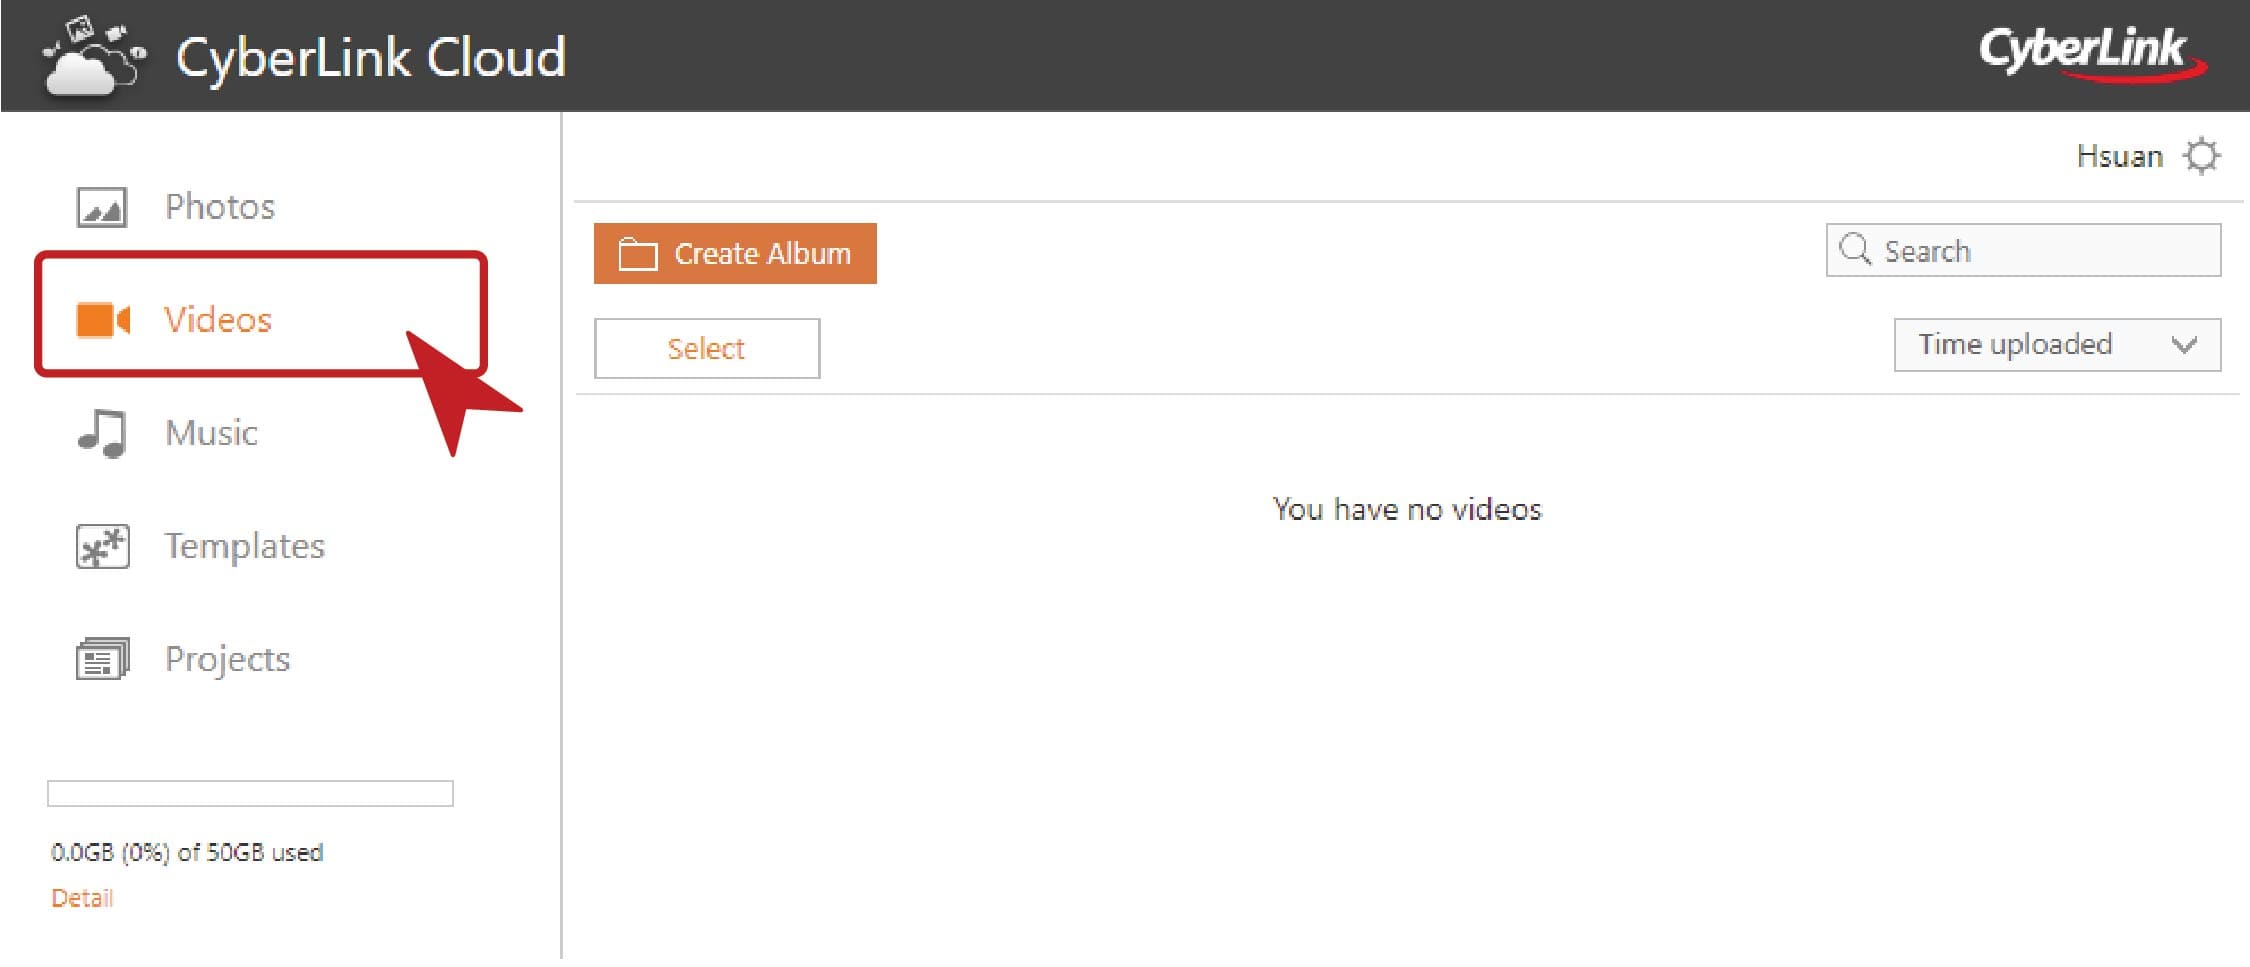
3. Select the type of media file you’d like to upload on the left. We will back up videos first.
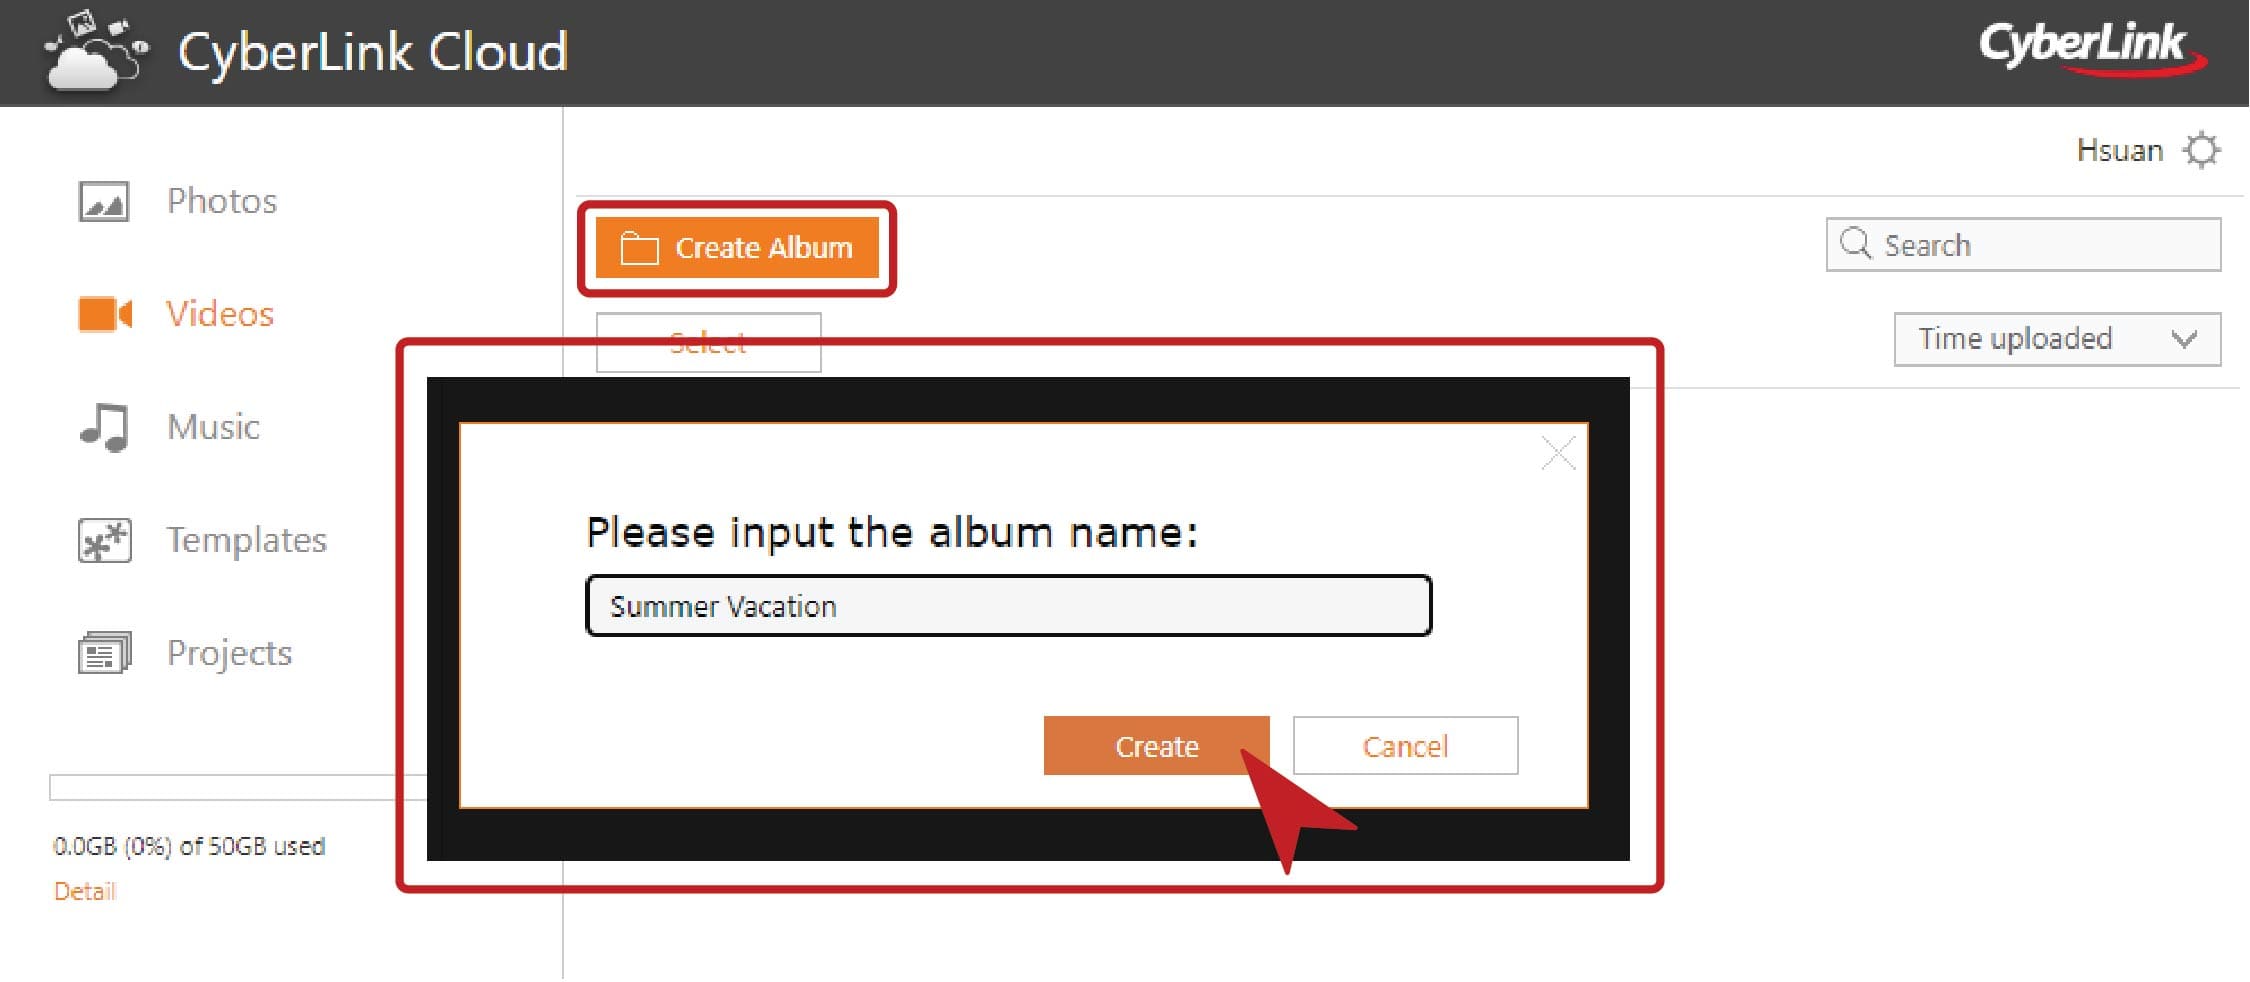
4. Click the Create Album button, enter an album name that matches one of the folders you organized earlier, and then click Create.
5. Click on the newly created folder, click the Upload button,
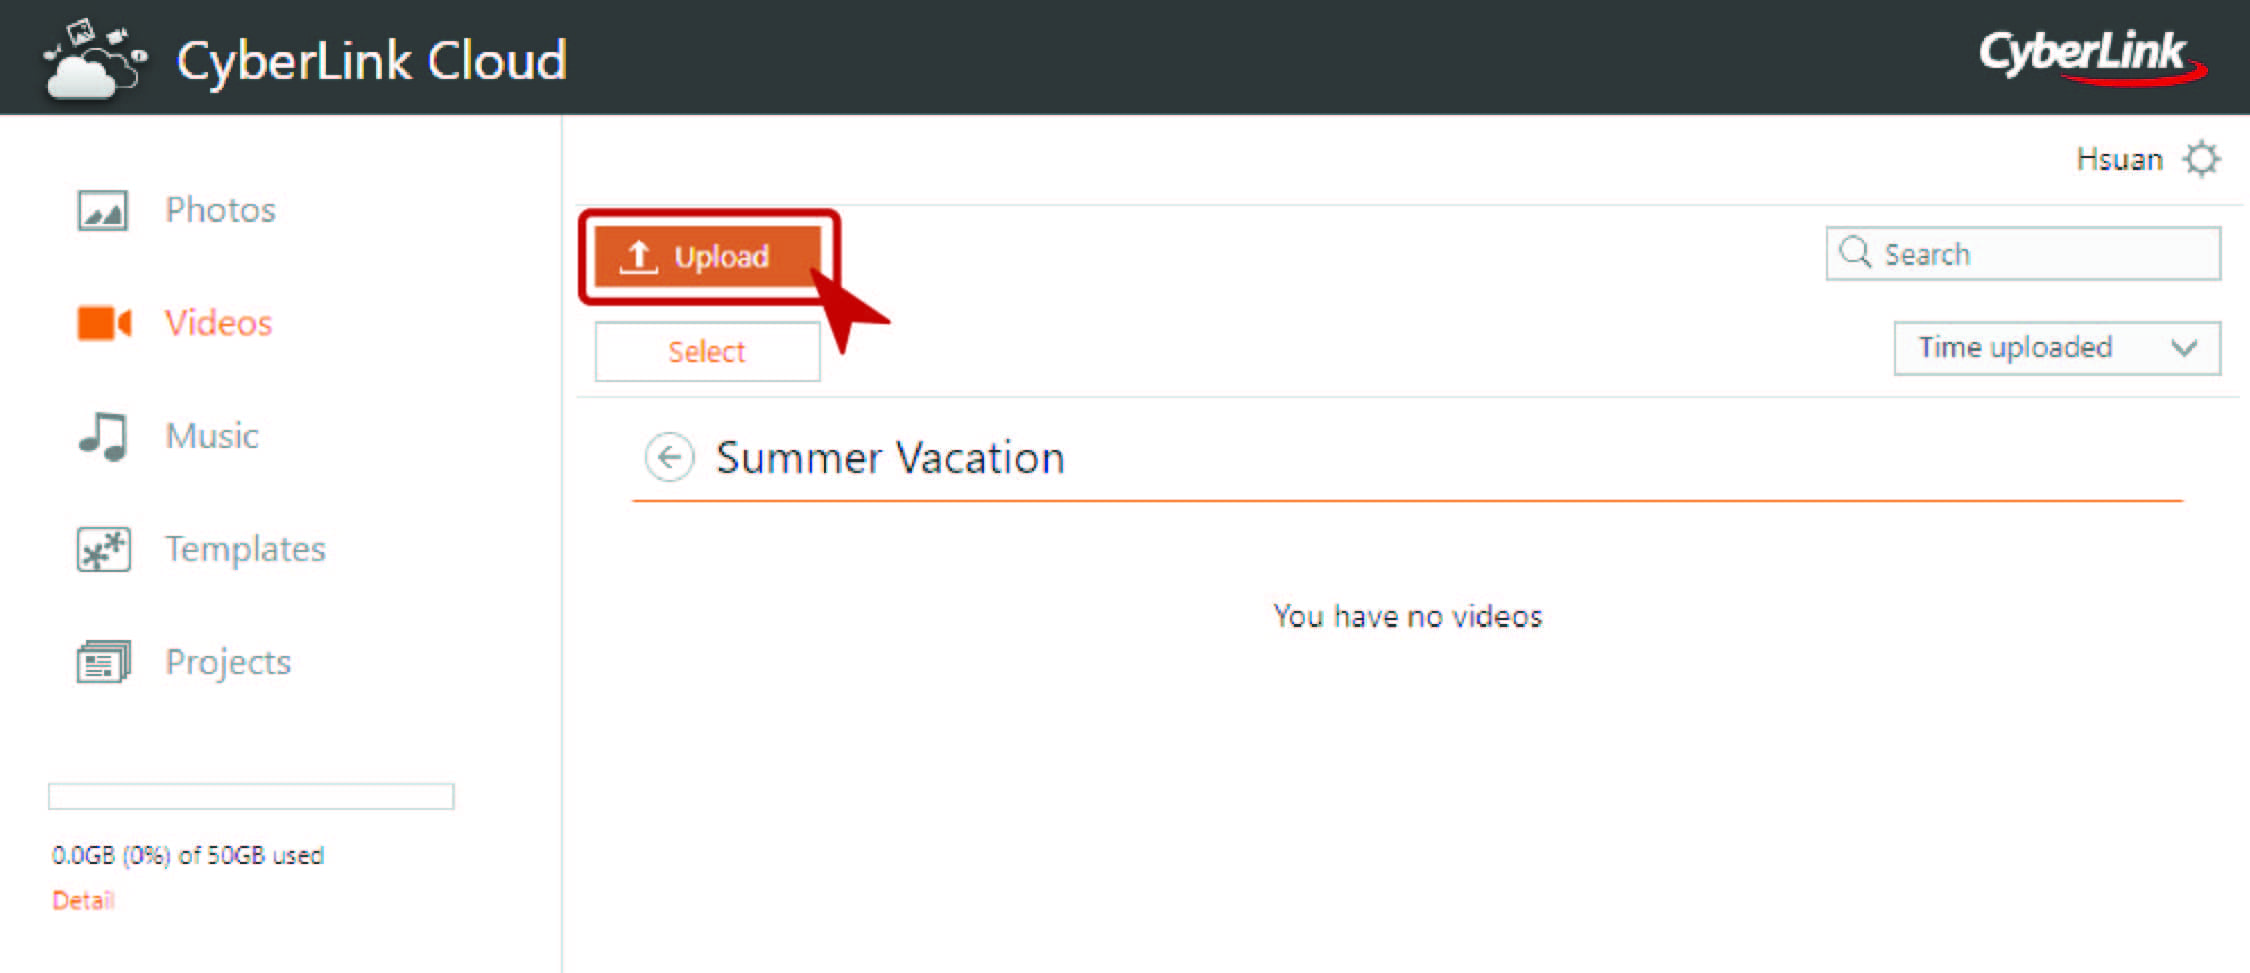
and then click Choose Files. Note: you can only upload up to 1 GB at a time.
6. Find the folder with the same name that contains your videos and then select all of the files you want to upload.
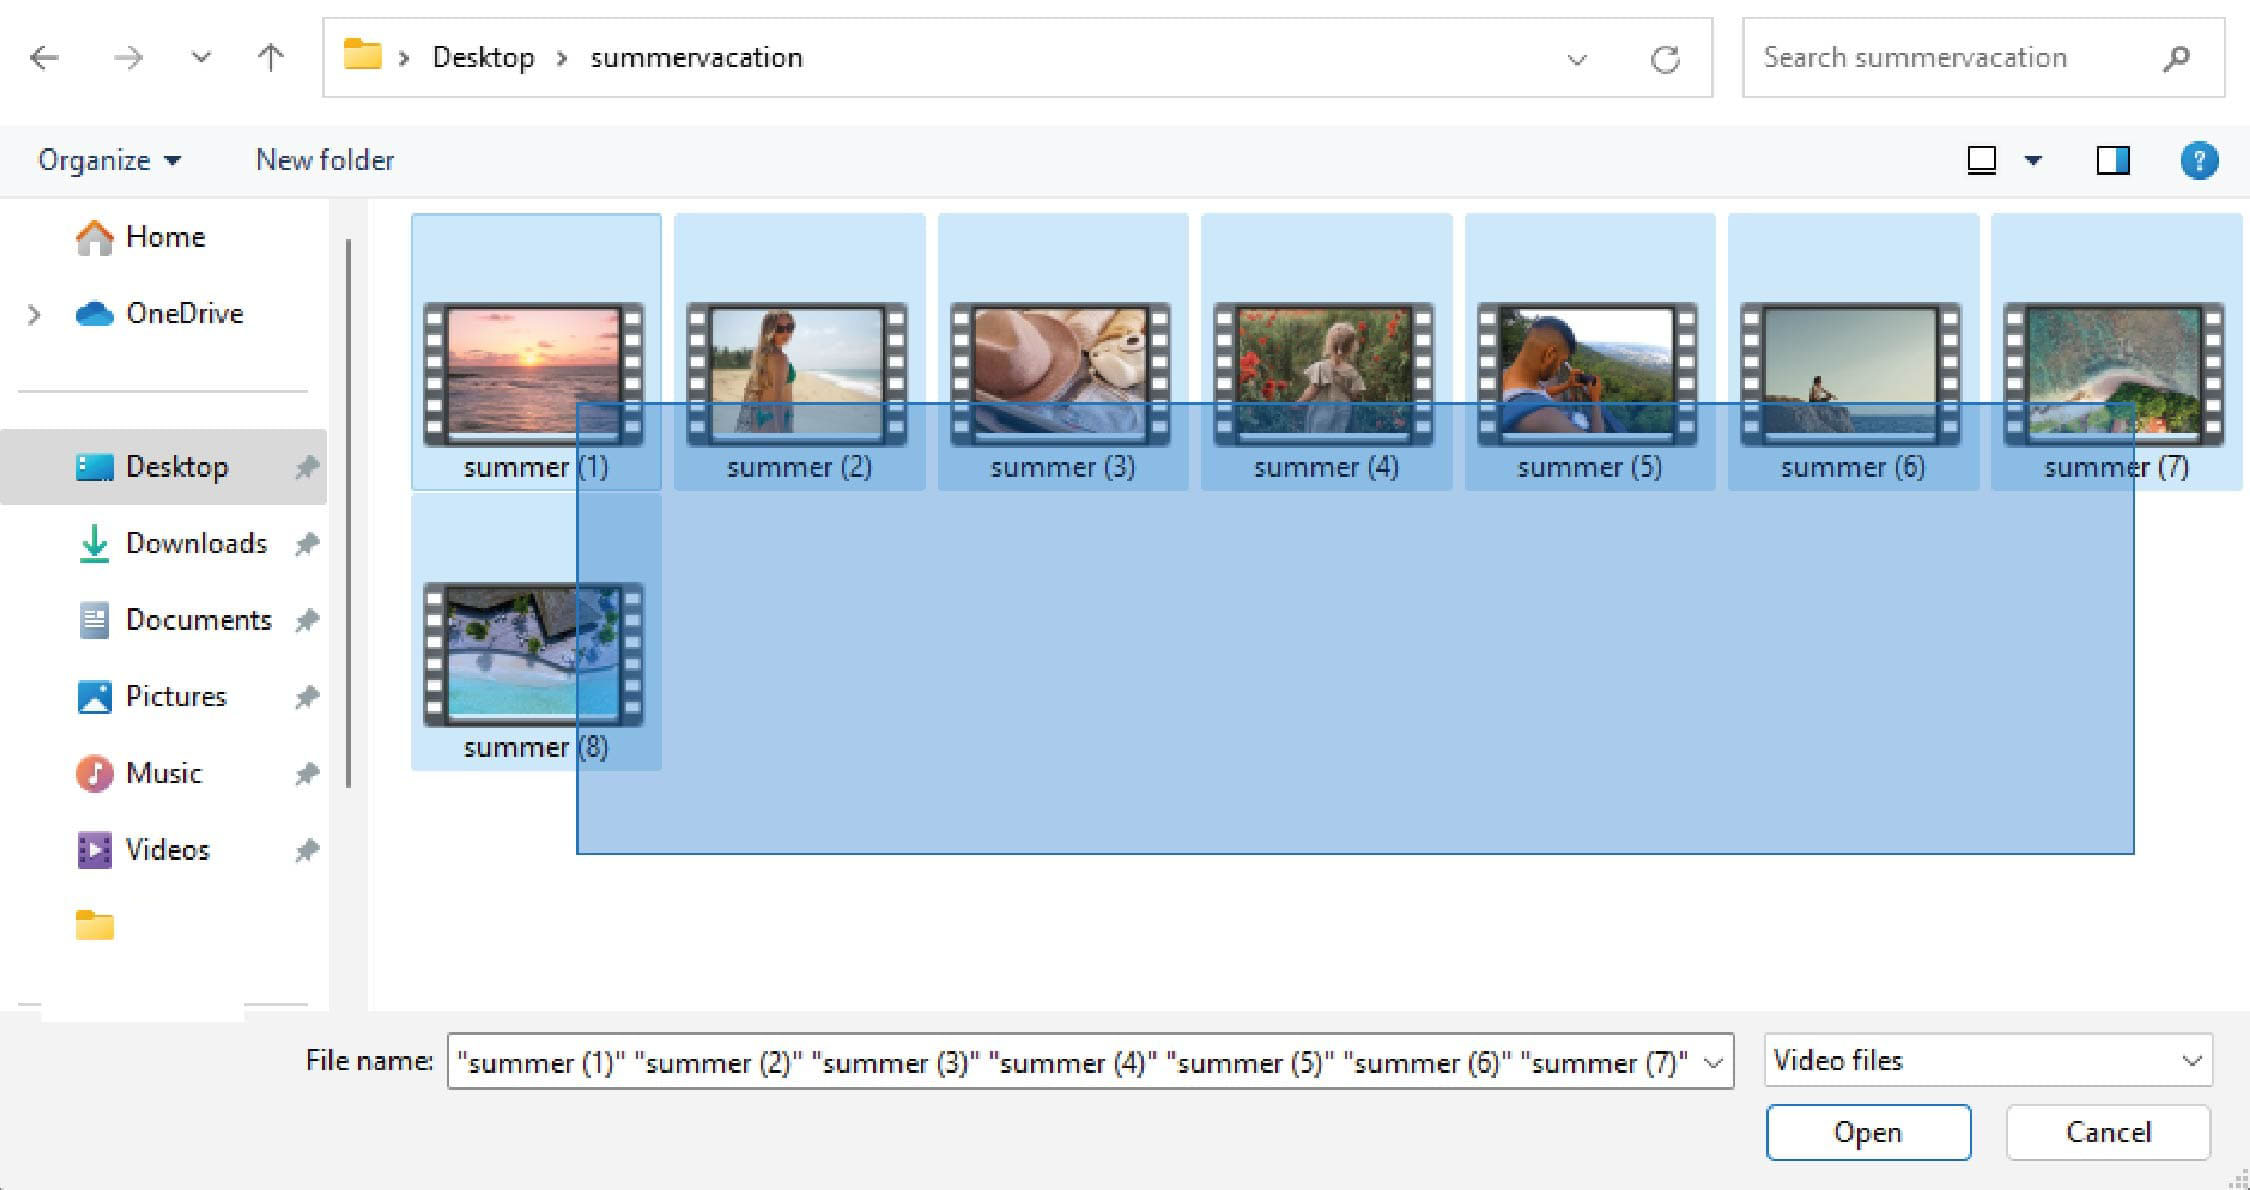
7. Click Open to upload them to CyberLink Cloud.
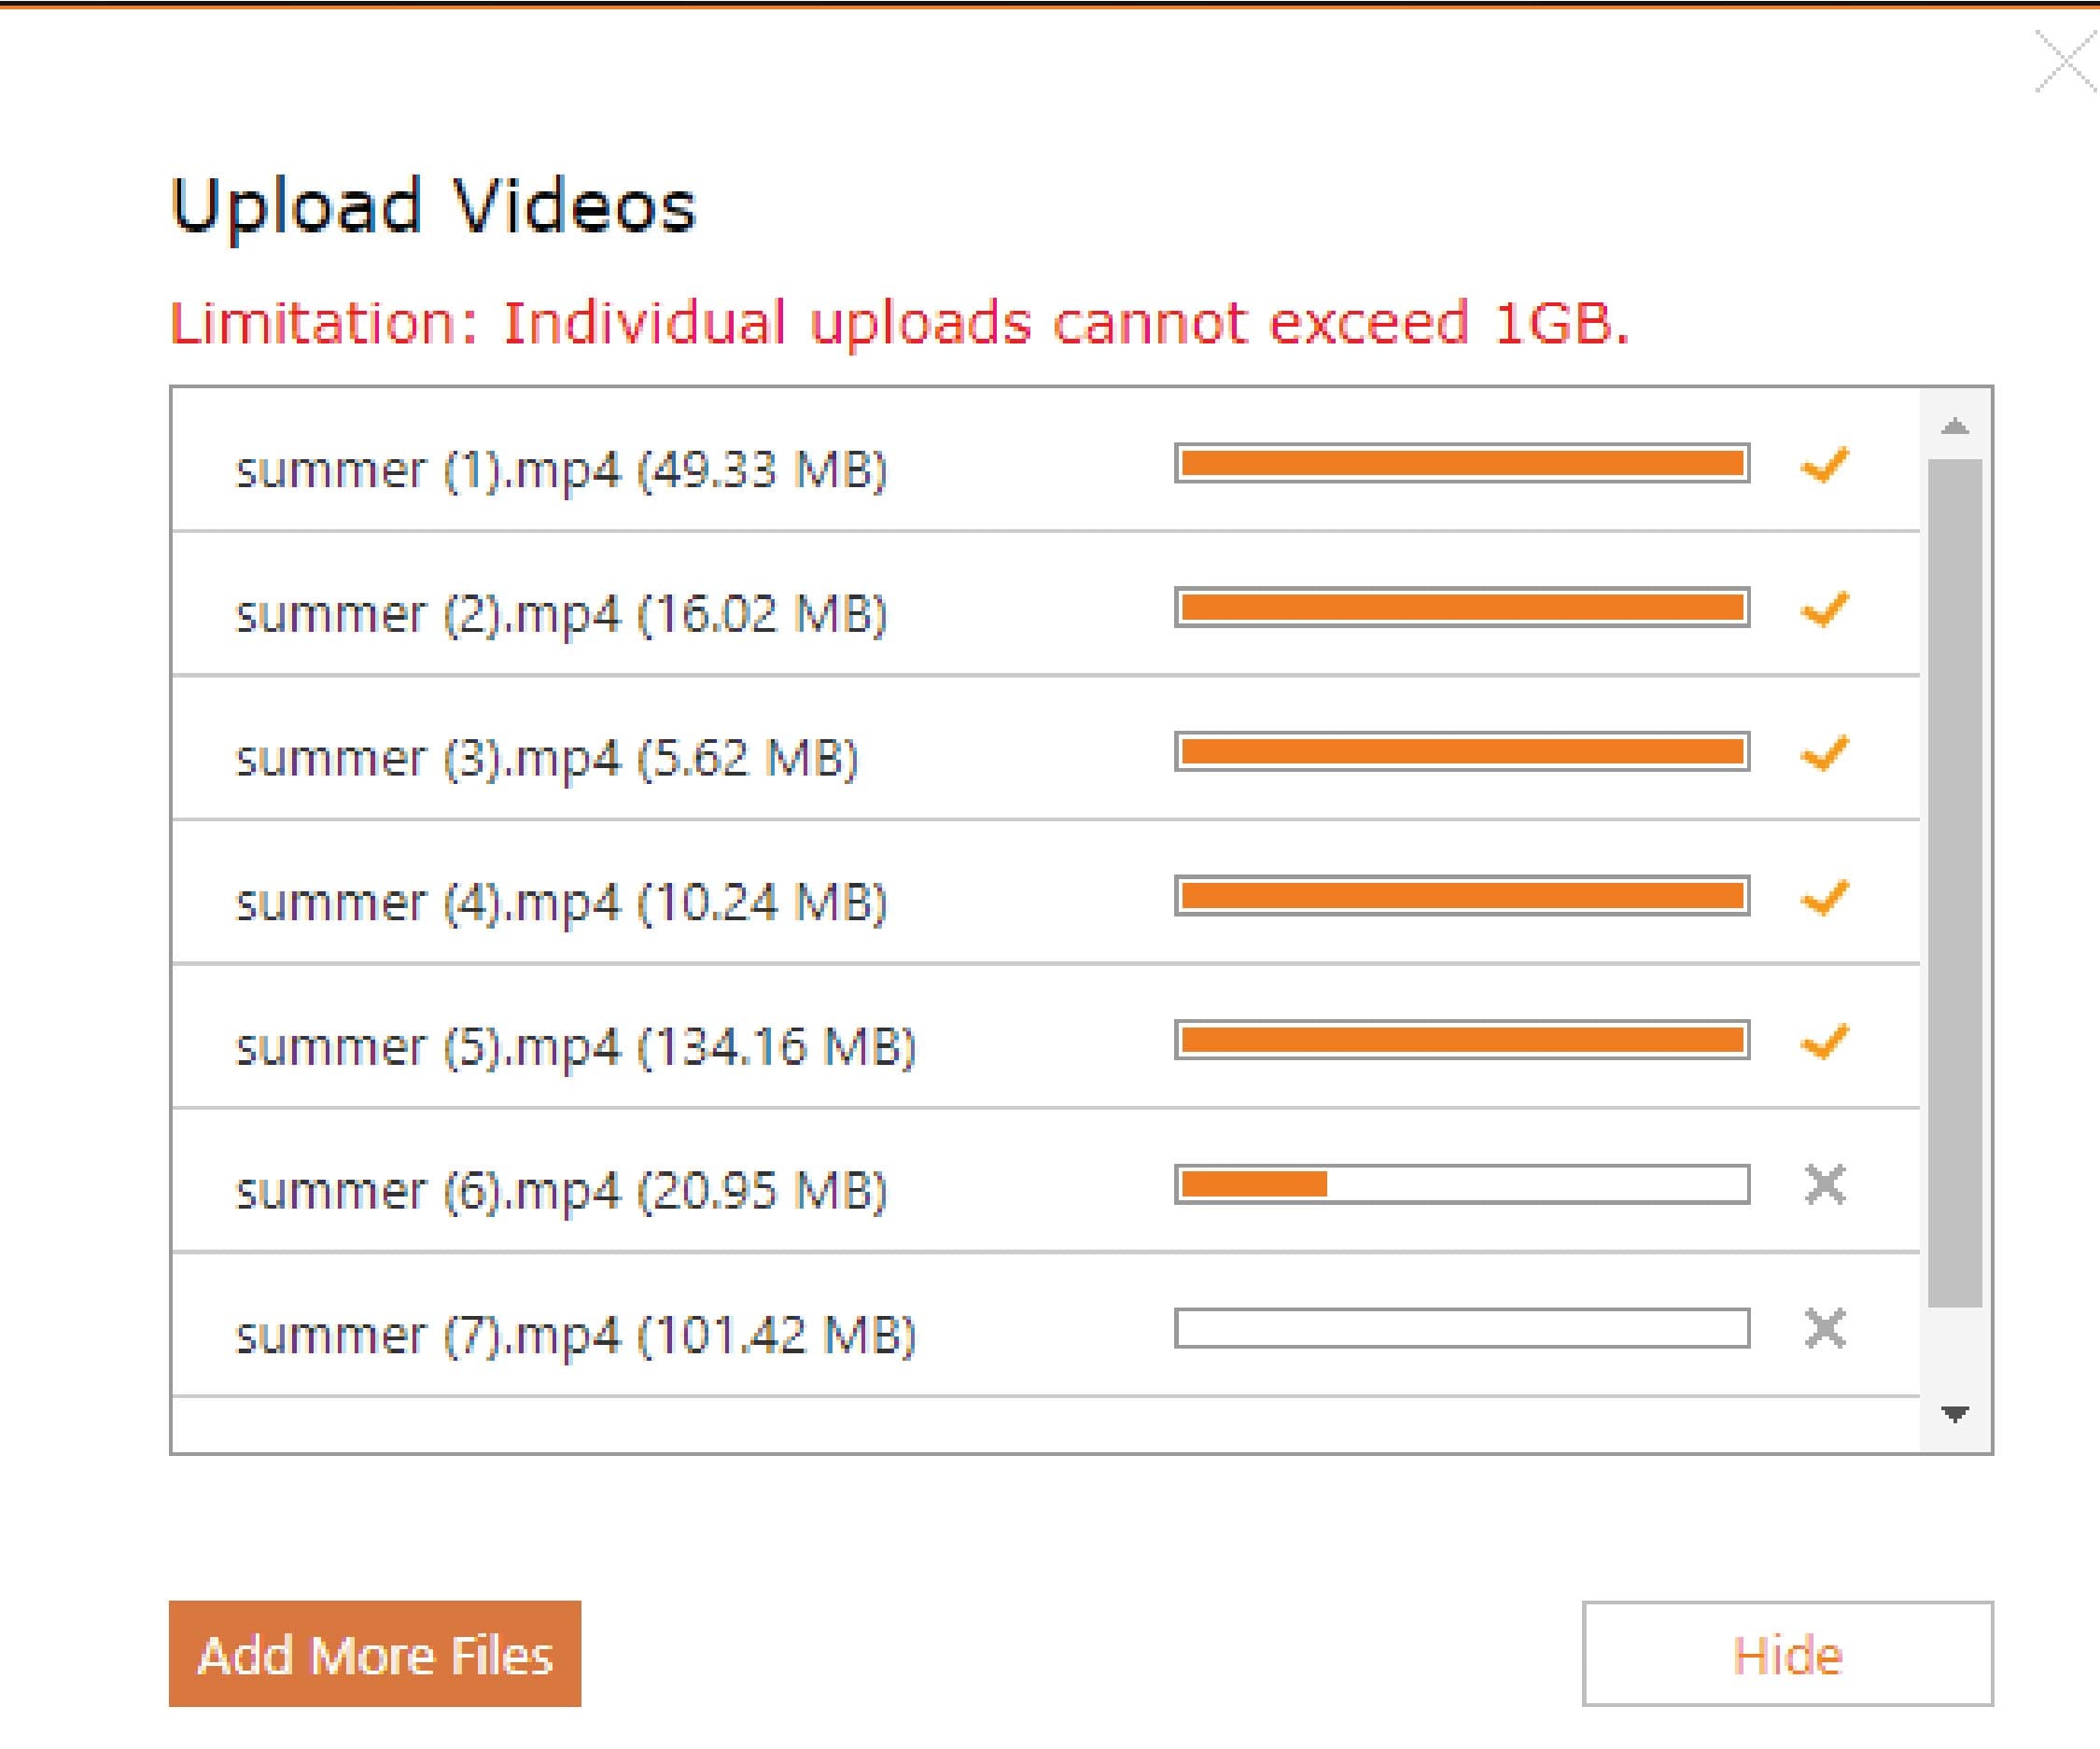
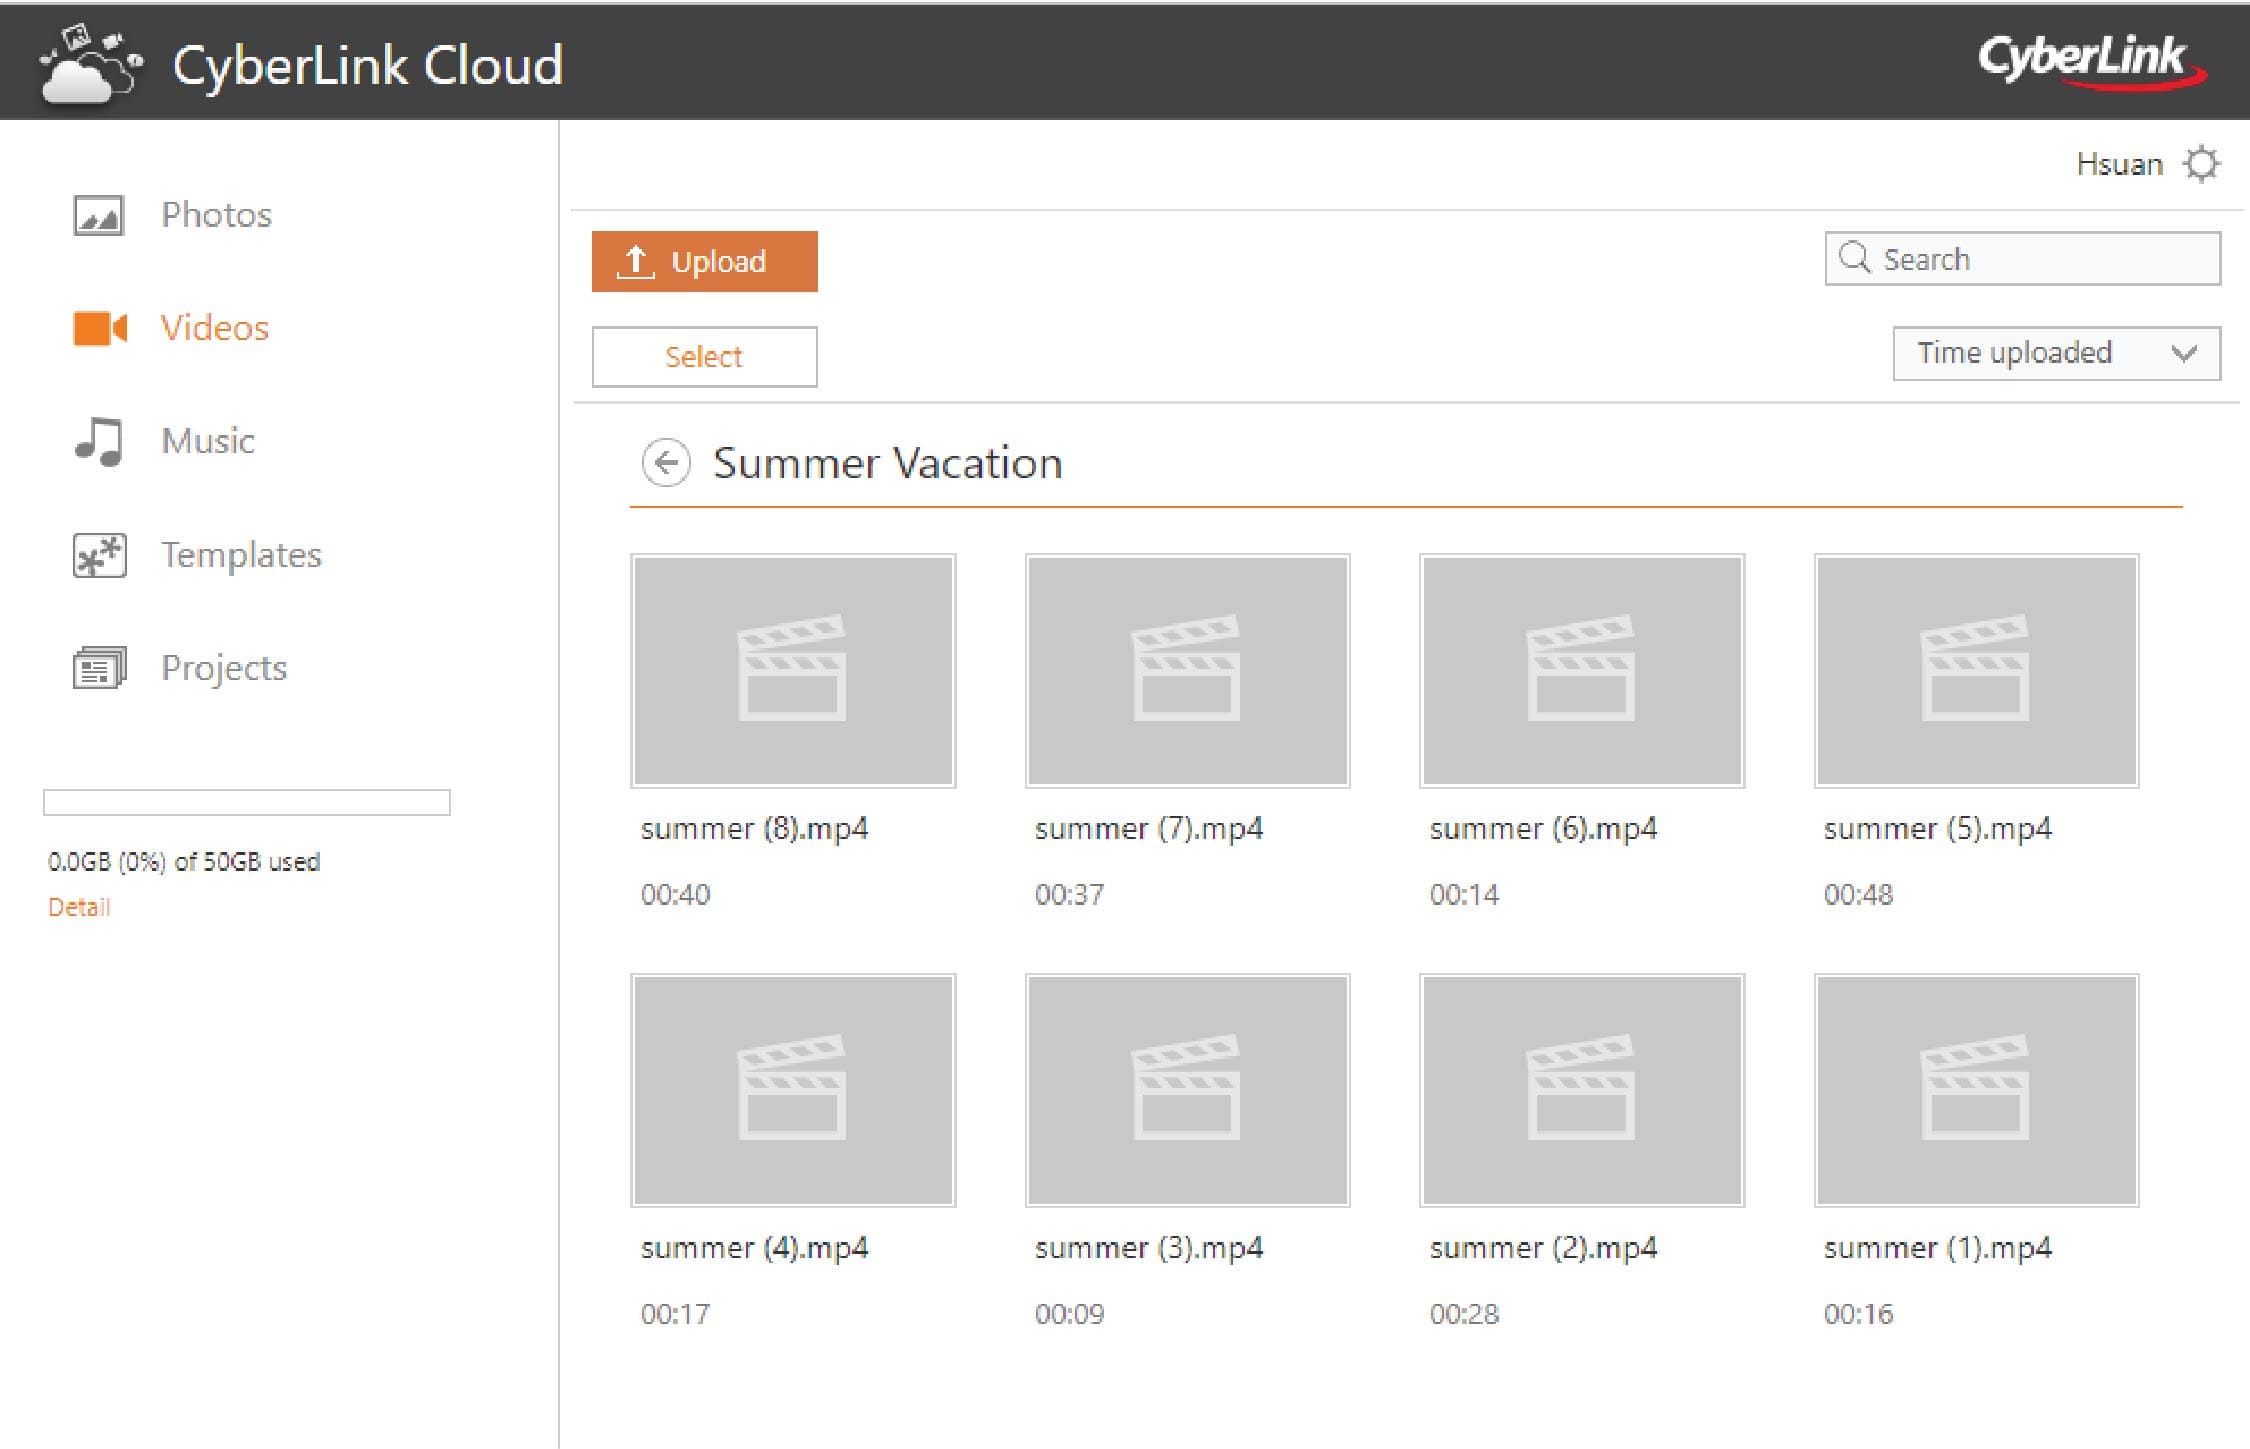
8. Click Hide to close the above dialog. The upload will continue in your web browser, so do not close it. Once it is done, all the video files will be shown in the created folder.
You can also upload your media files to CyberLink Cloud within projects created in PowerDirector.
How to Edit Your First Video
Now that you have all your photos and videos organized, it is time to start creating a project. Here we will take you through the basic steps of creating a simple first video in PowerDirector.
1. Importing Your Media Files
The first step is to import your photos and videos into PowerDirector. Here is how to do this.
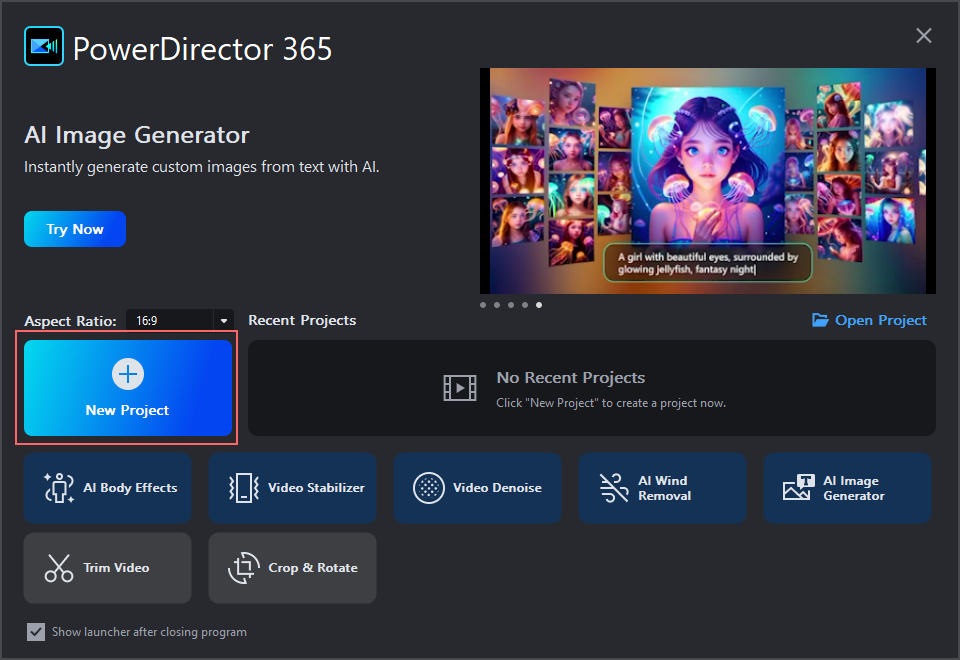
1. Launch PowerDirector 365 and then select New Project.
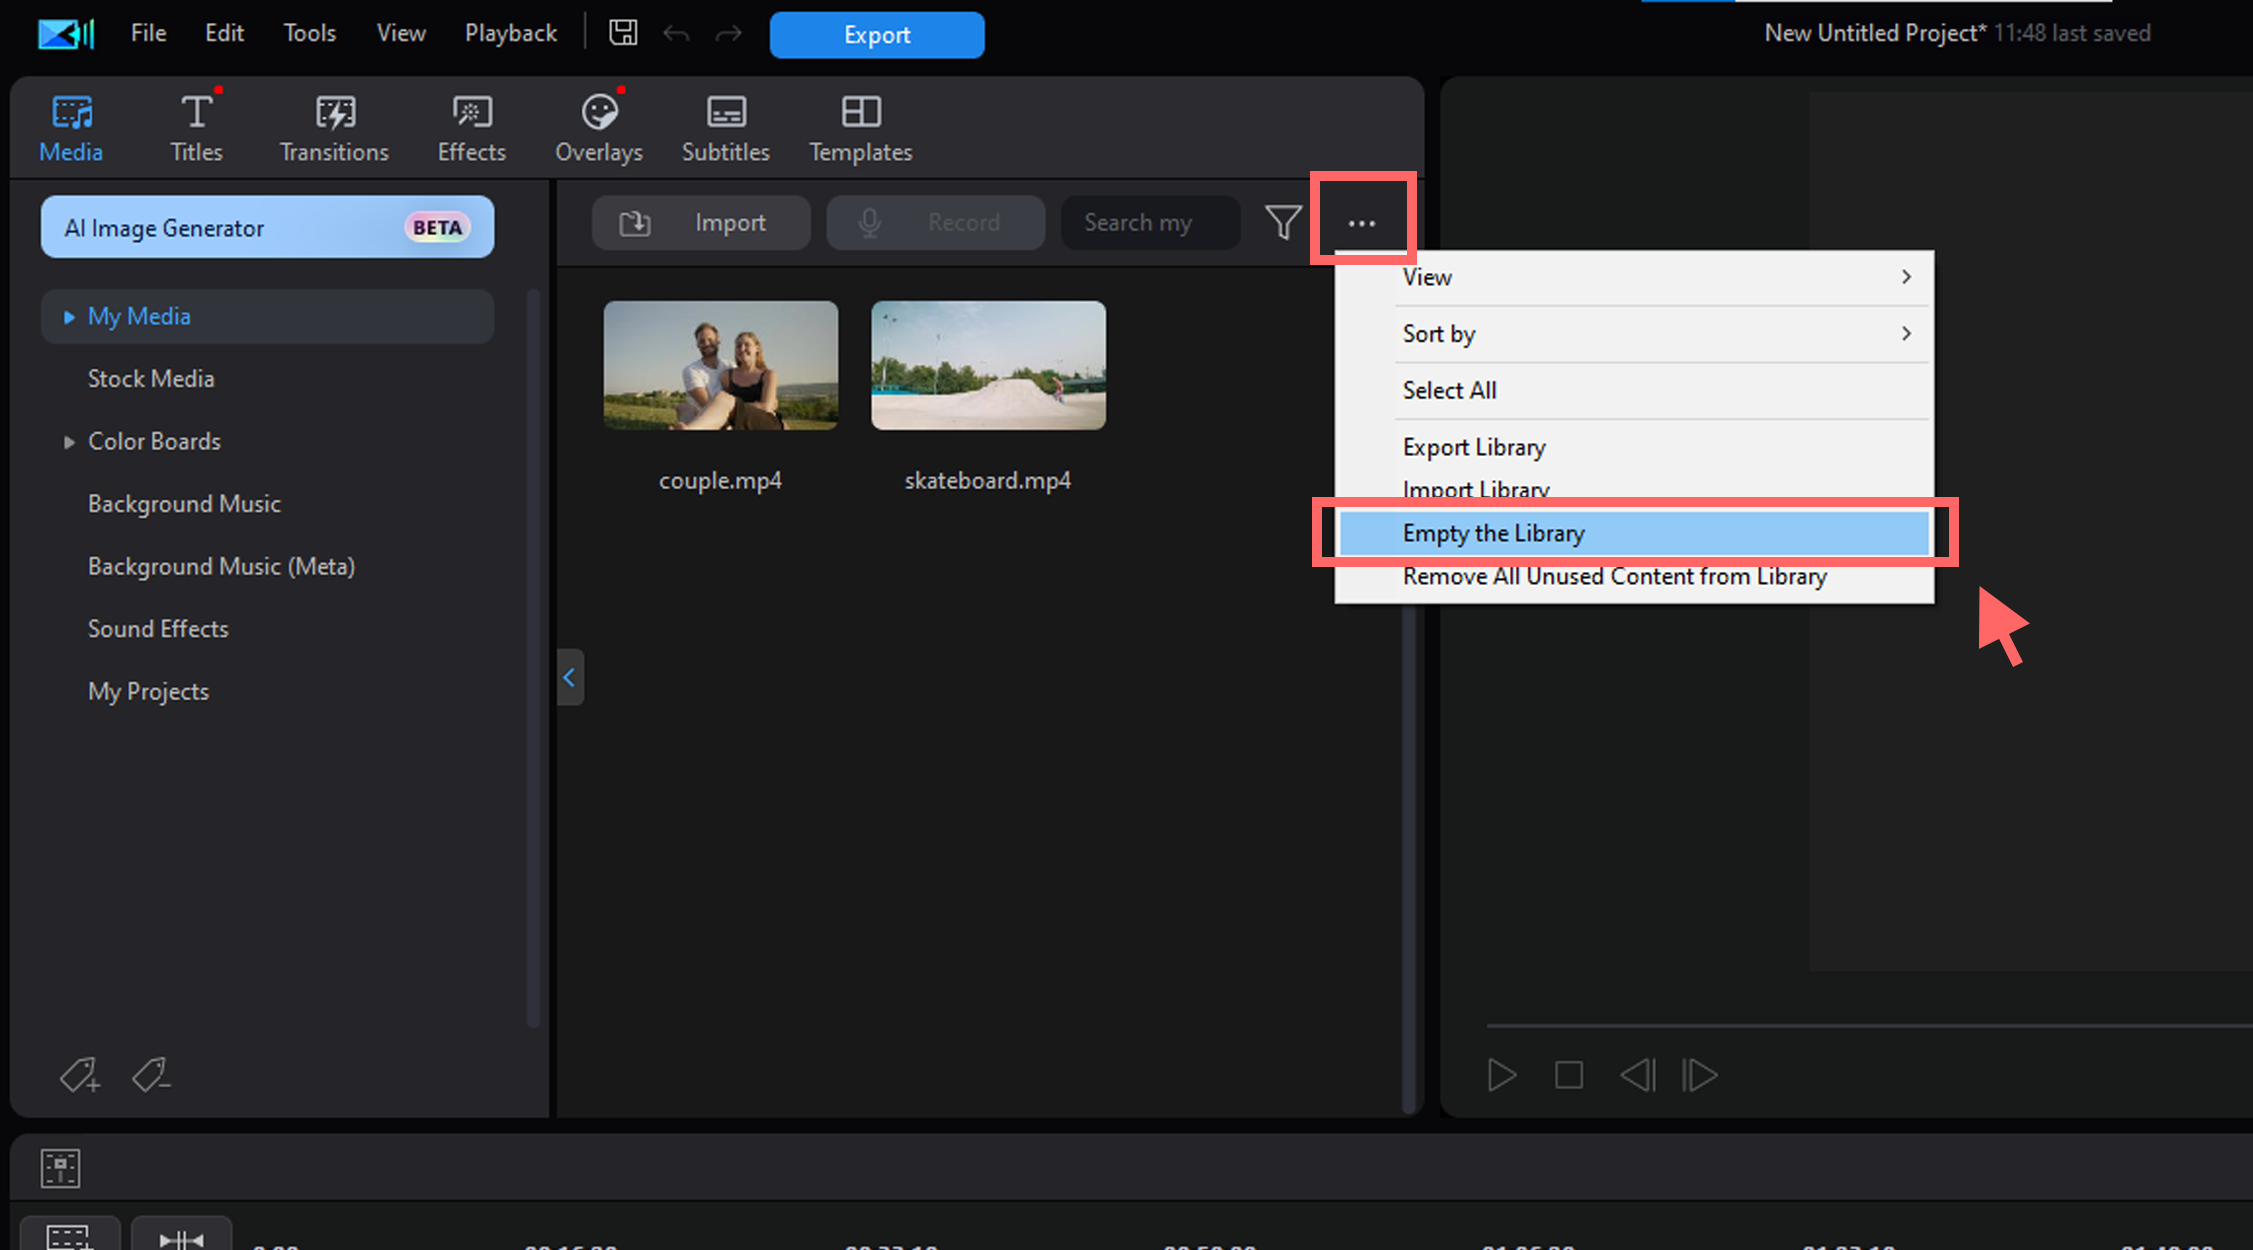
2. To keep your media library clean with just your imported files, let’s first remove the default clips. Do this by clicking the  button and then selecting Empty the Library.
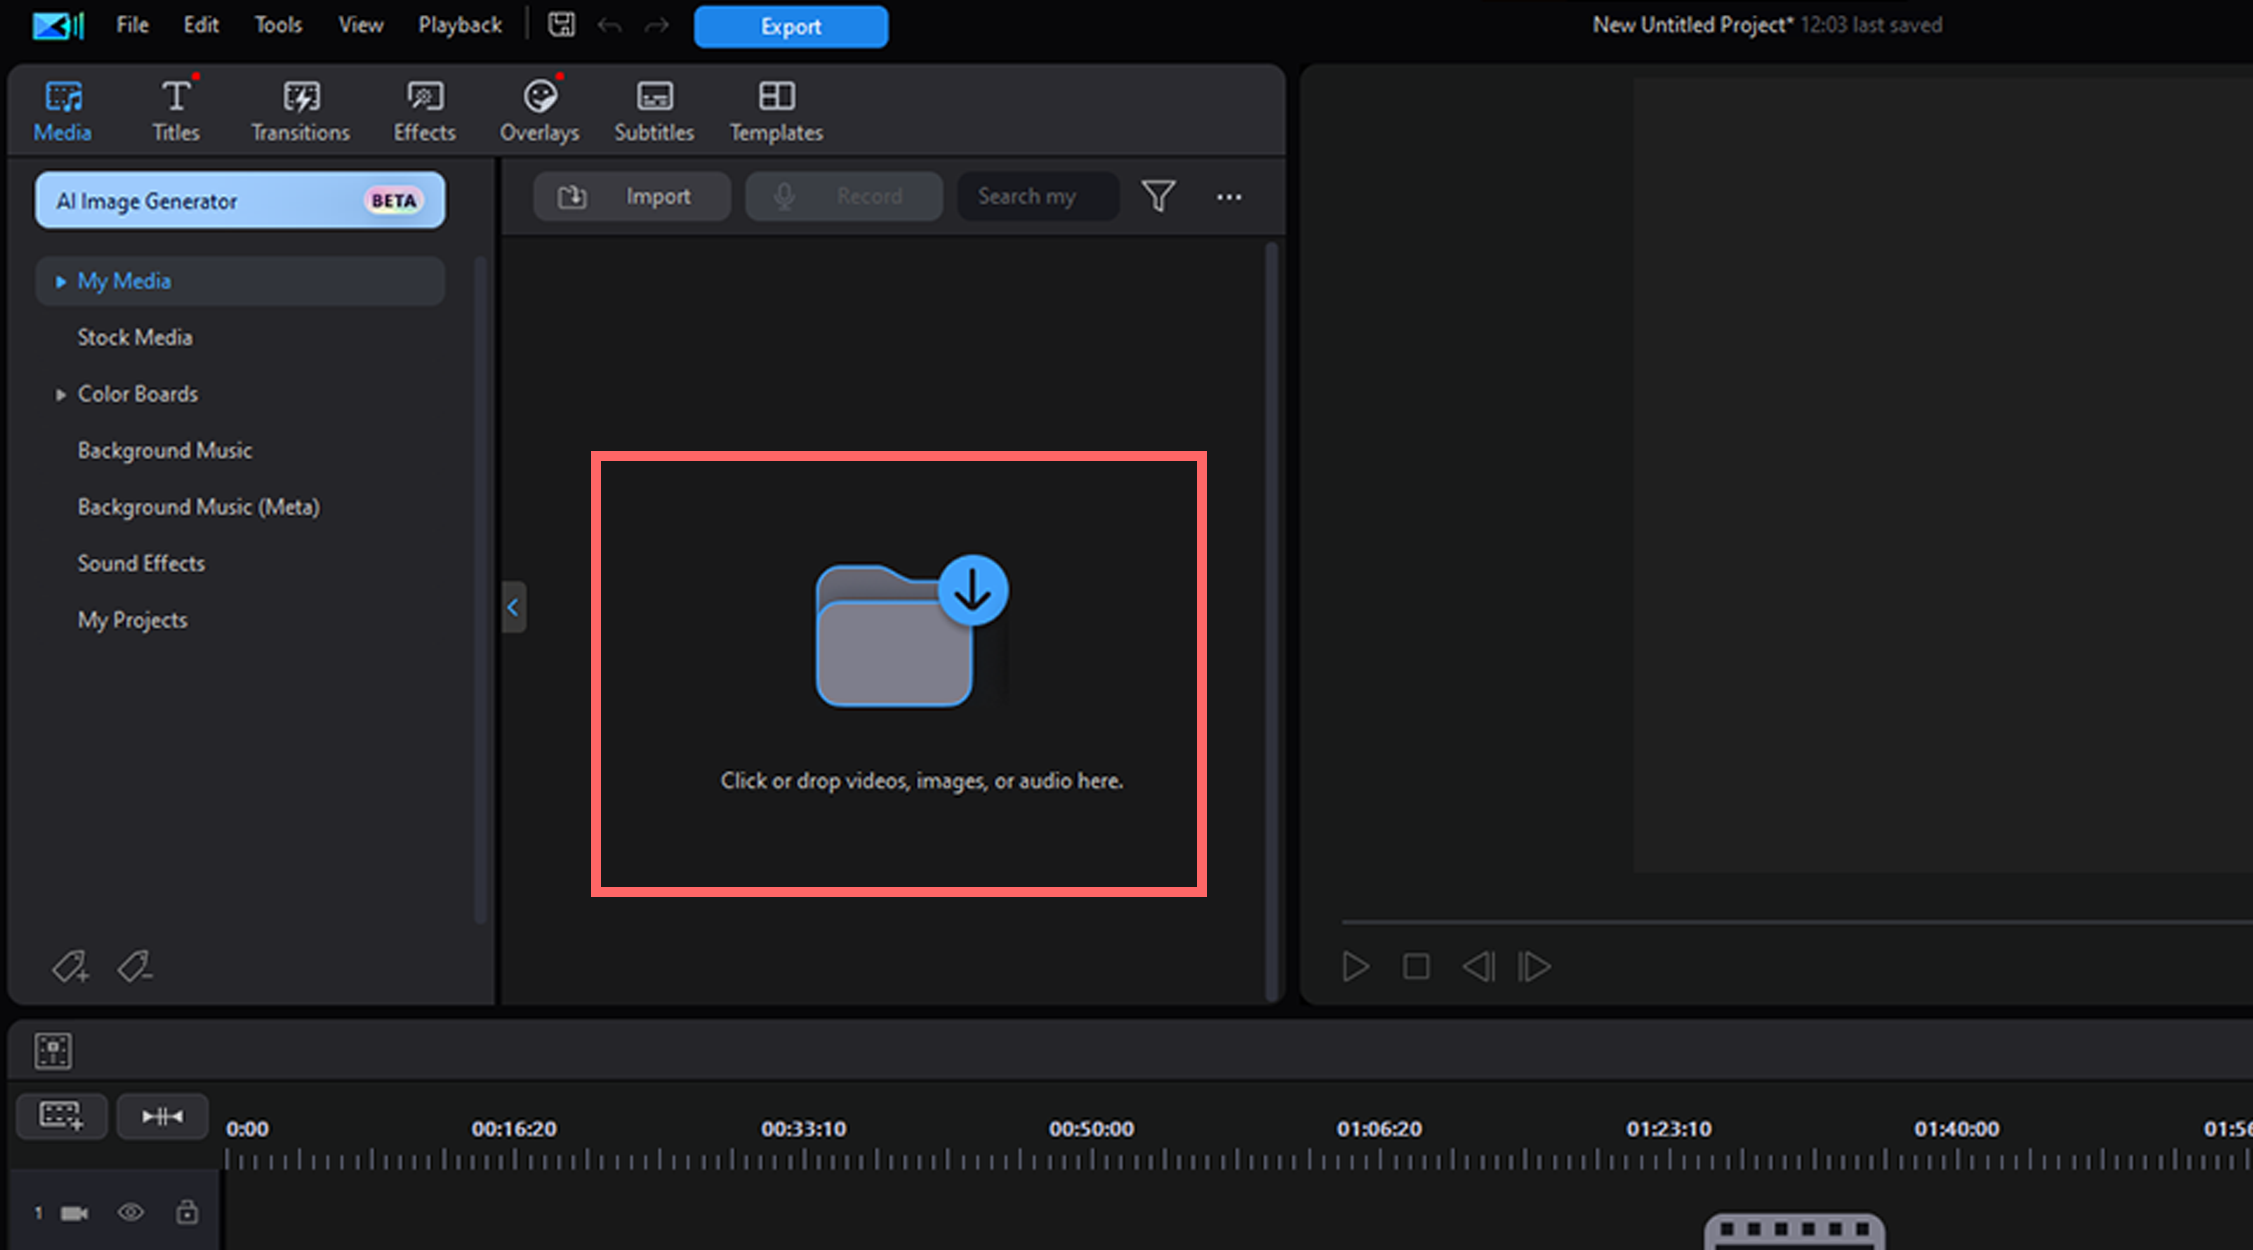
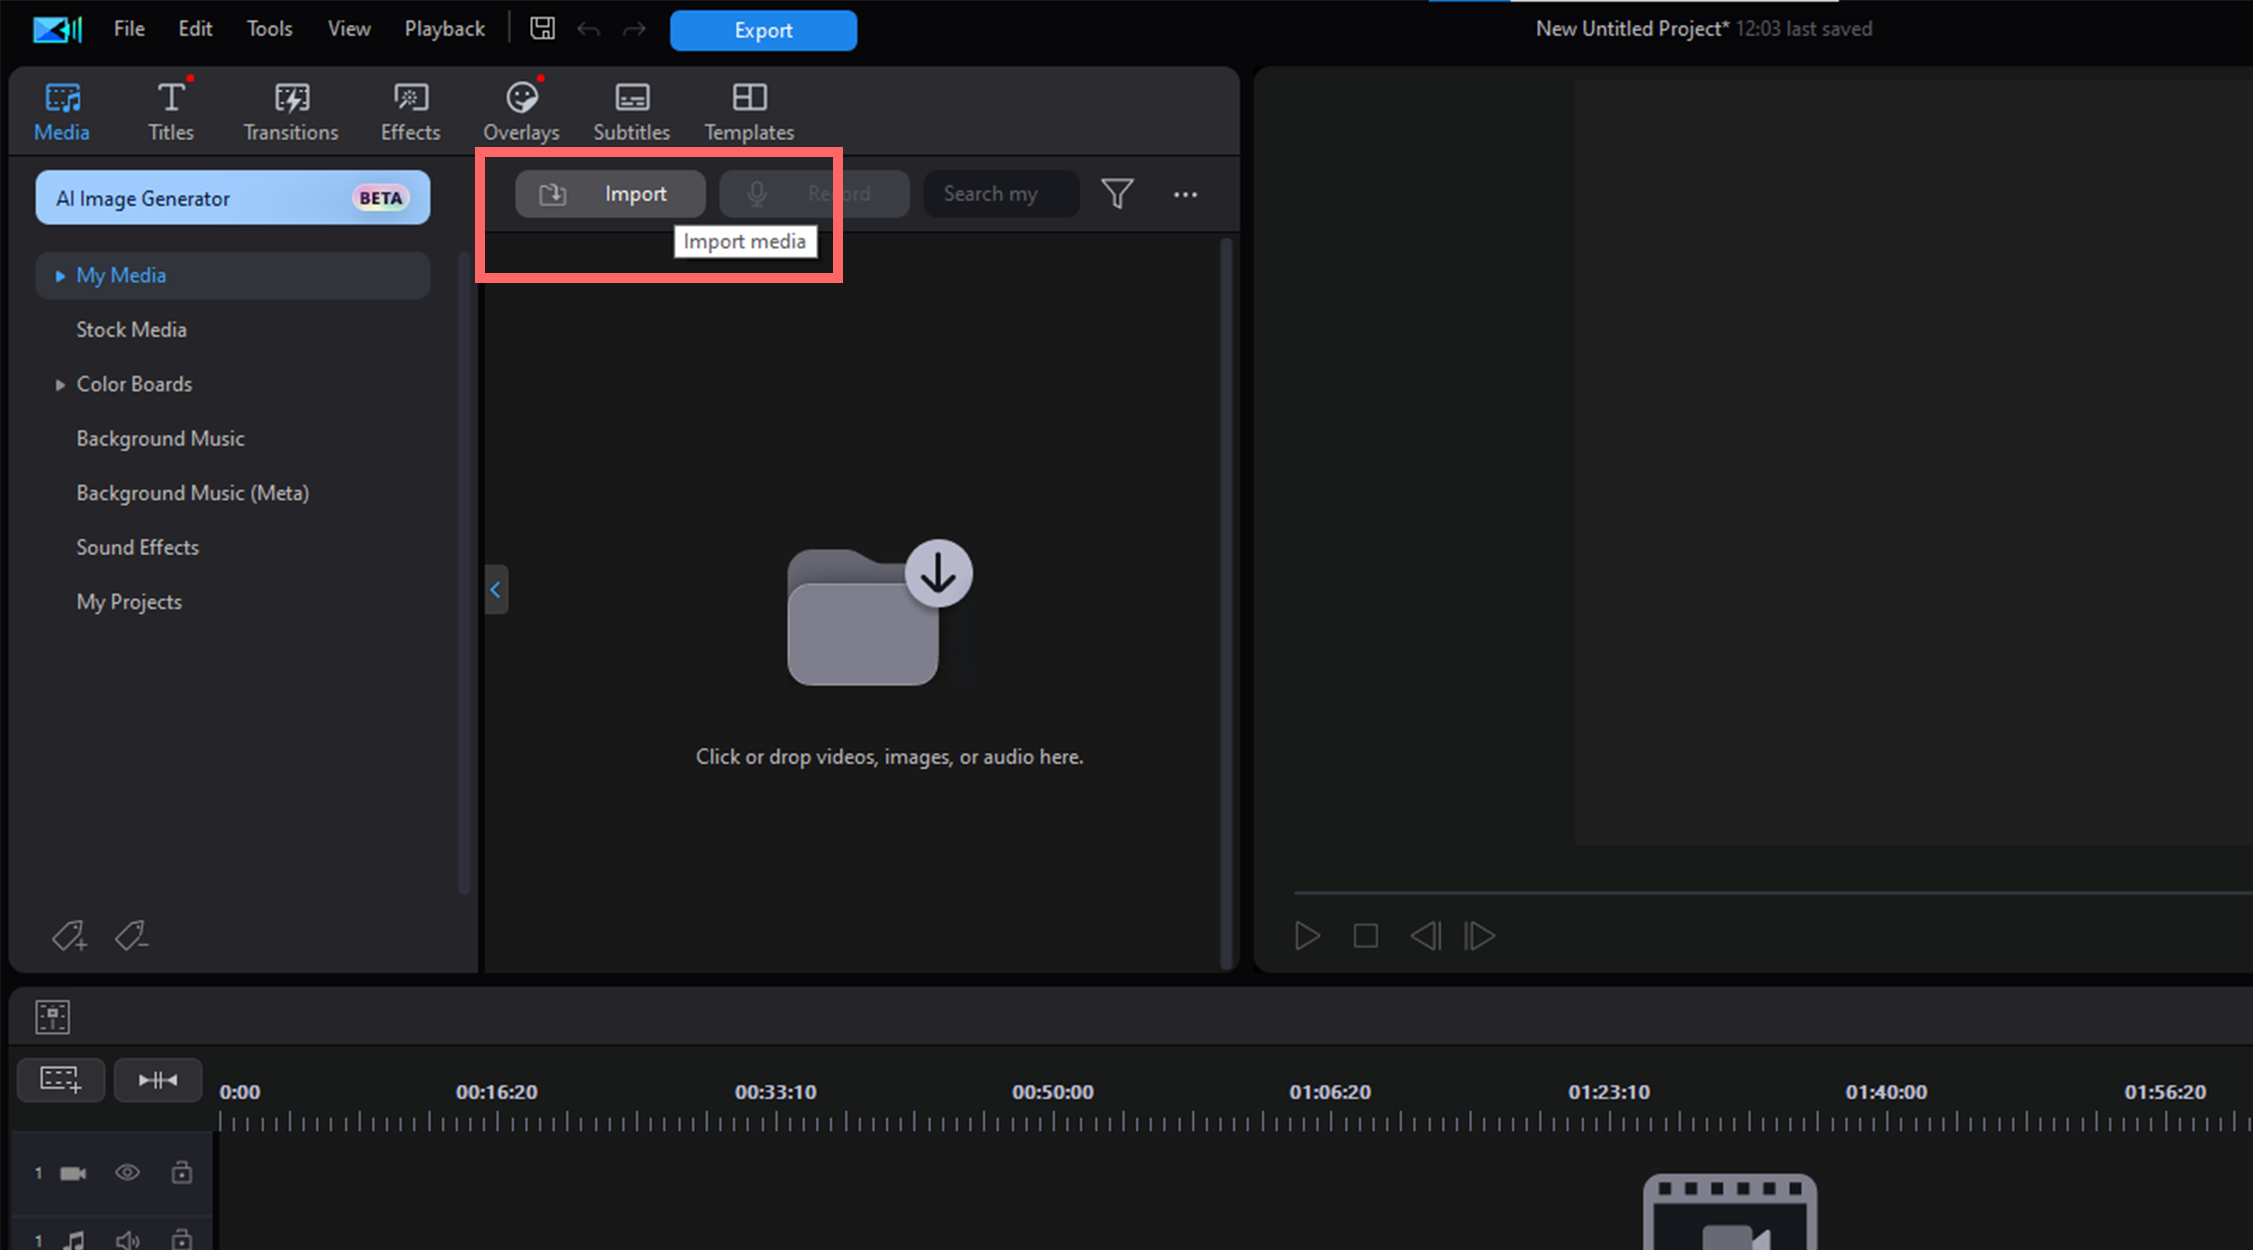
3. Click the big folder icon to import media, or click the Import button to have more import options.
4. Browse to the folder on your computer that contains your media files, select it, and then click Select Folder to import all the folder’s contents.
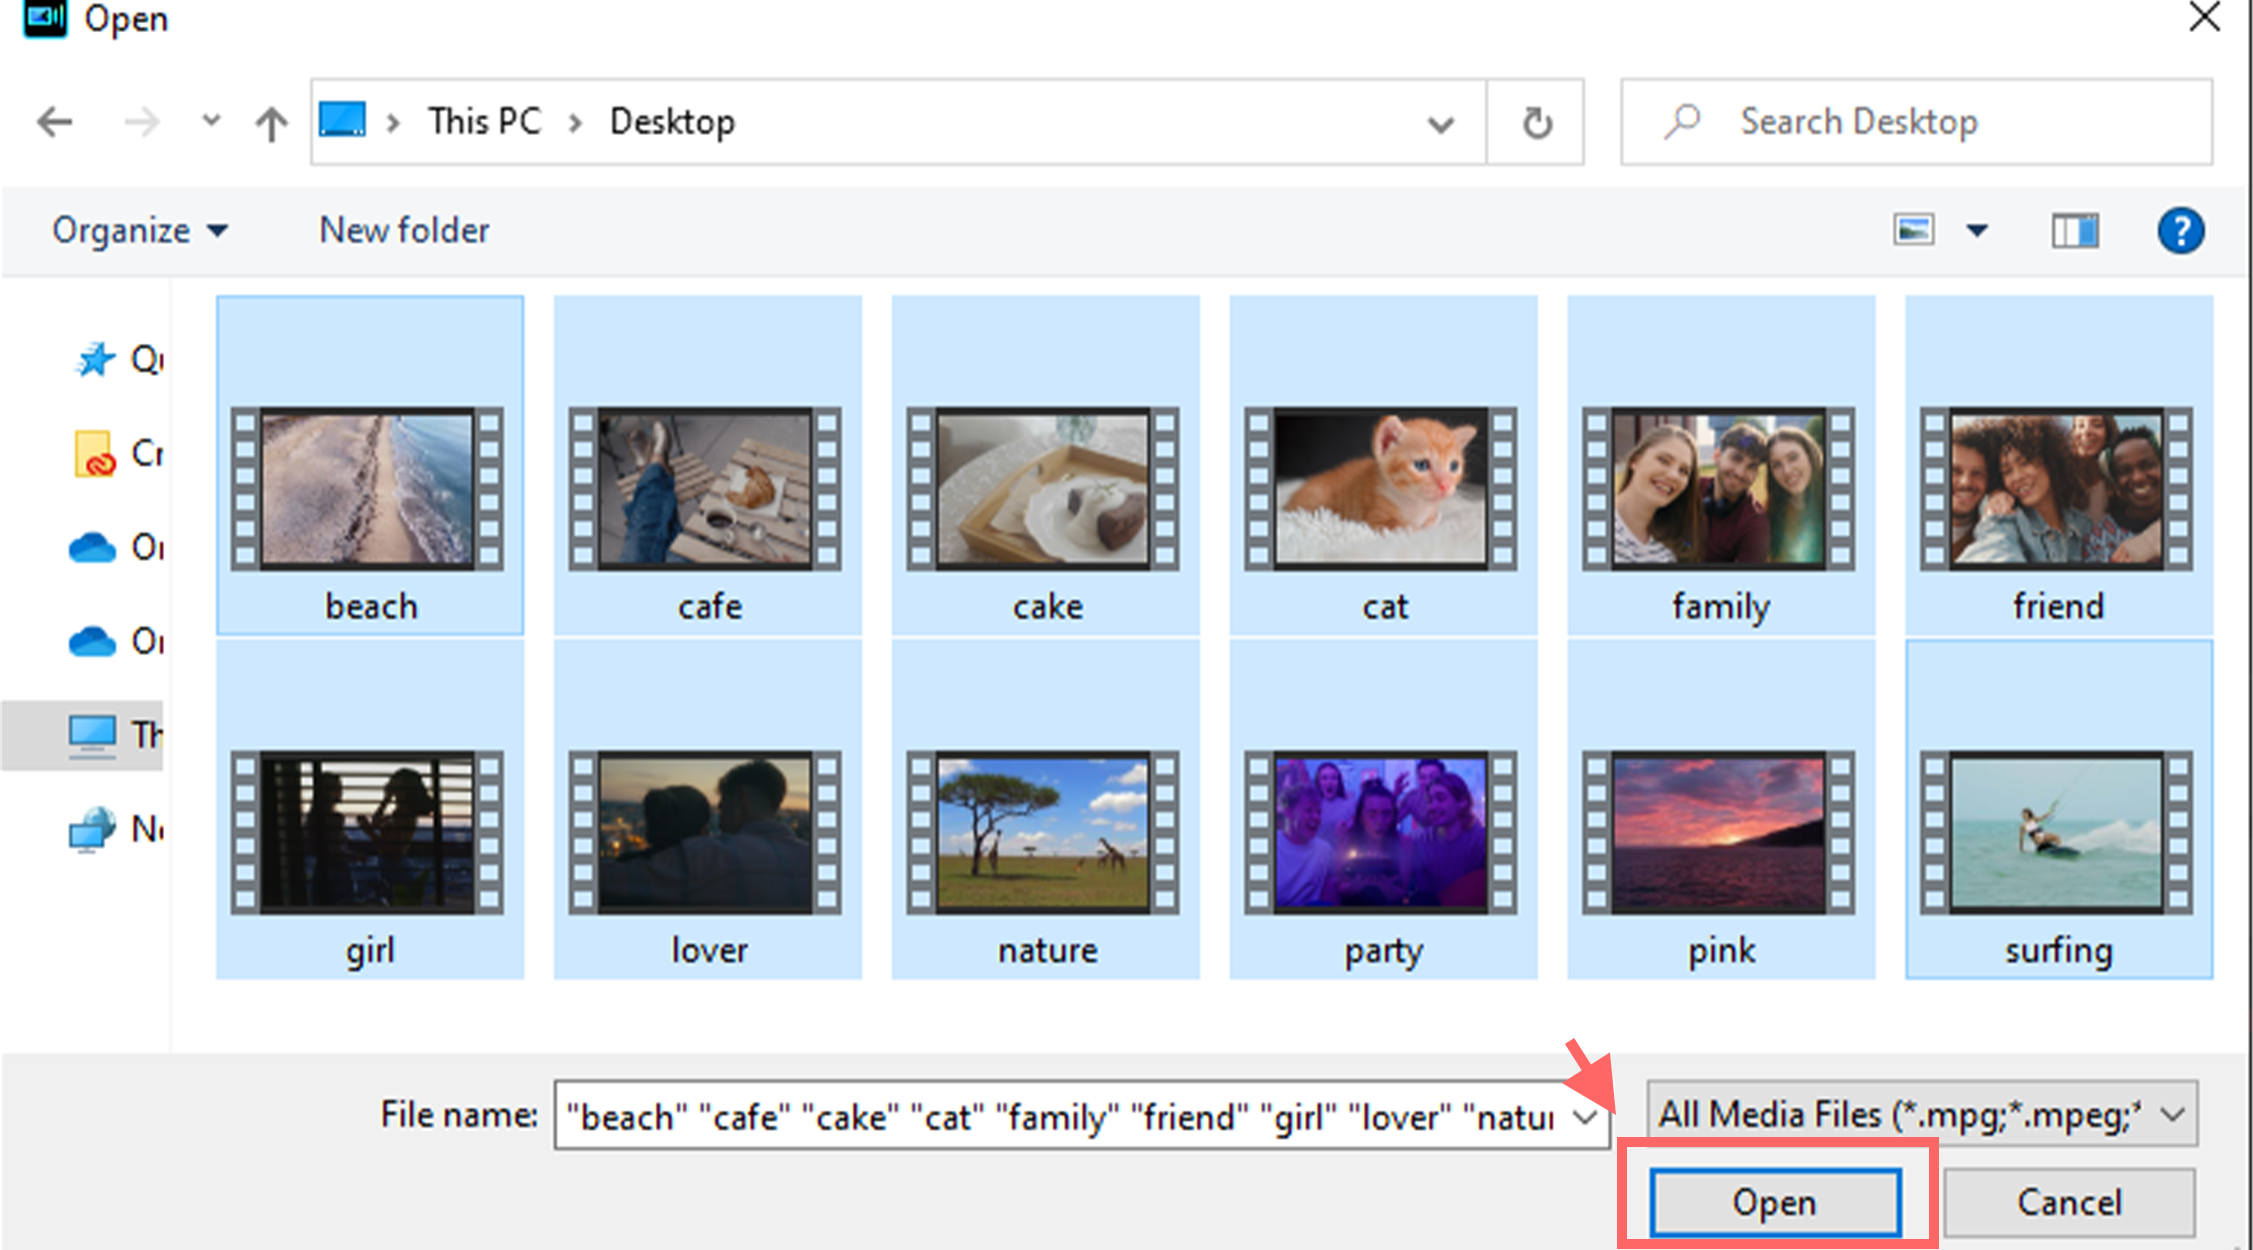
5. All the media files in the folder will be imported into the PowerDirector media library.
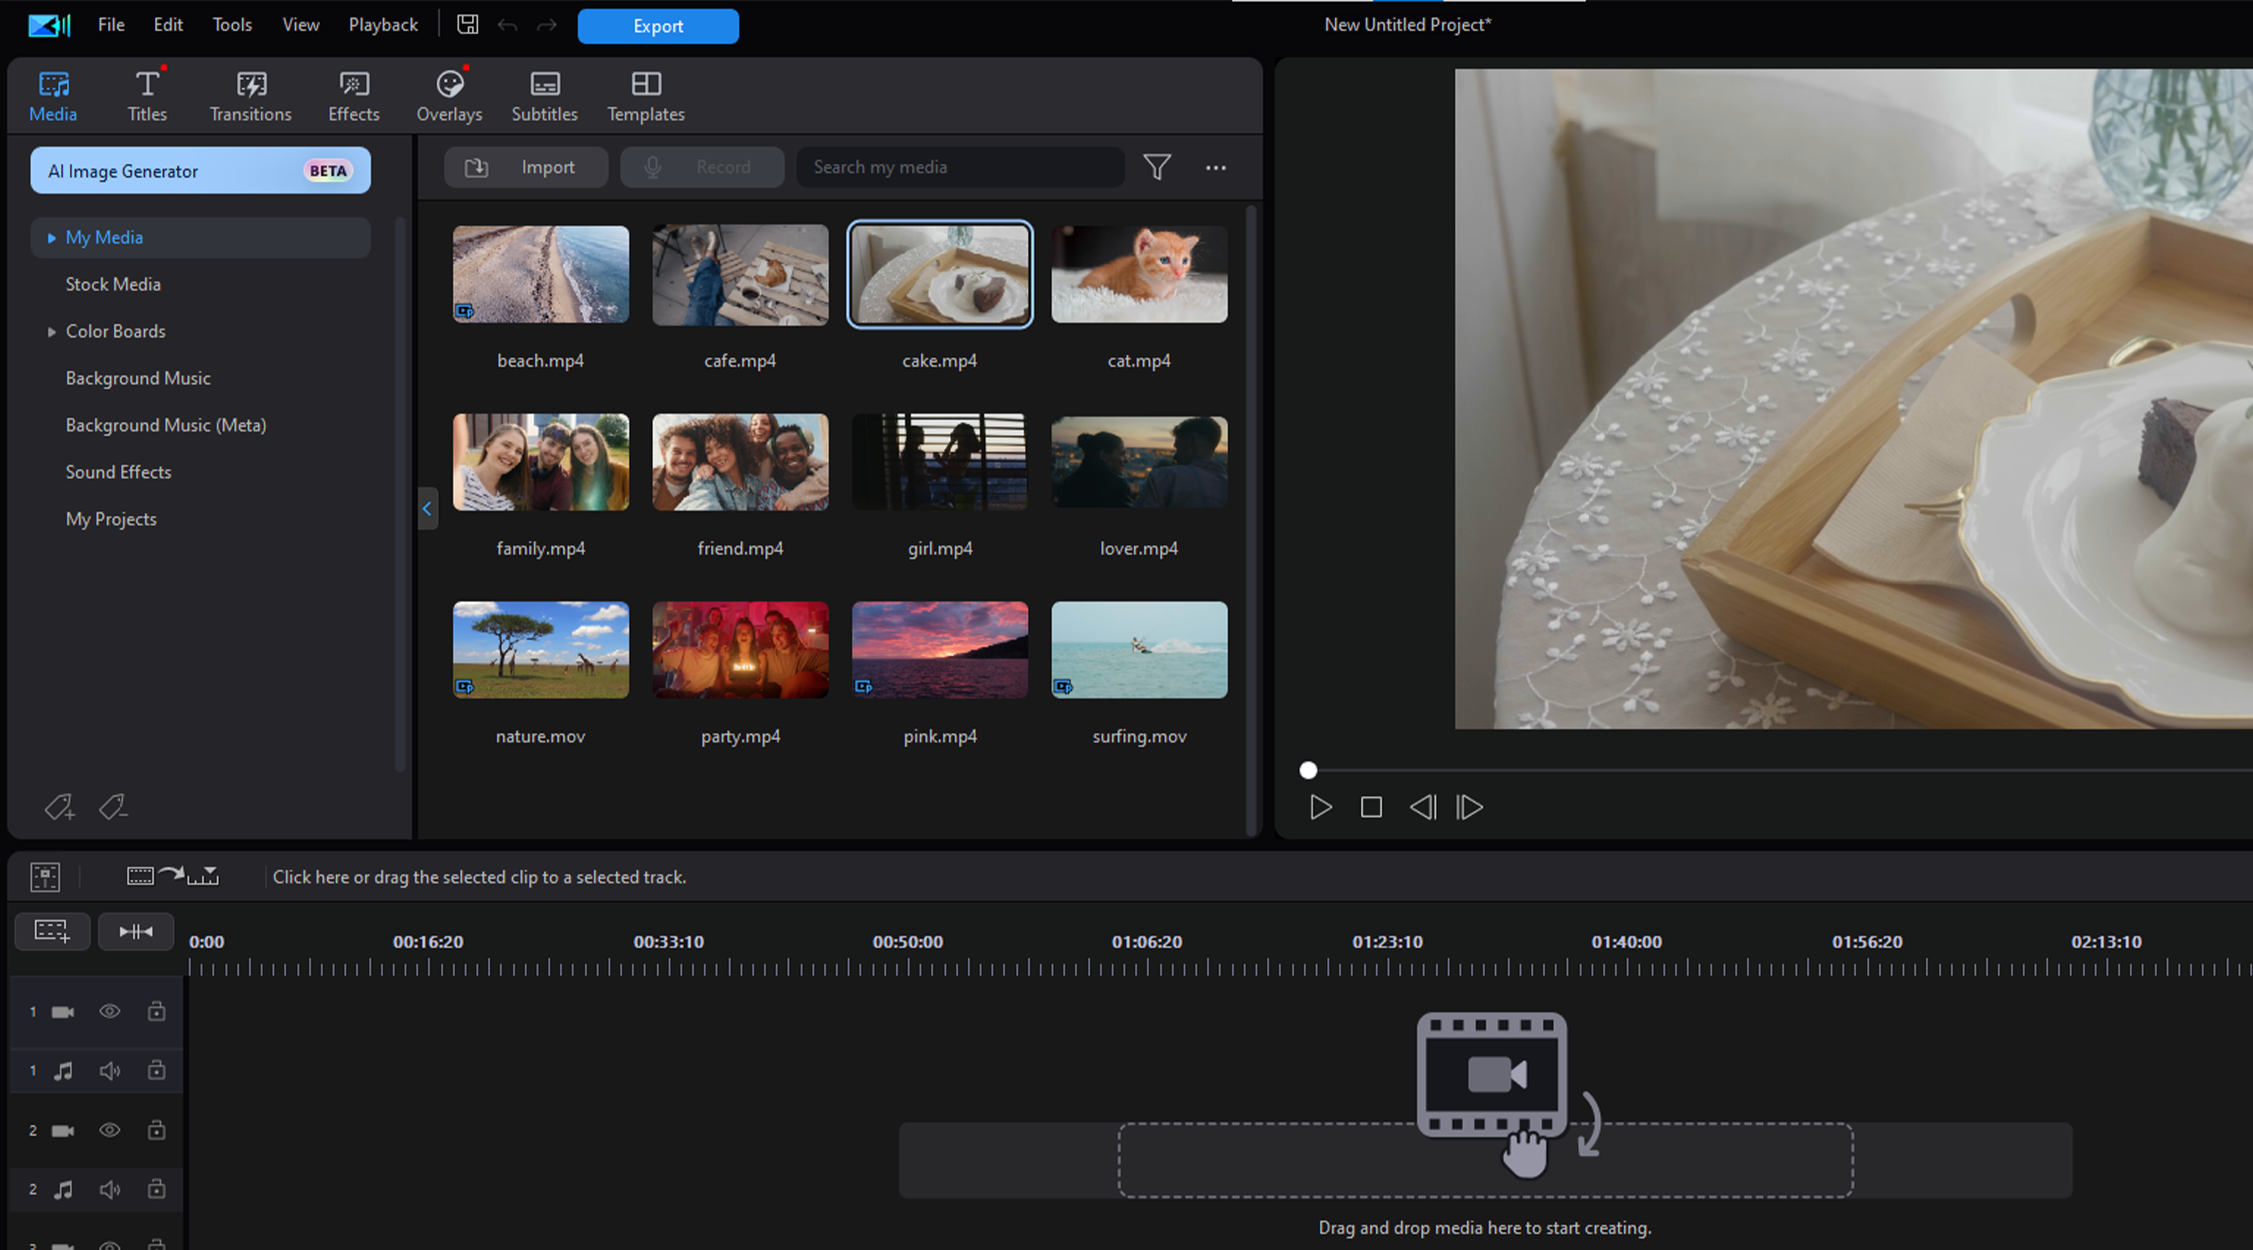
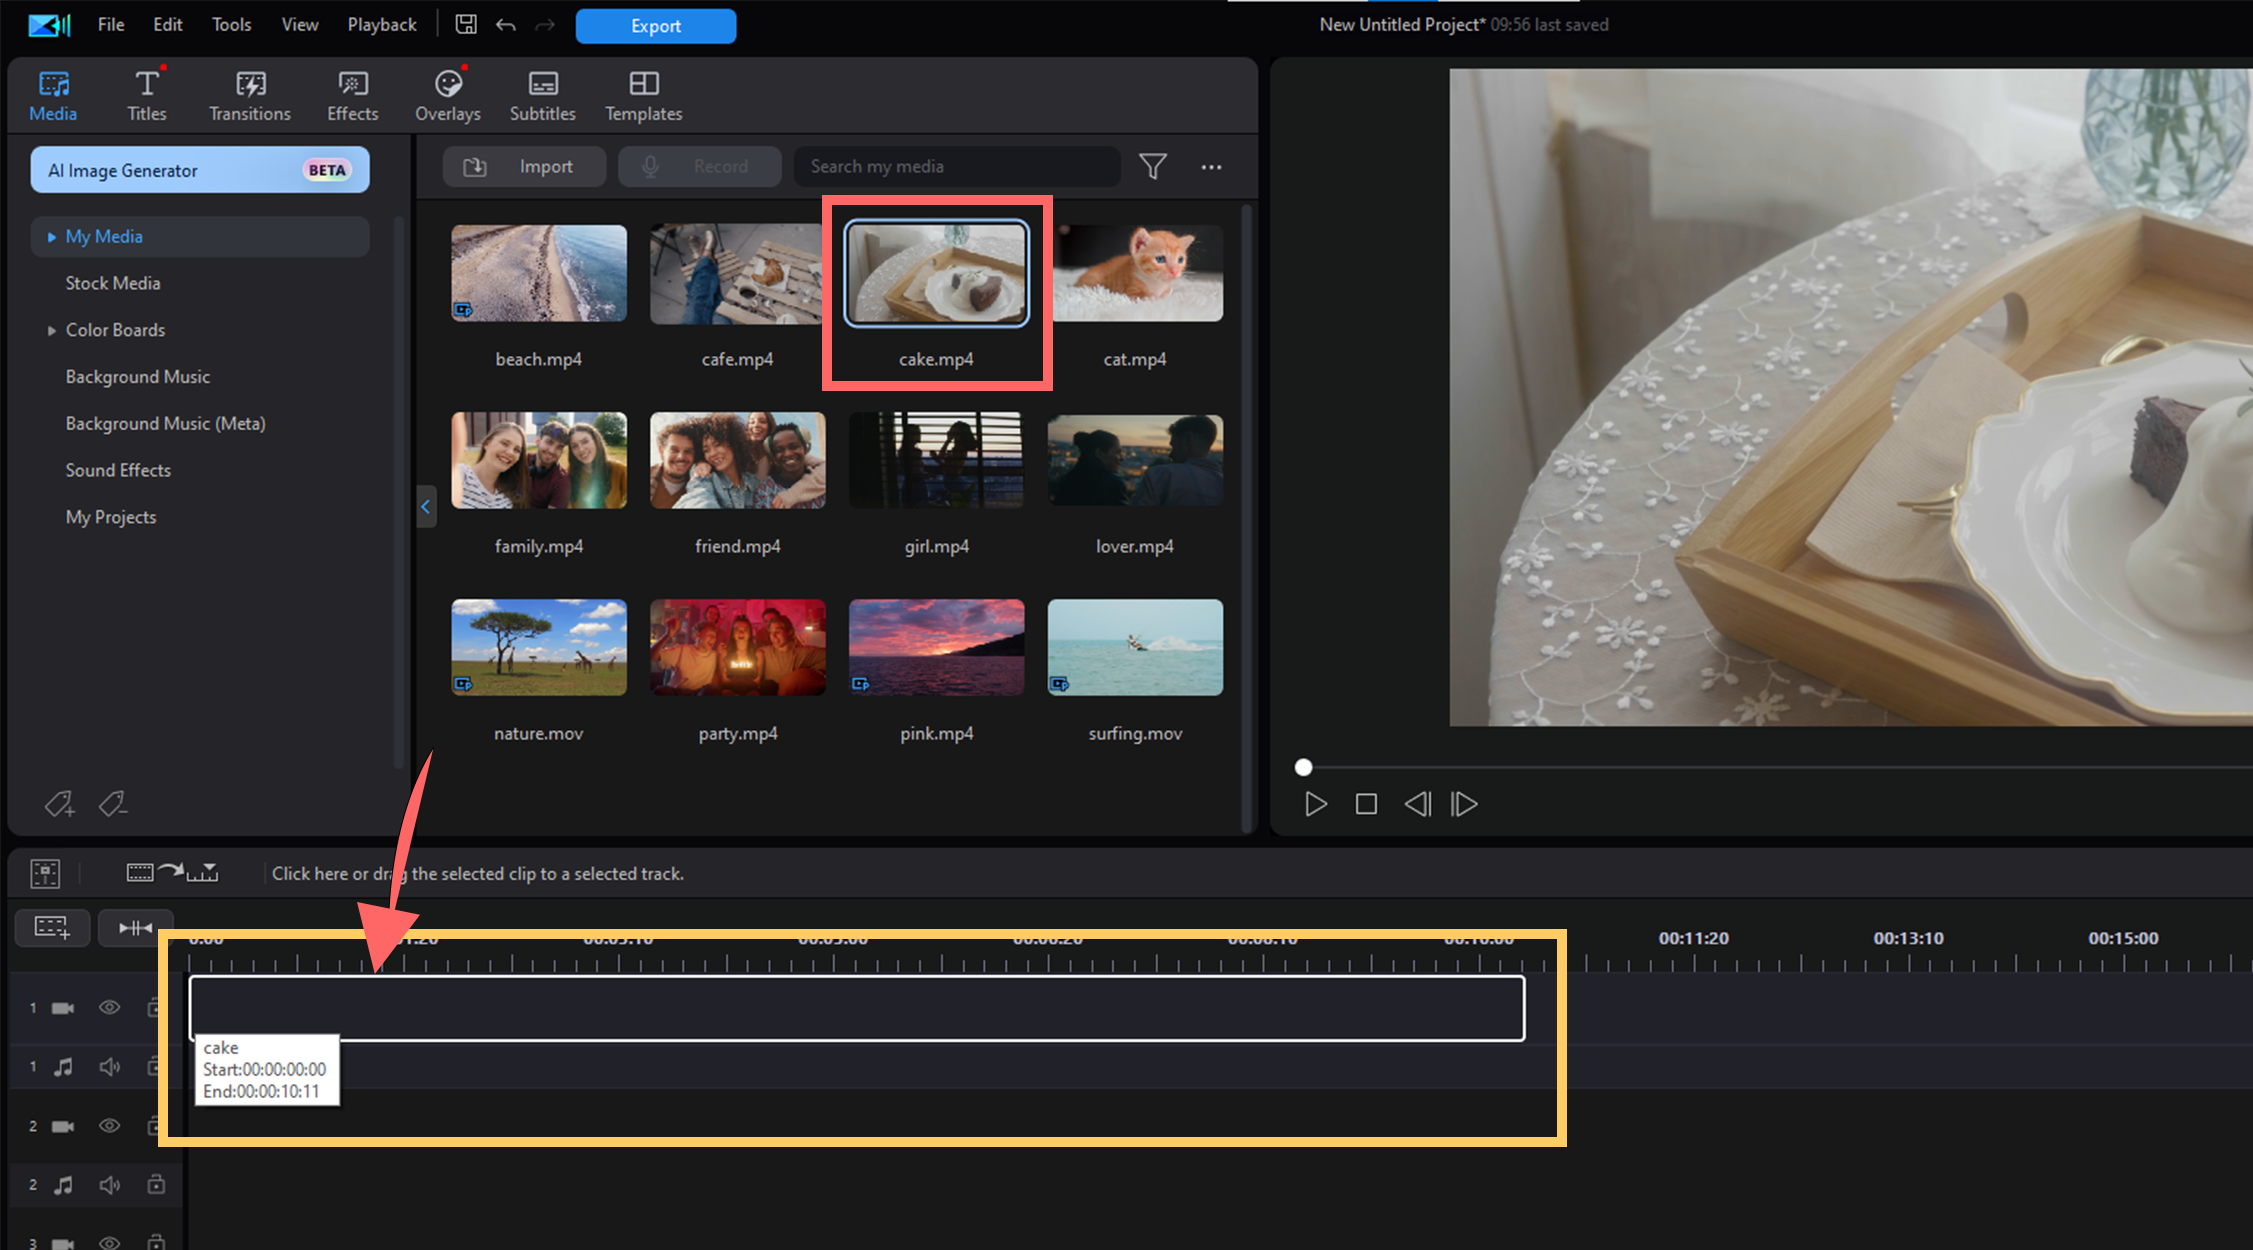
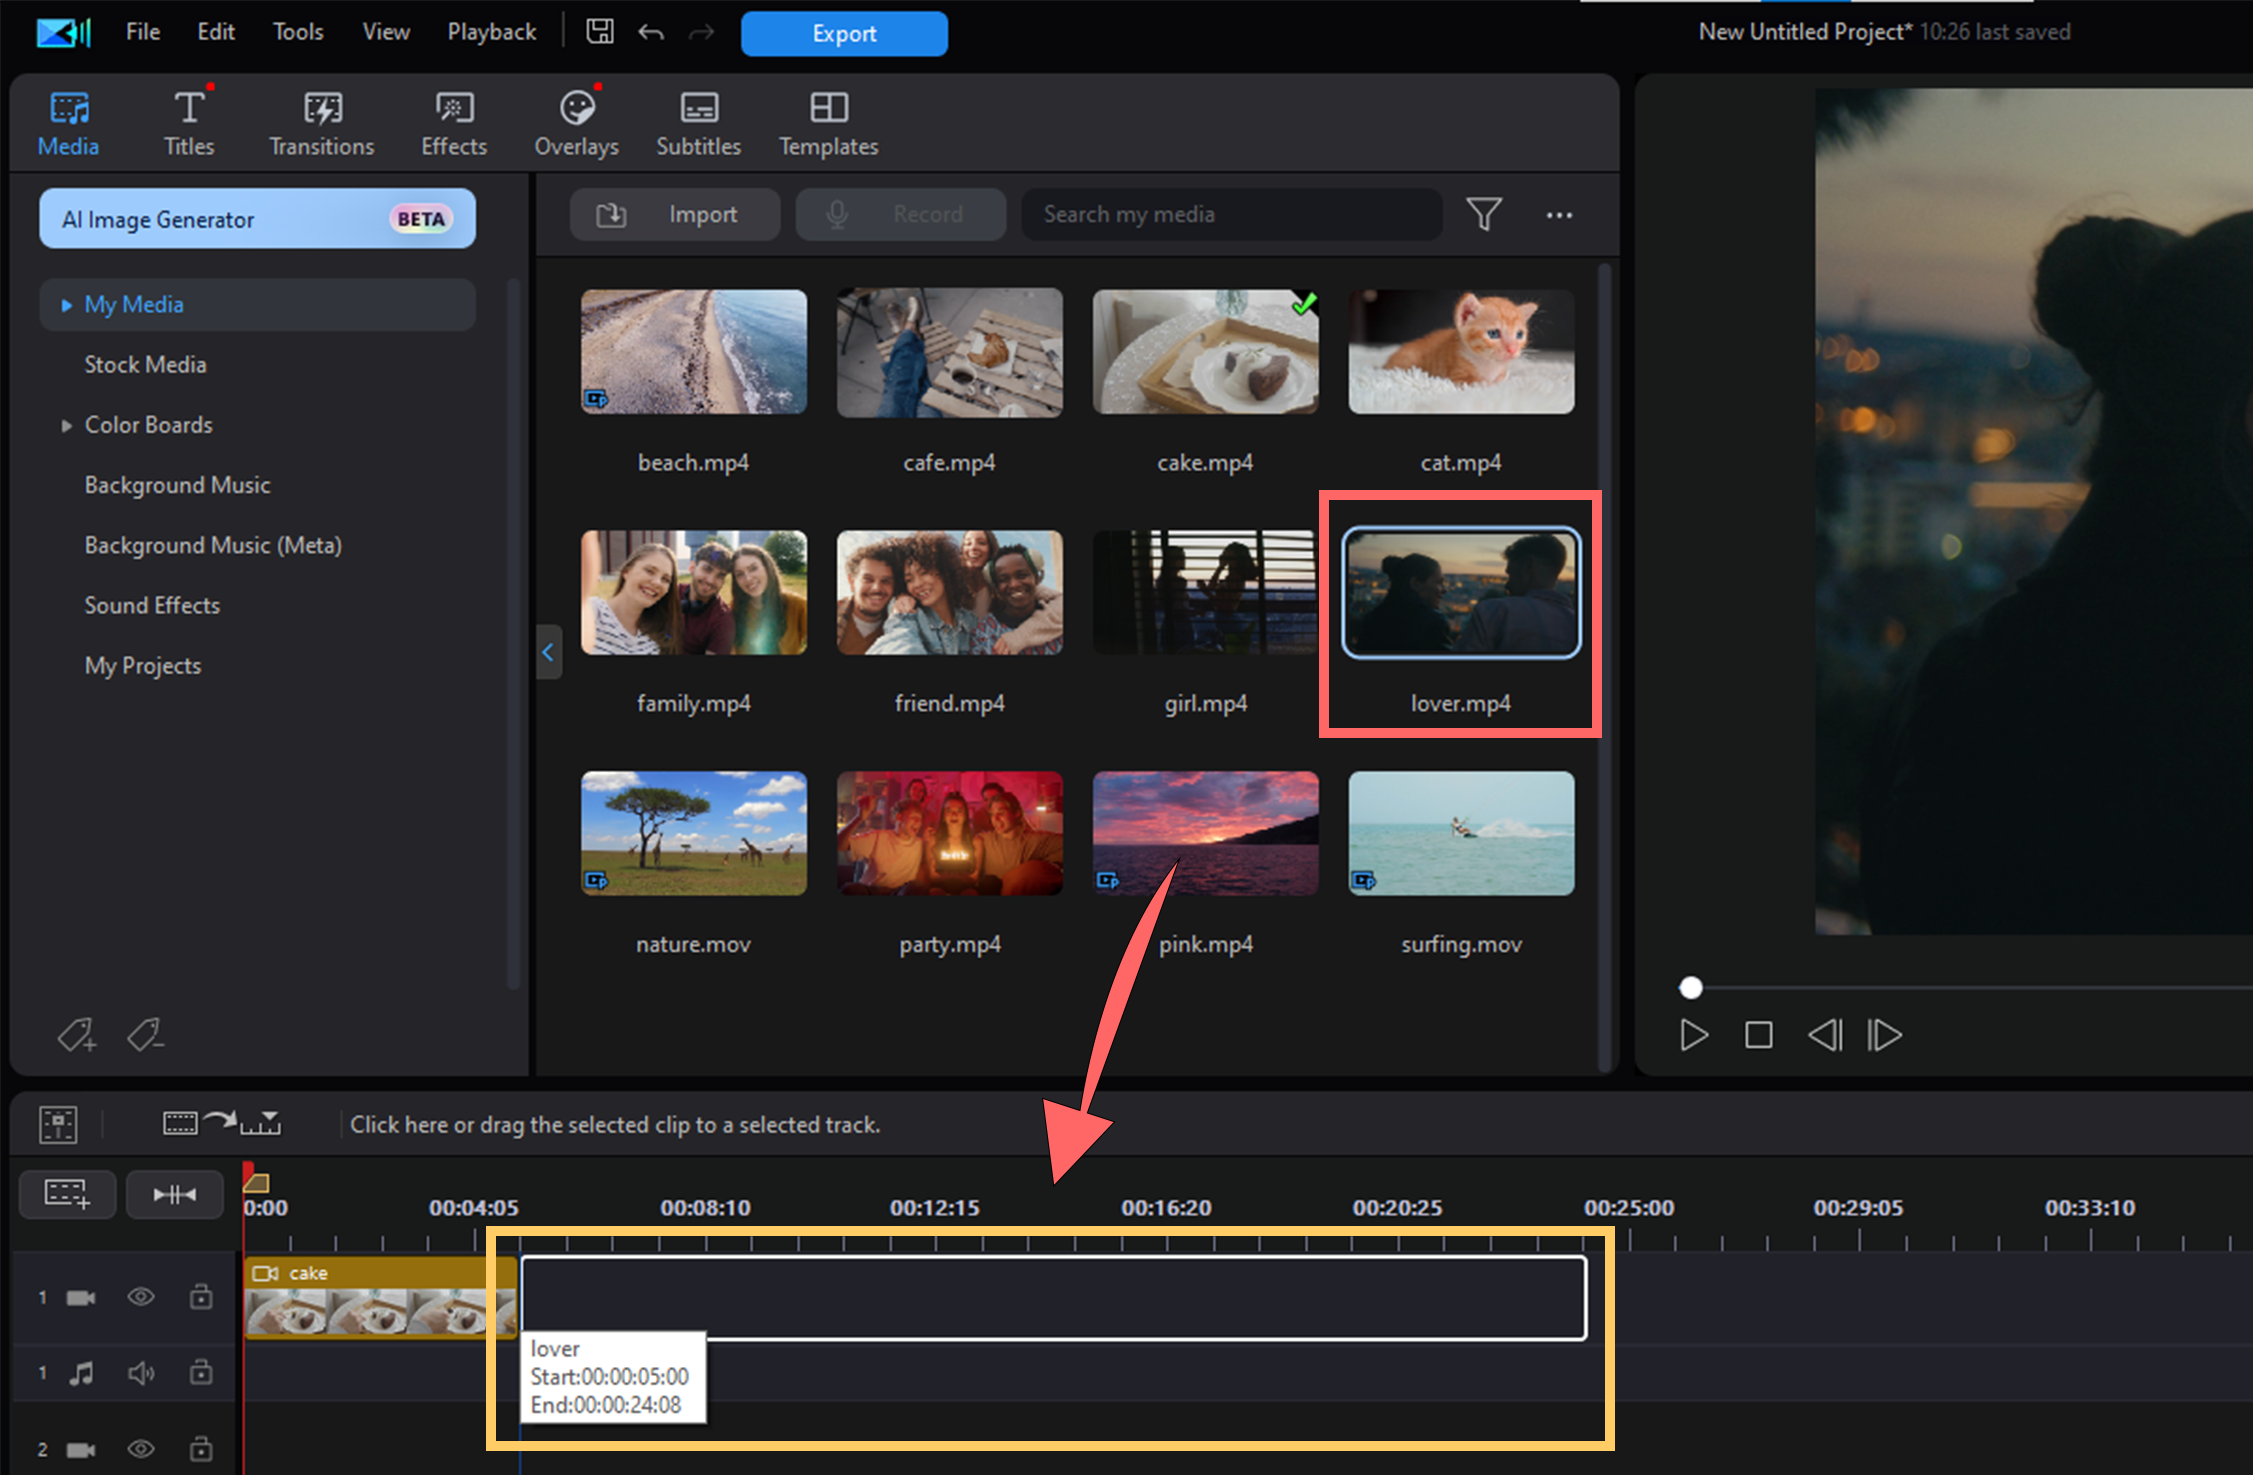
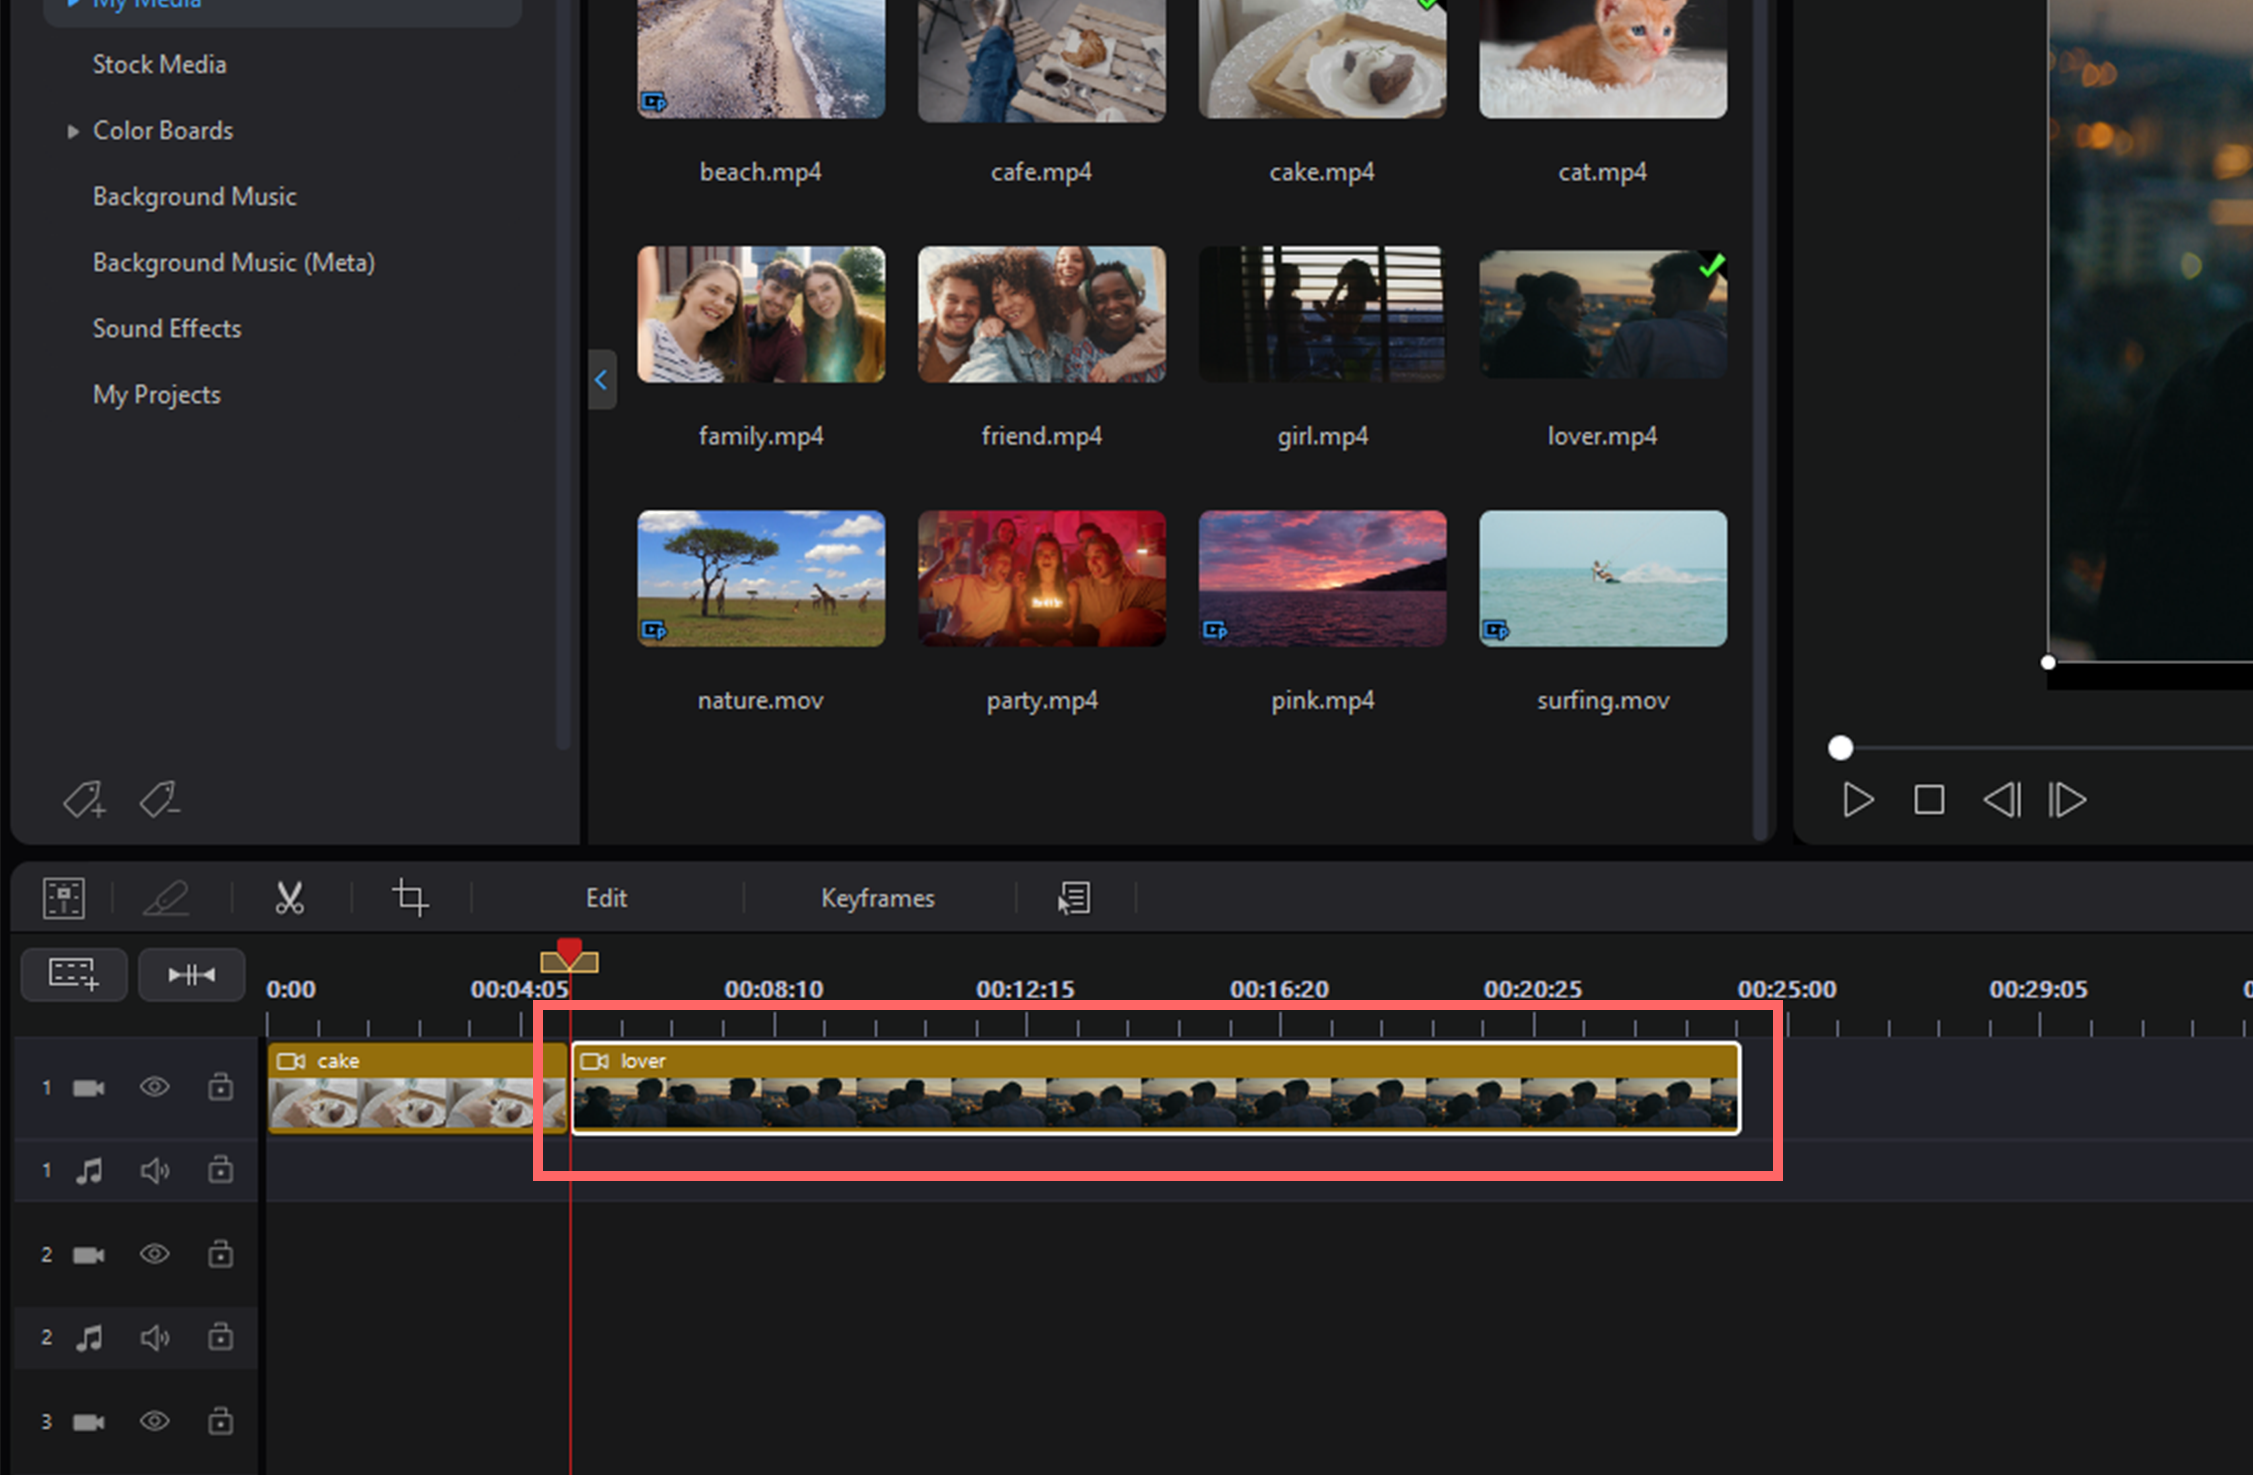
2. Adding Media Files to the Video Timeline
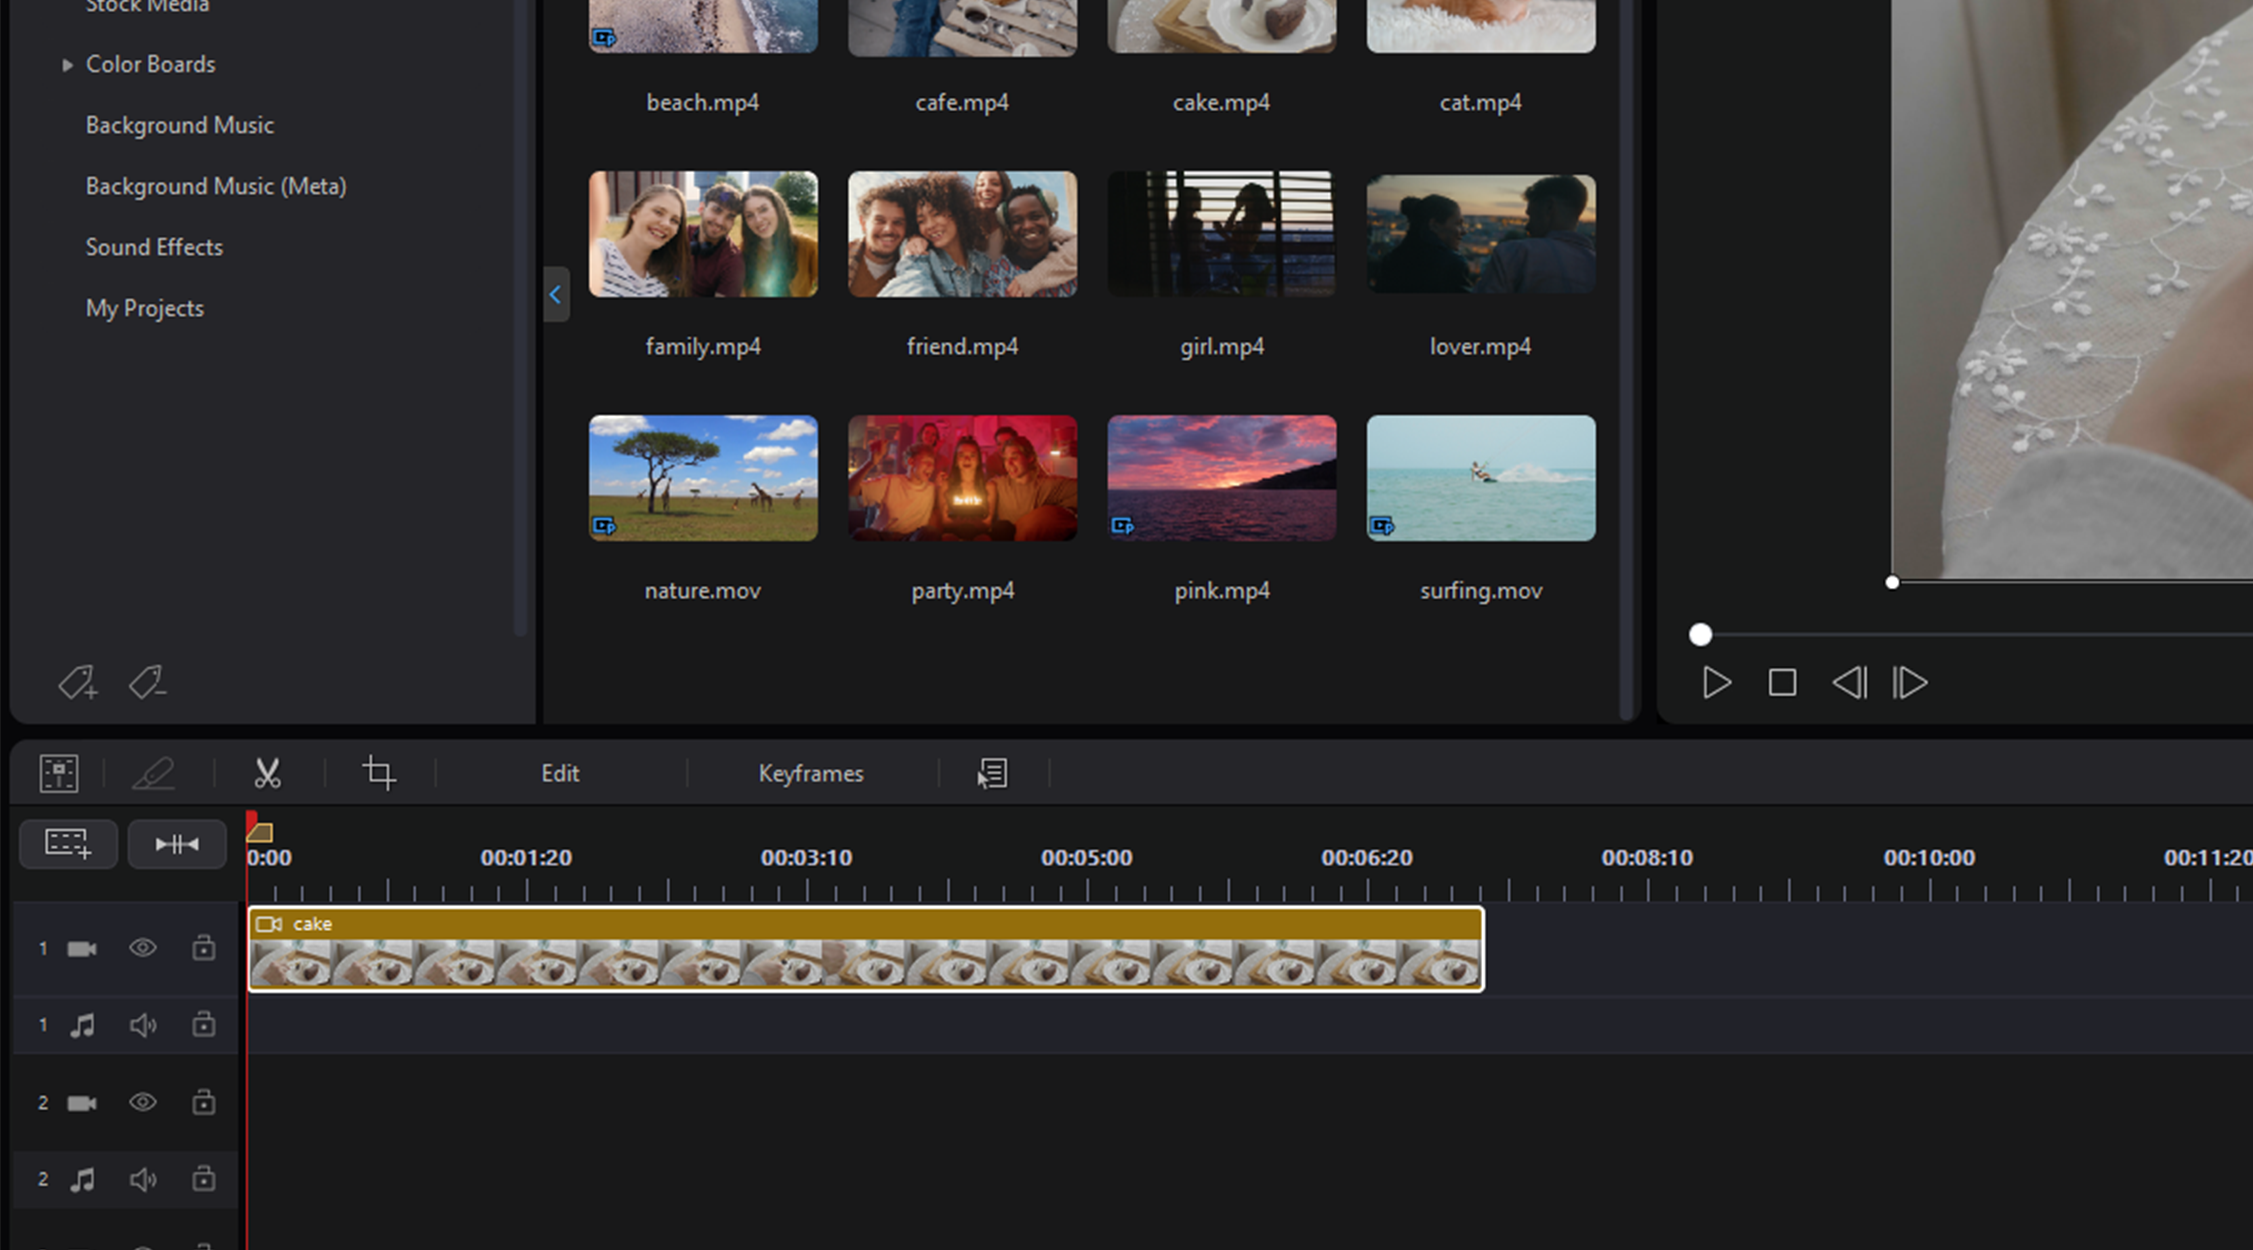
Once you have your media files in the media library, you can begin putting your video production together by adding your photos and videos to the video timeline. You add the media clips in the order that tells the story you want to tell.
To add a video file to the video timeline, select it in the media library and then drag it to the video timeline.
Before we go on, be sure to save your video project. This ensures you don’t lose any of the changes you make. To do this, select Save Button from the Top menu.
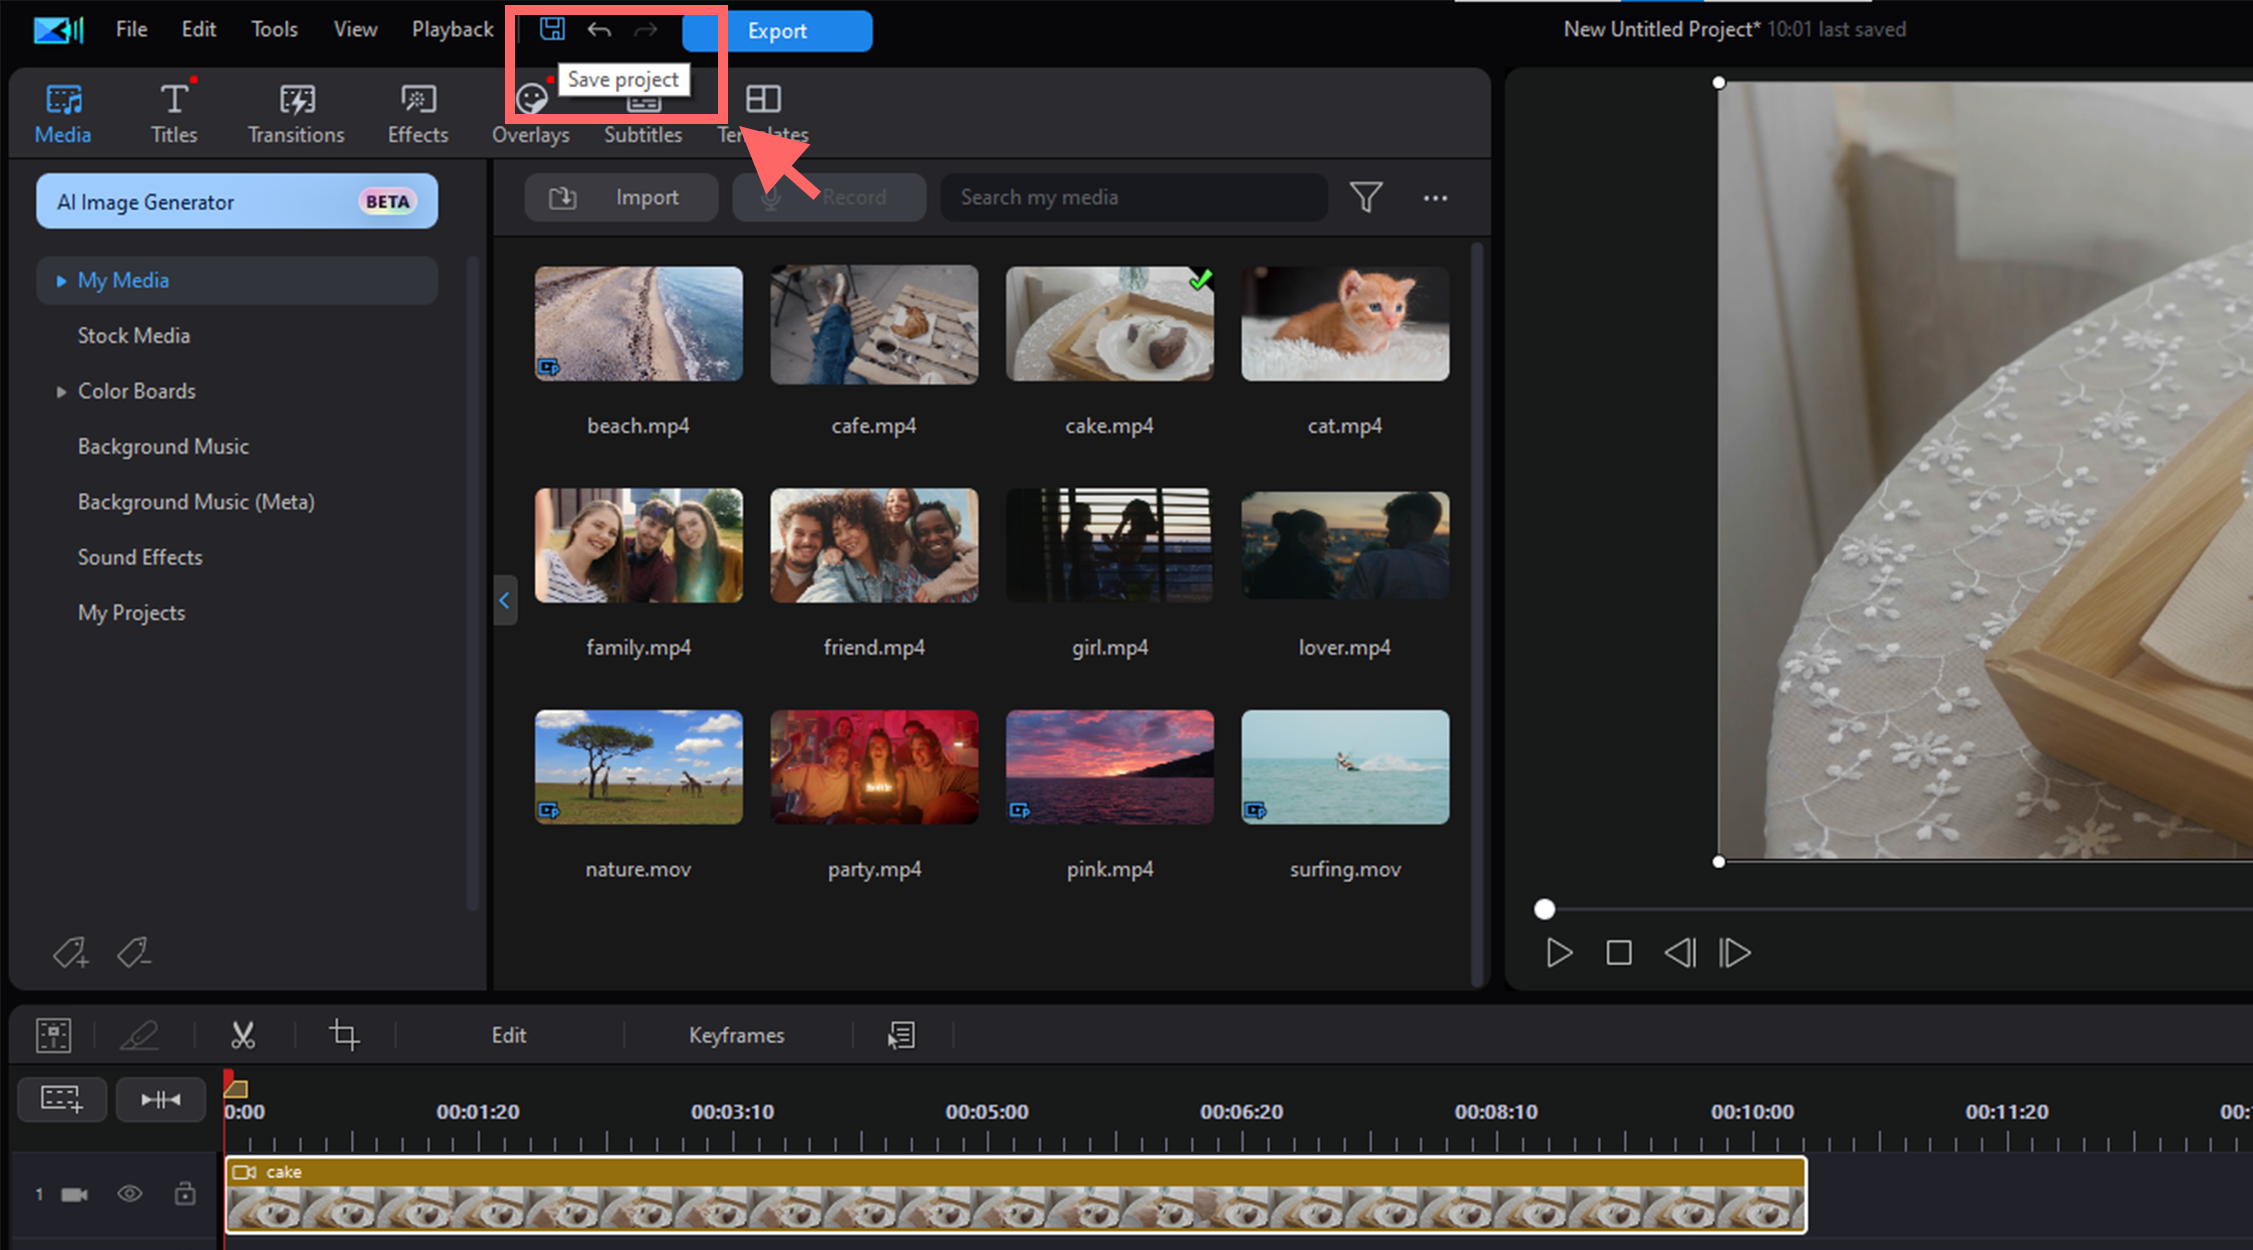
It is a great idea to save your project often as you go along, especially after big edits.
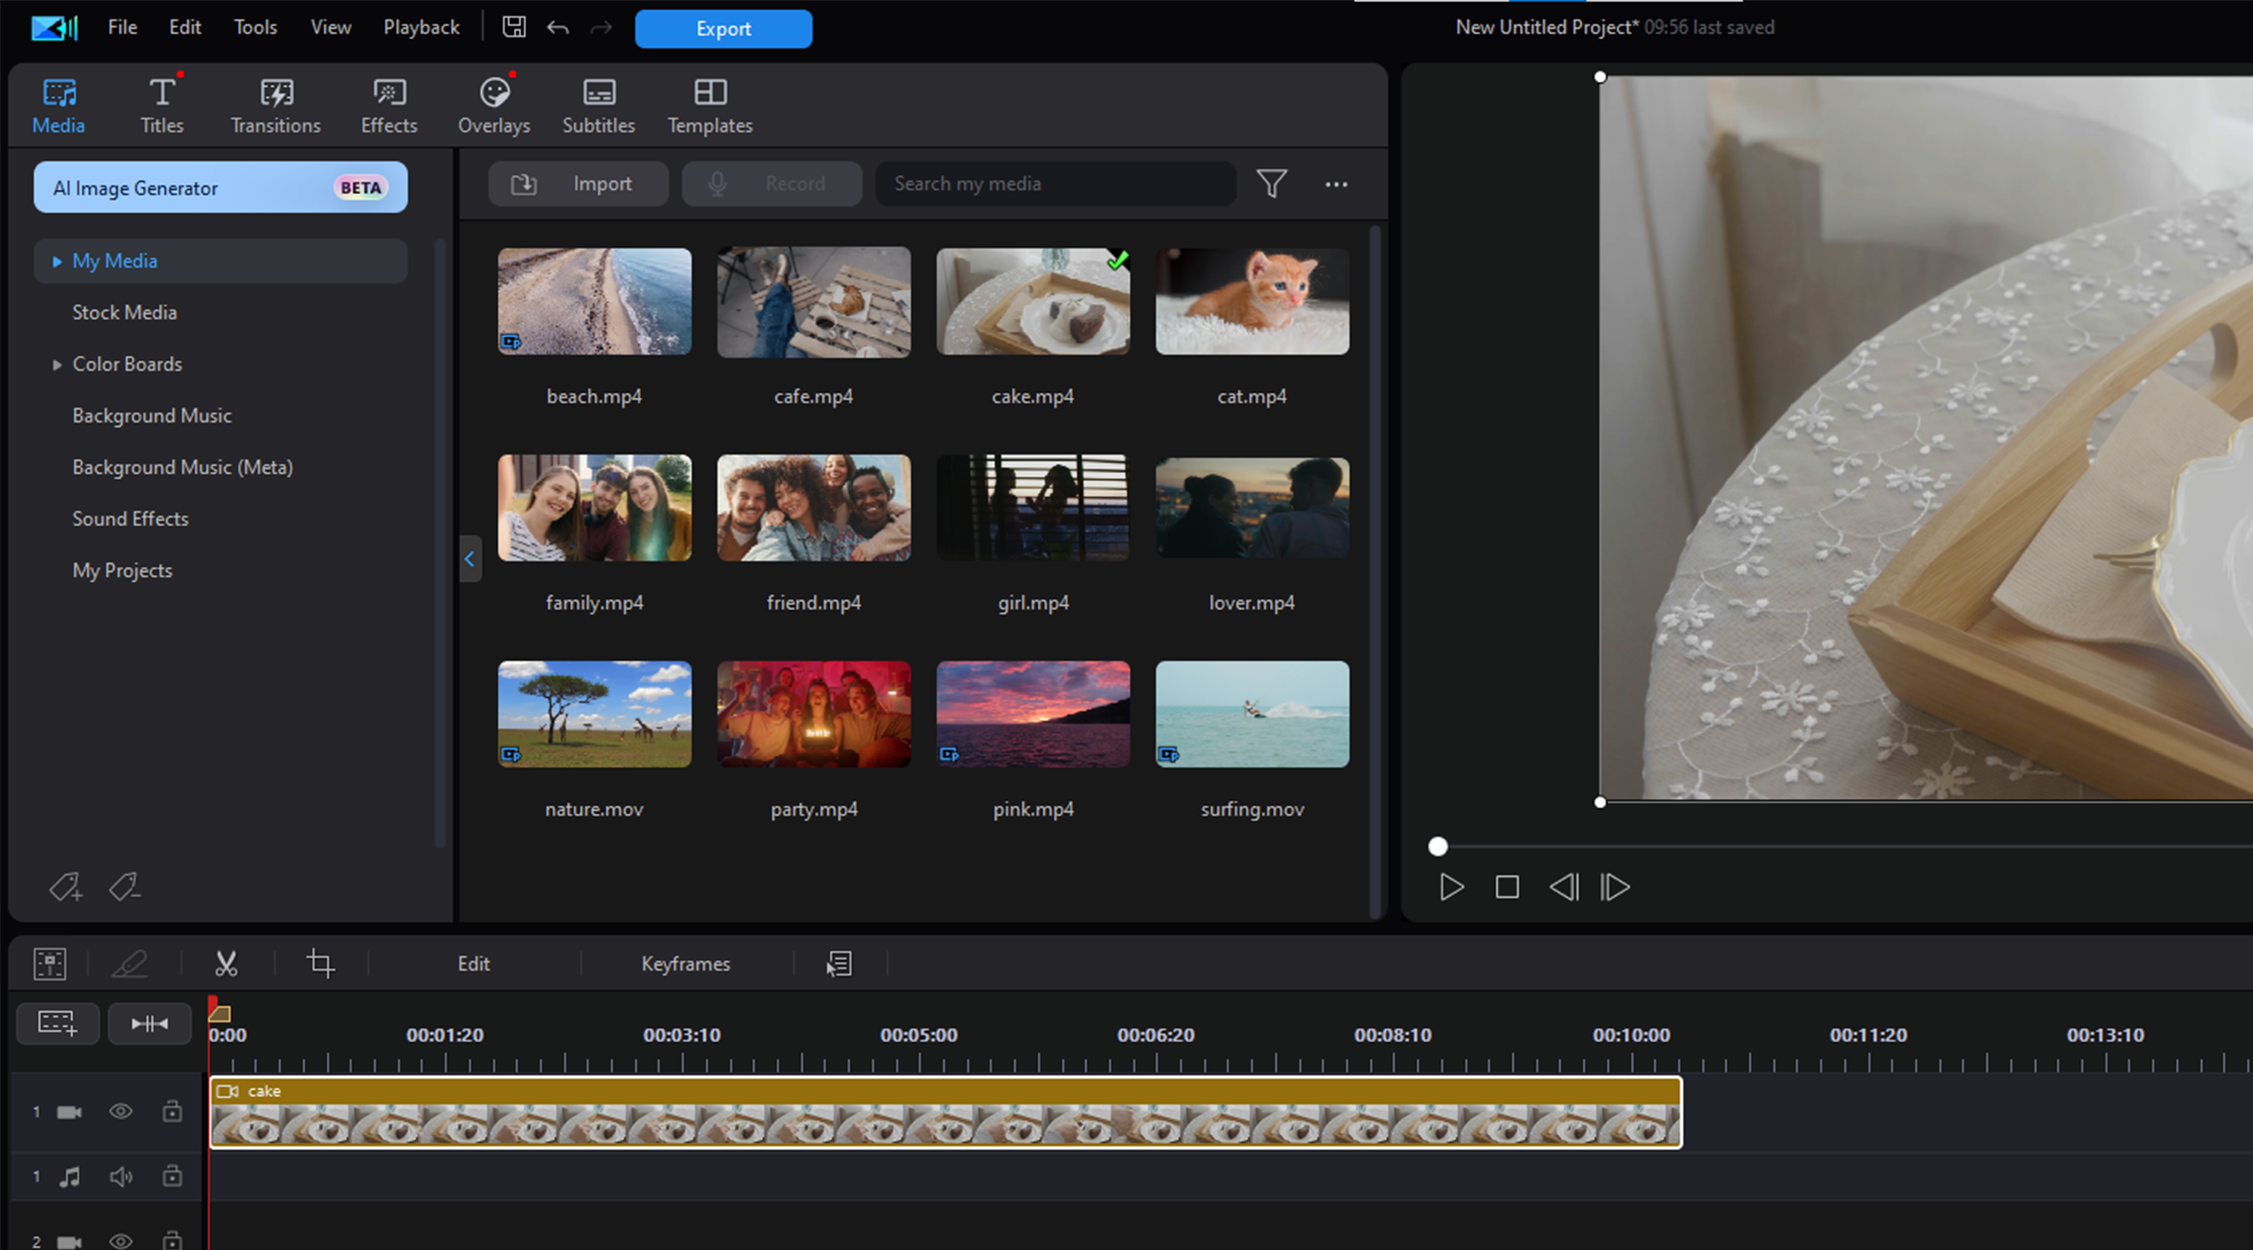
3. Splitting and Trimming Clips
The video clip you are using in your video project may have portions at the beginning or end that you want to remove. Here are two ways you can go about doing that.
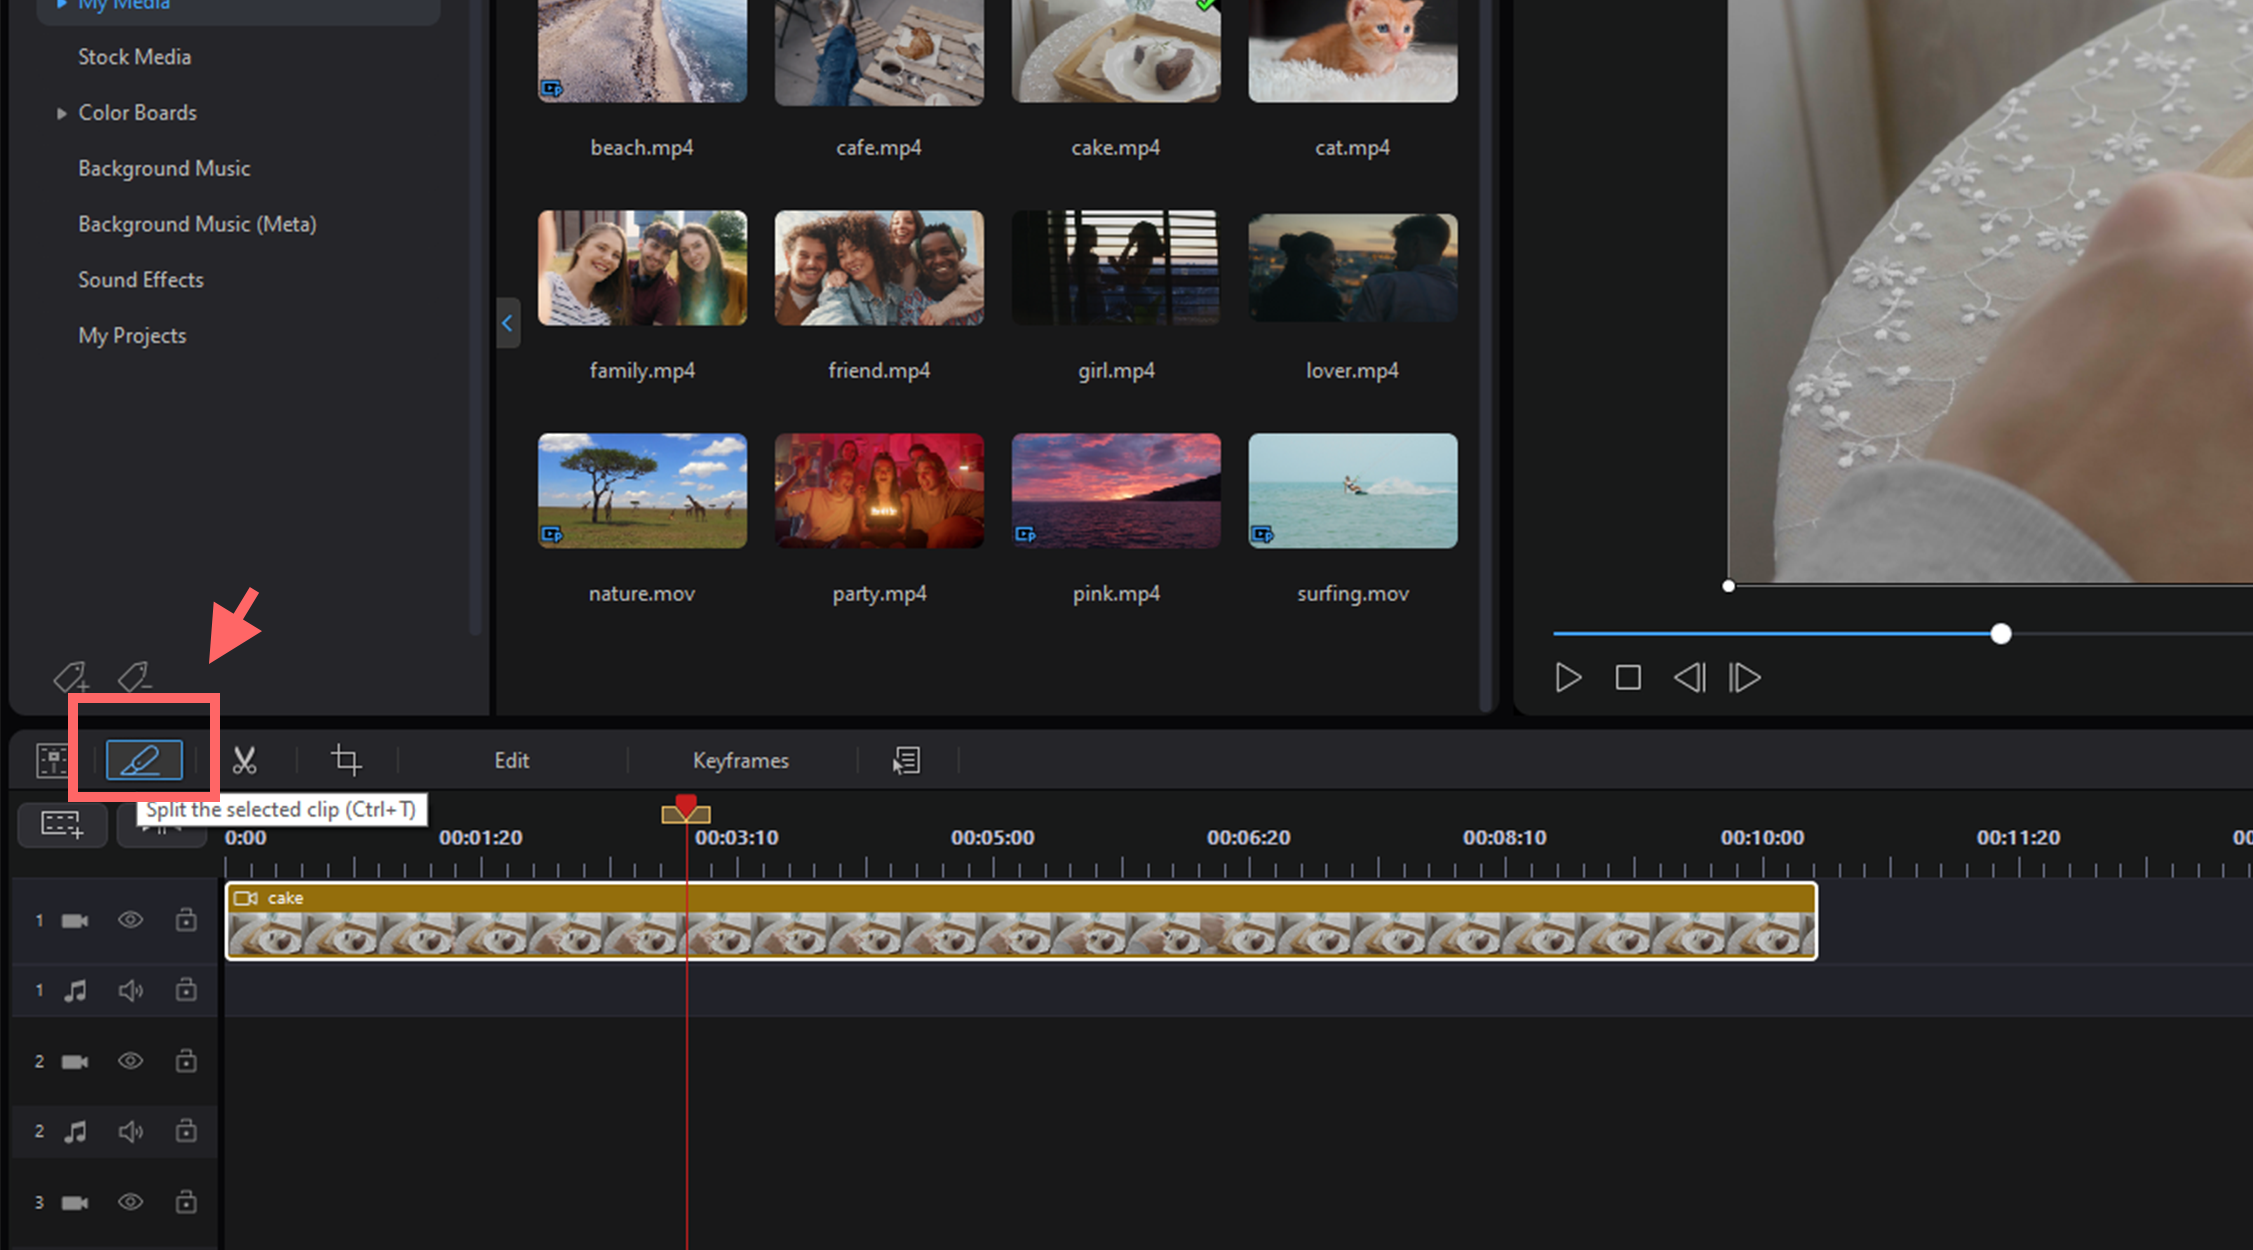
Splitting a Clip
You can split a media clip into segments on any track in the video timeline.
1. Move the video timeline slider to the position where you want to split the clip, and then click the  button.
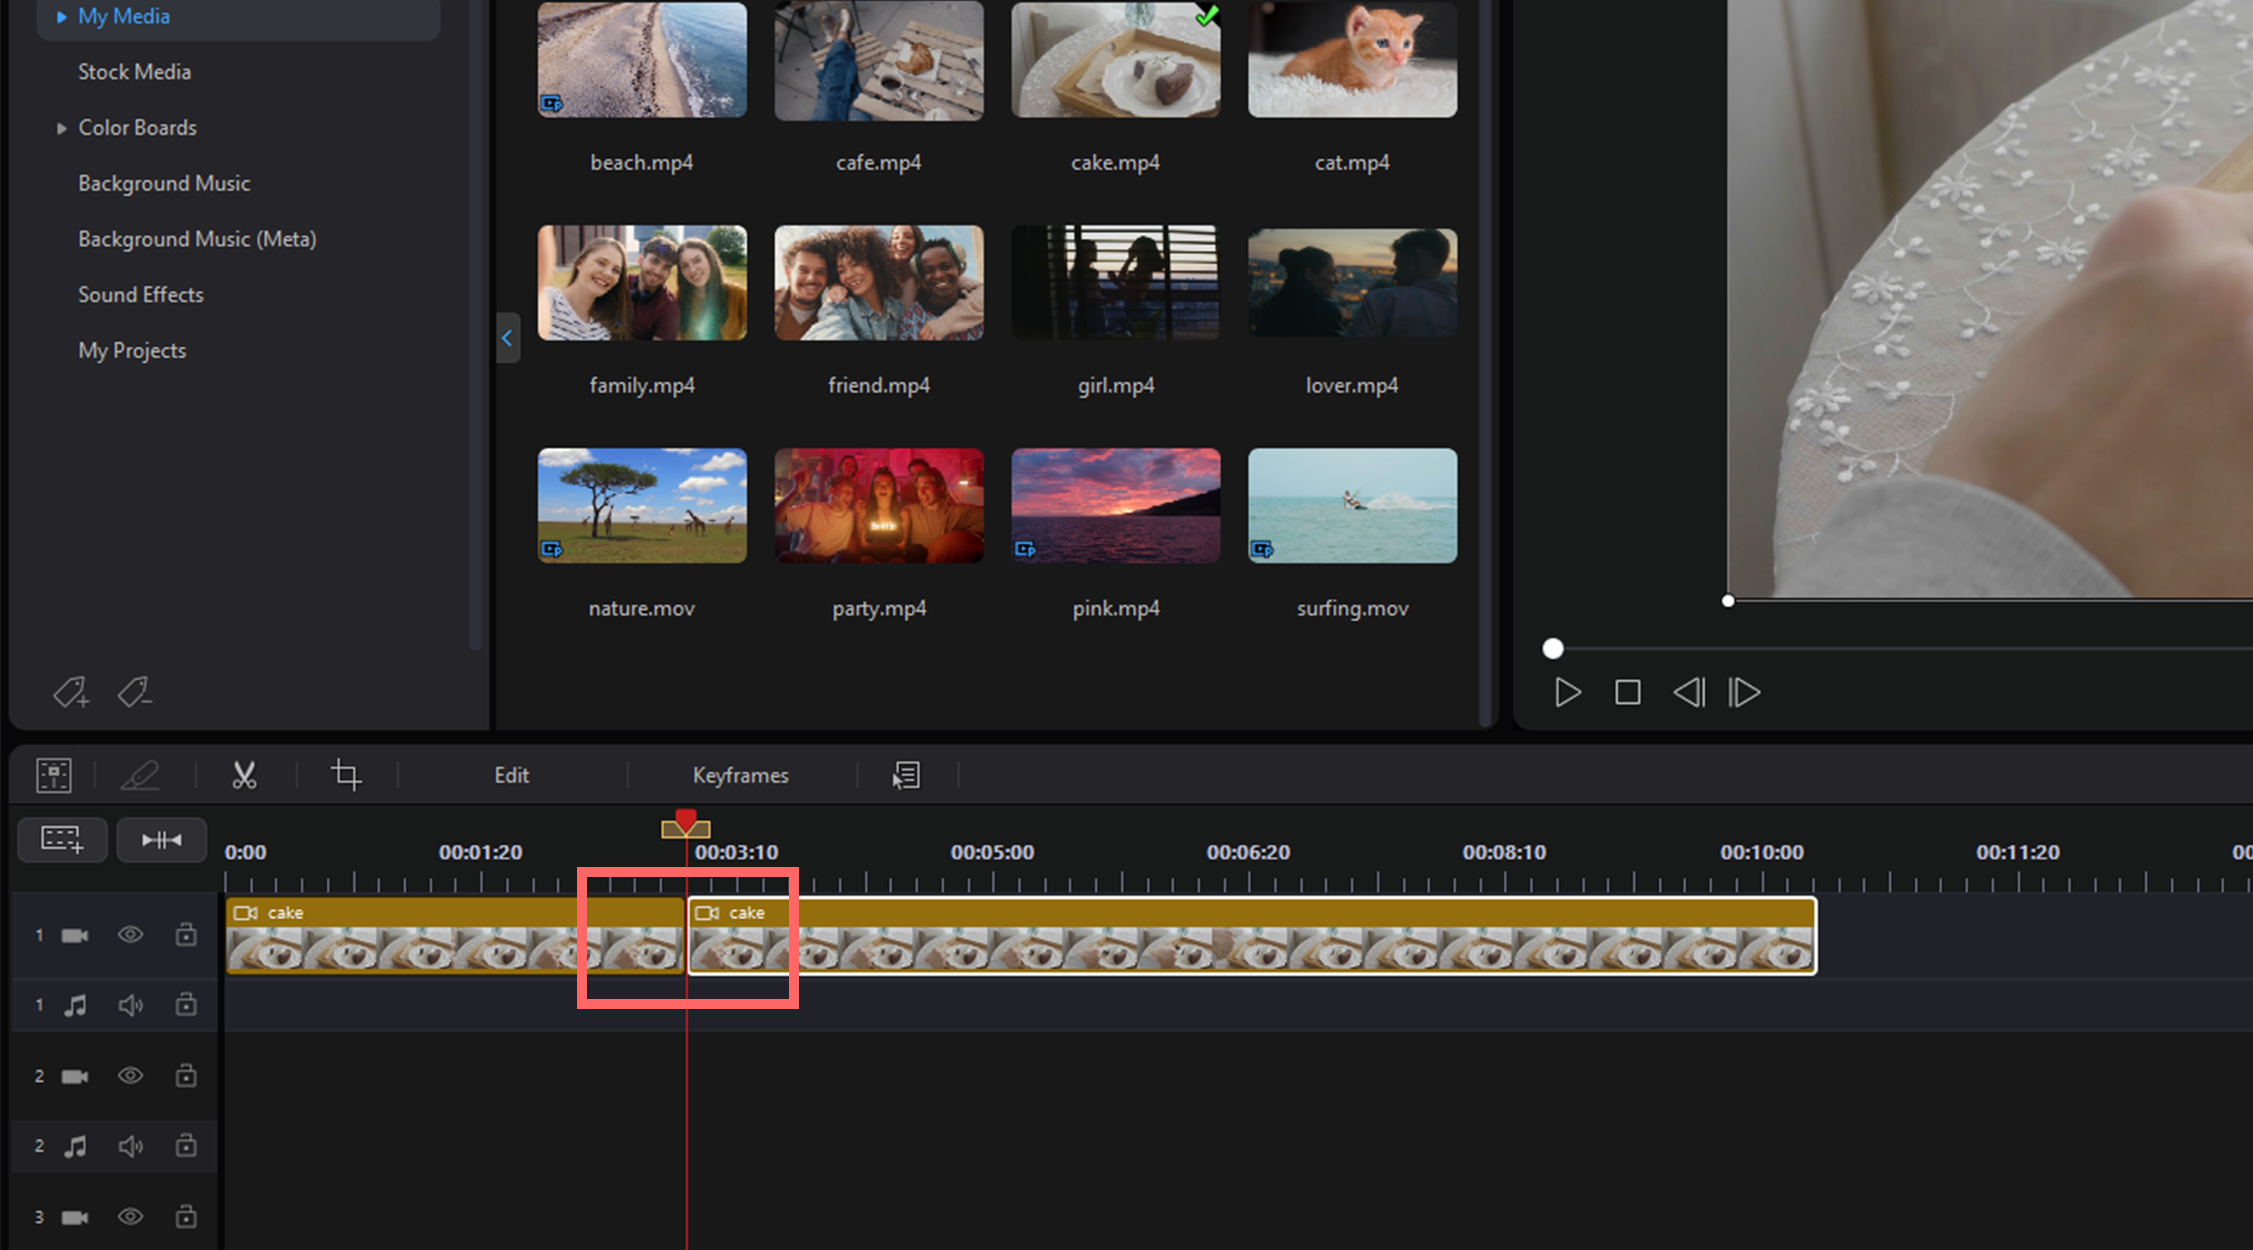
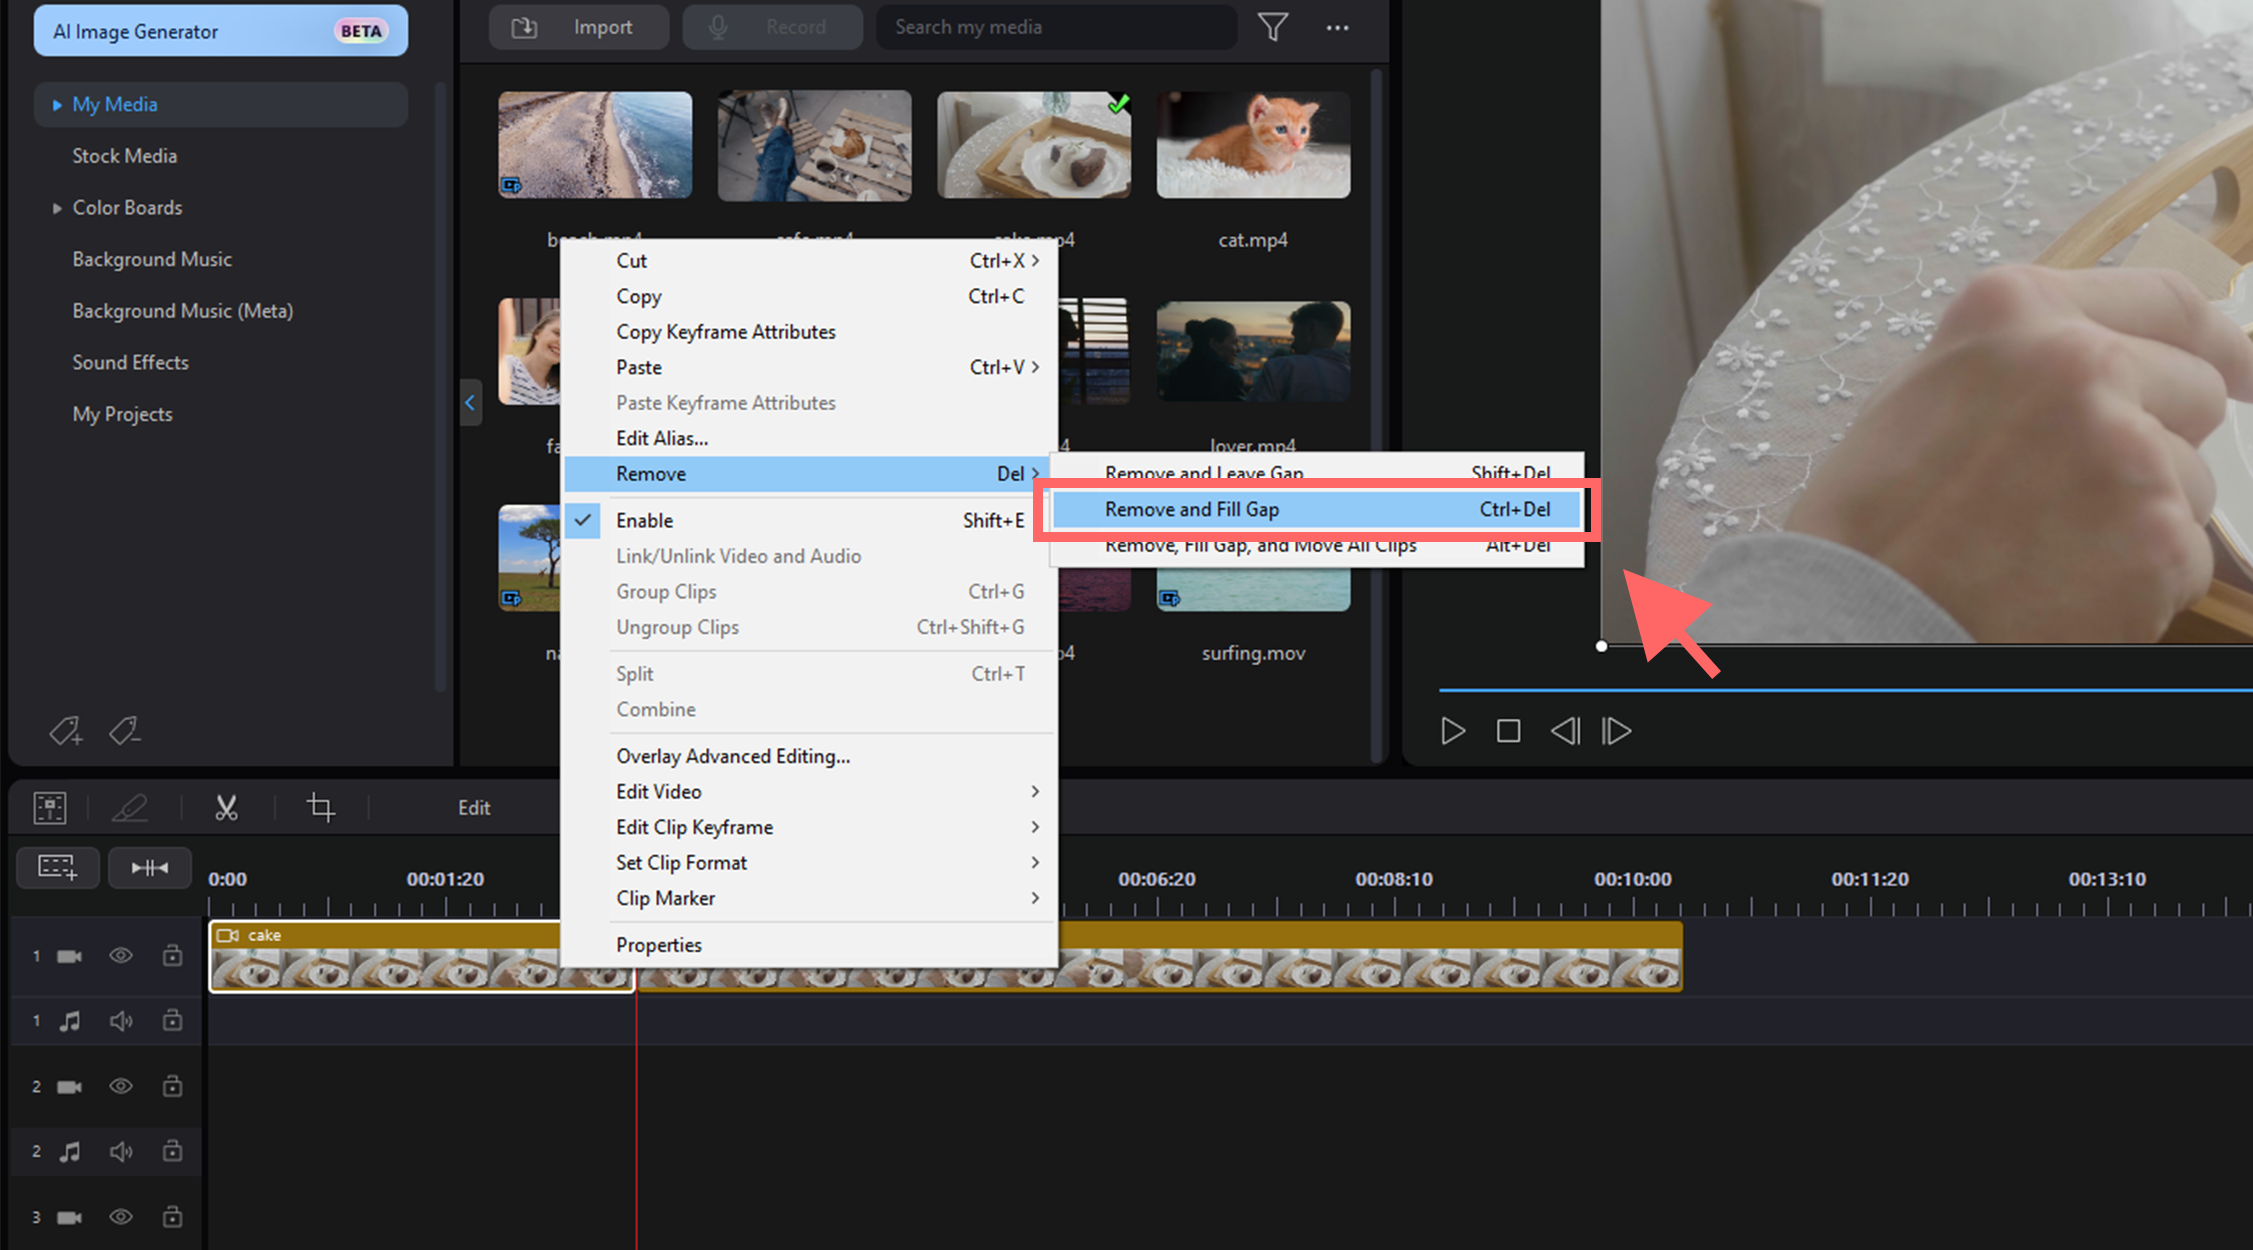
2. Once you’ve split the clip, select the portion that you don’t want and then click the Delete key on your keyboard to remove it from the video timeline.
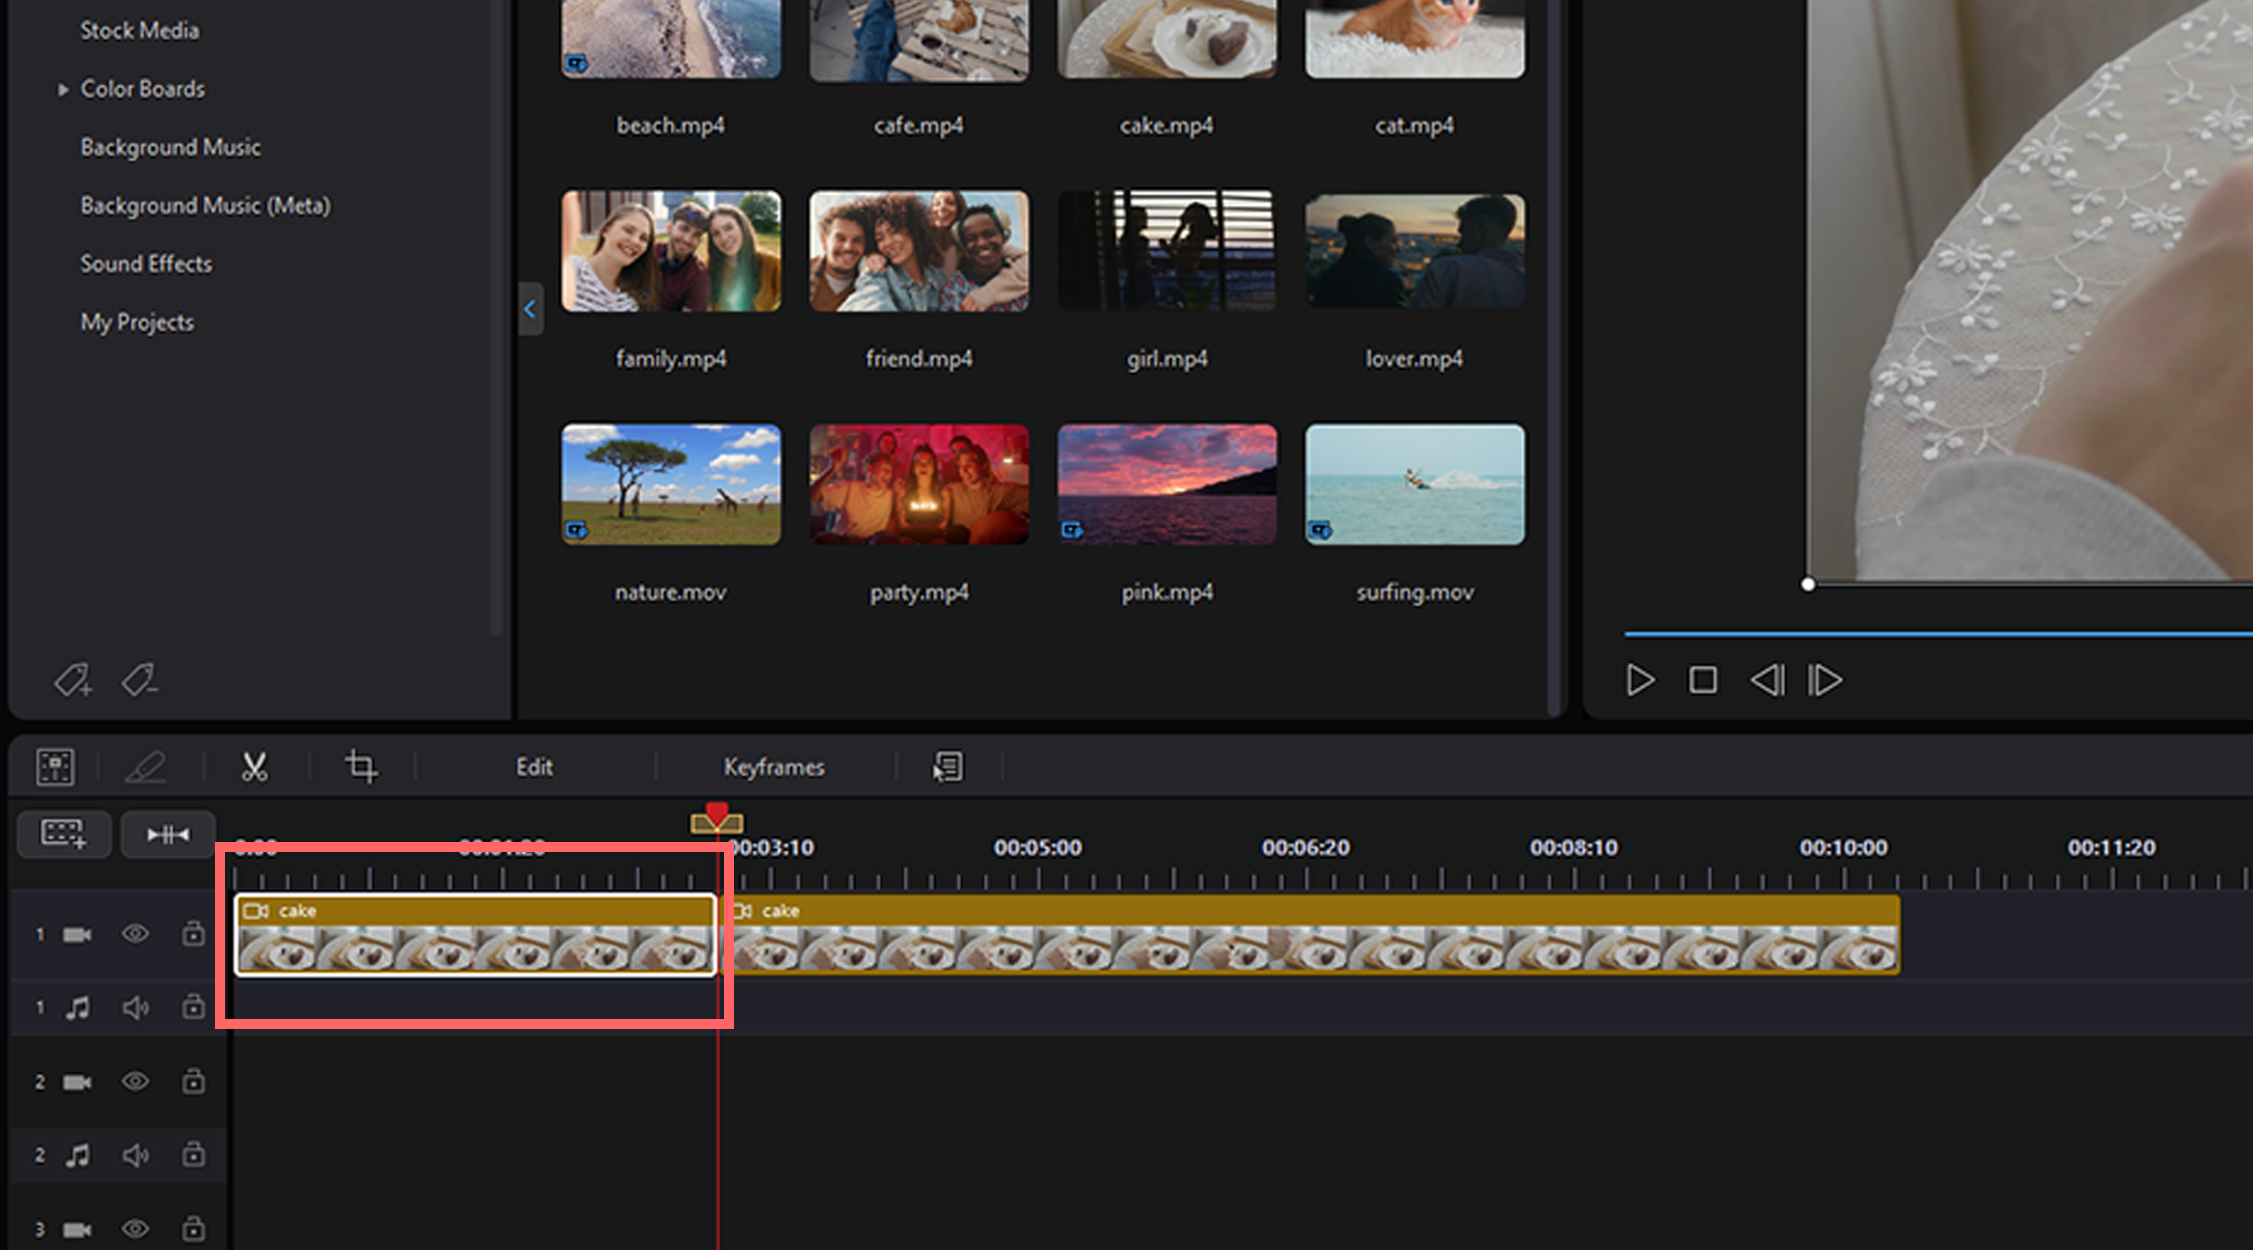
3. Select the Remove and Fill Gap option when prompted so that the video clip fills in the empty space on the video timeline.
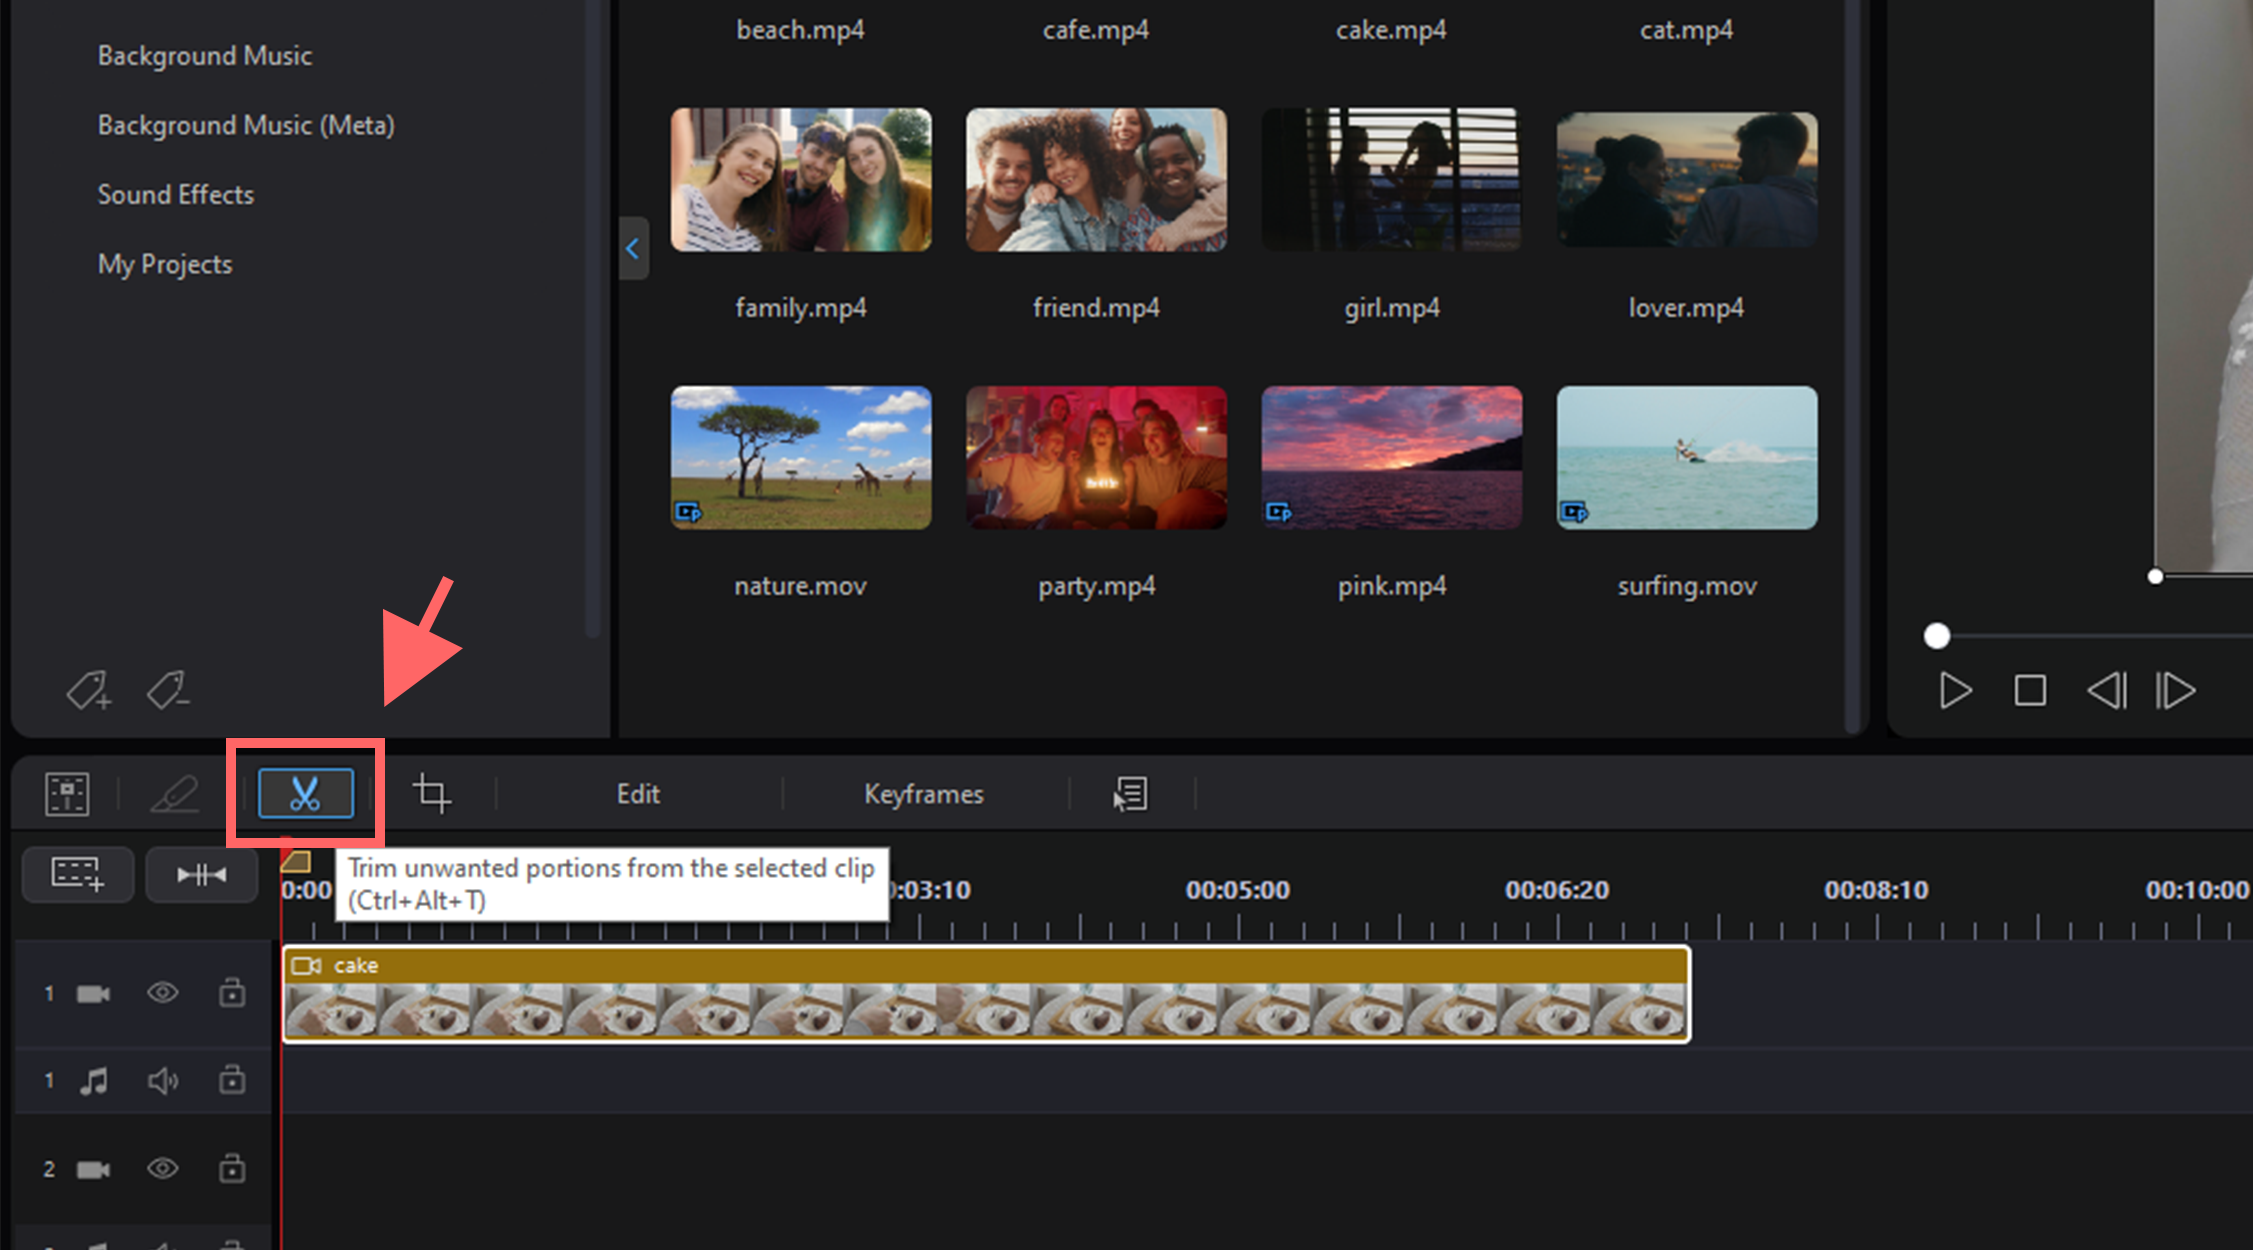
Trimming a Clip
The single trim function allows you to trim the beginning and end of a video clip.
1. Select the video clip and then click on the  button above the video timeline.
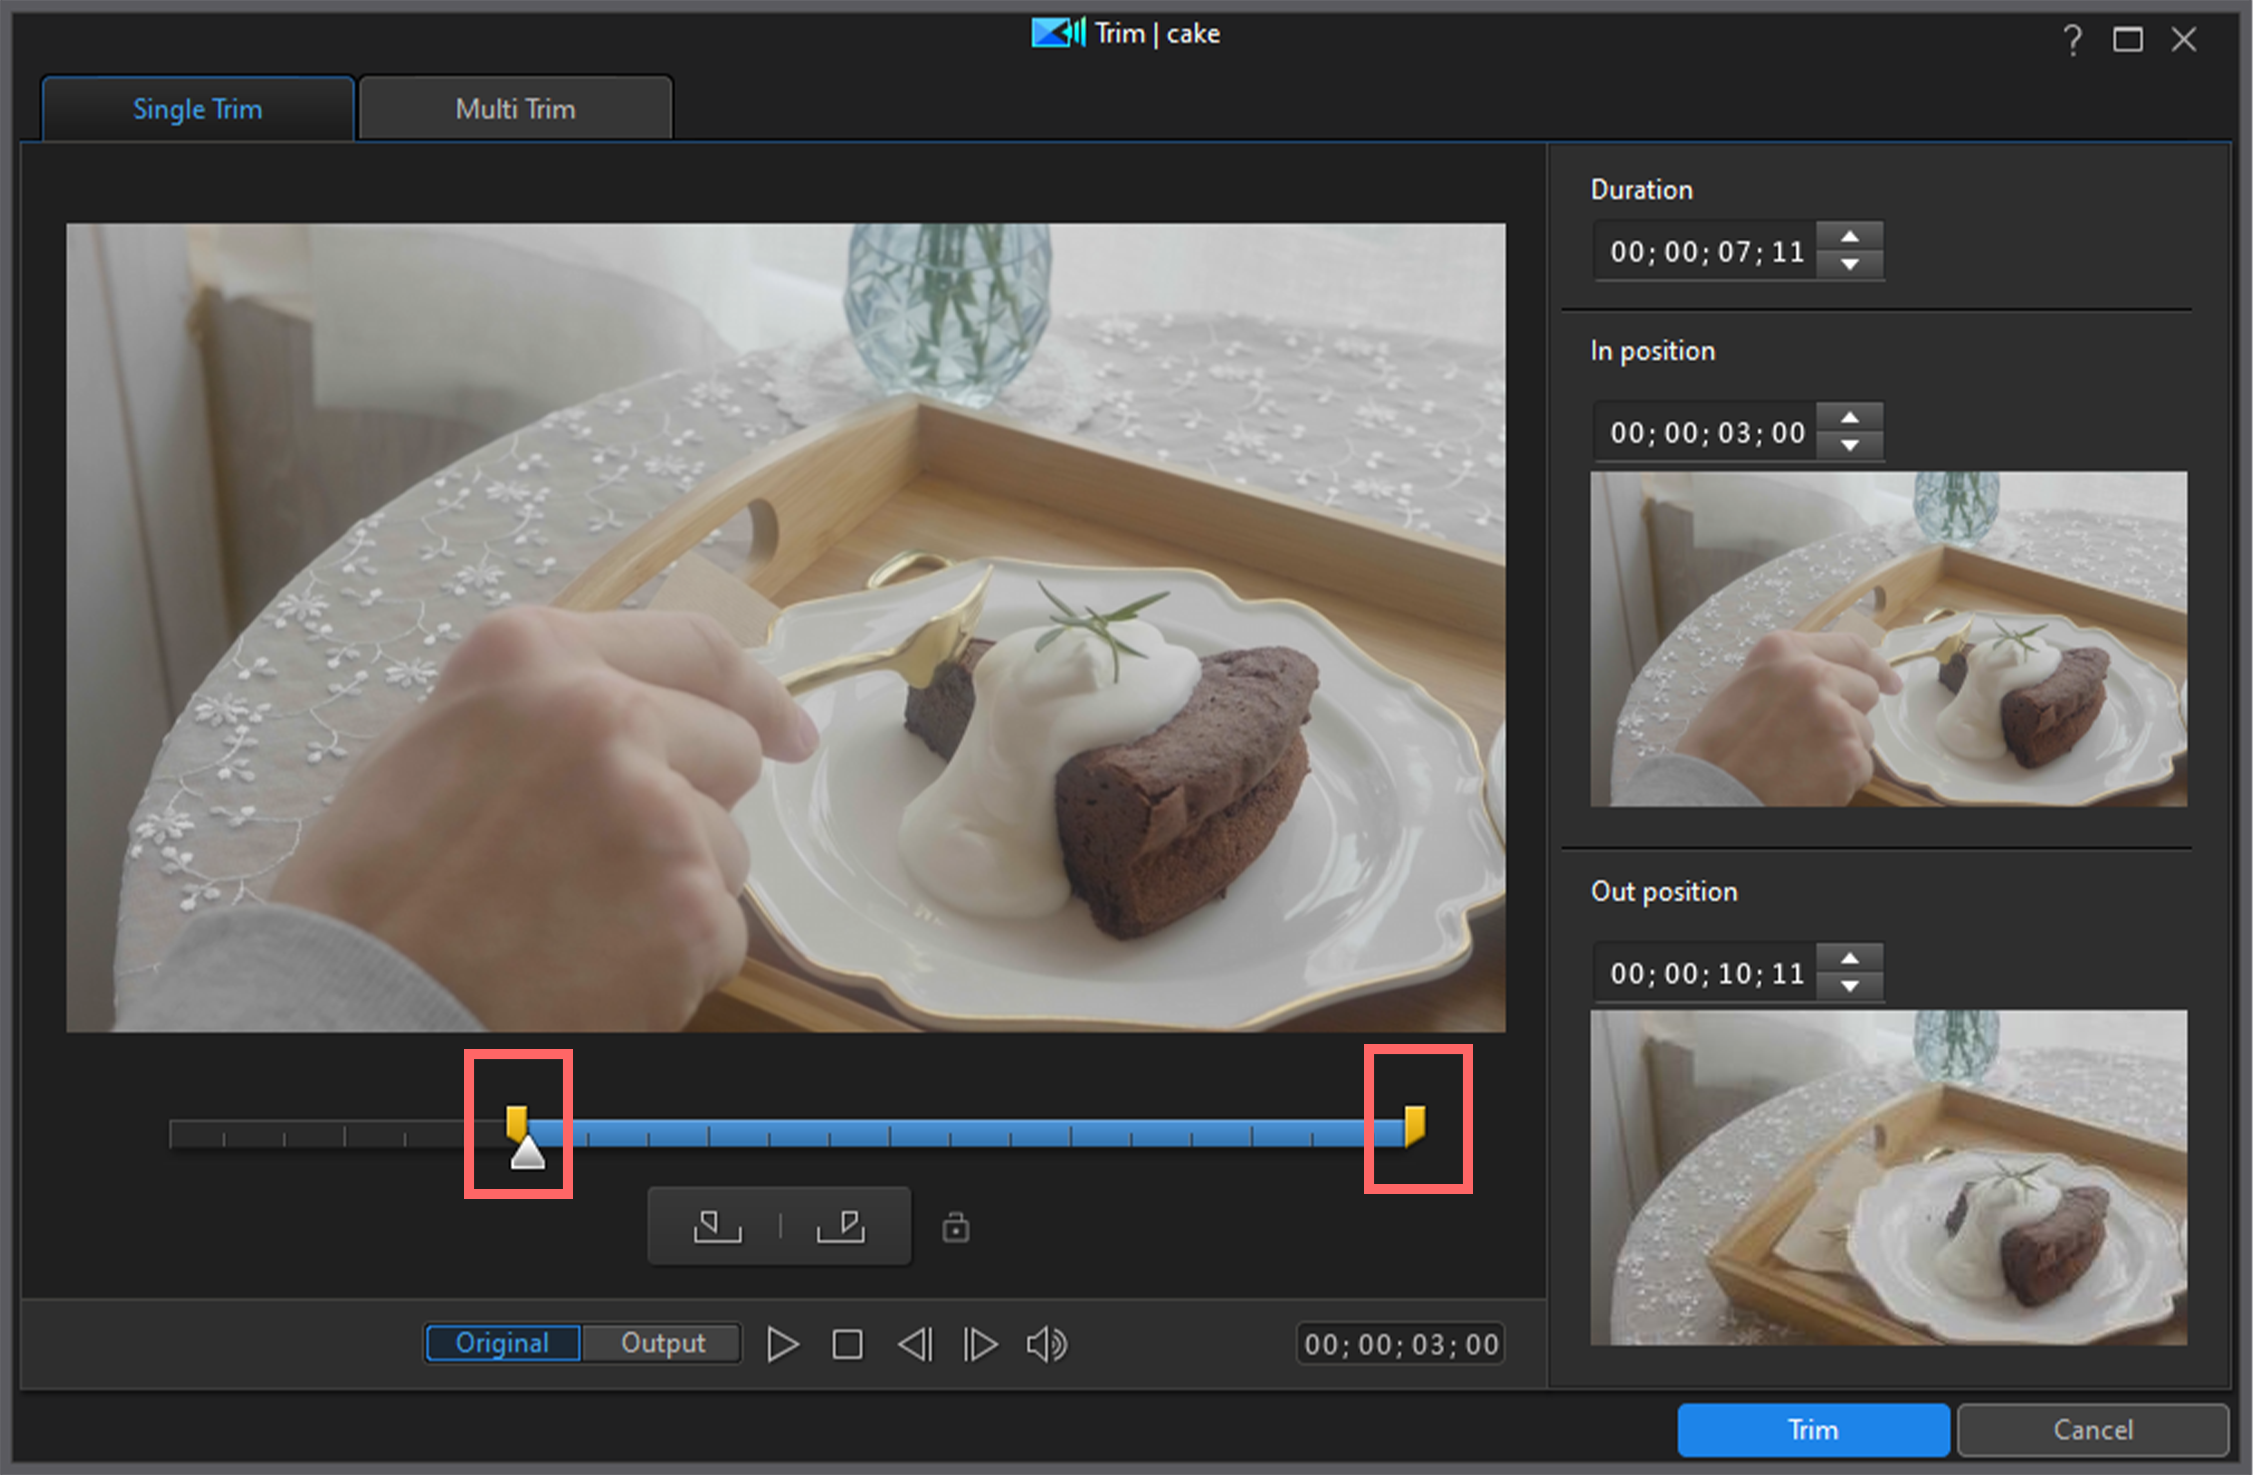
2. Drag the mark in and mark out position sliders to your preferred positions and then click OK to finish trimming.
For a more detailed overview of both of these features, and how to perform a Multi Trim, please check out the full tutorial for editing and trimming your videos.
Now that you have added and trimmed your first video clip, go ahead and add the next clip you want in your video. The process to add it to the video timeline is the same, this time you drag it behind the first clip on the timeline.
4. Adding Transitions Between Clips
We will now show you how to add a transition effect between two clips. Smooth transitions can help make your videos look more professional.
1. Click Transition.
2. Click and drag a transition to a video clip on your timeline.
For a more detailed look at adding transitions, take a look at the adding transitions tutorial.
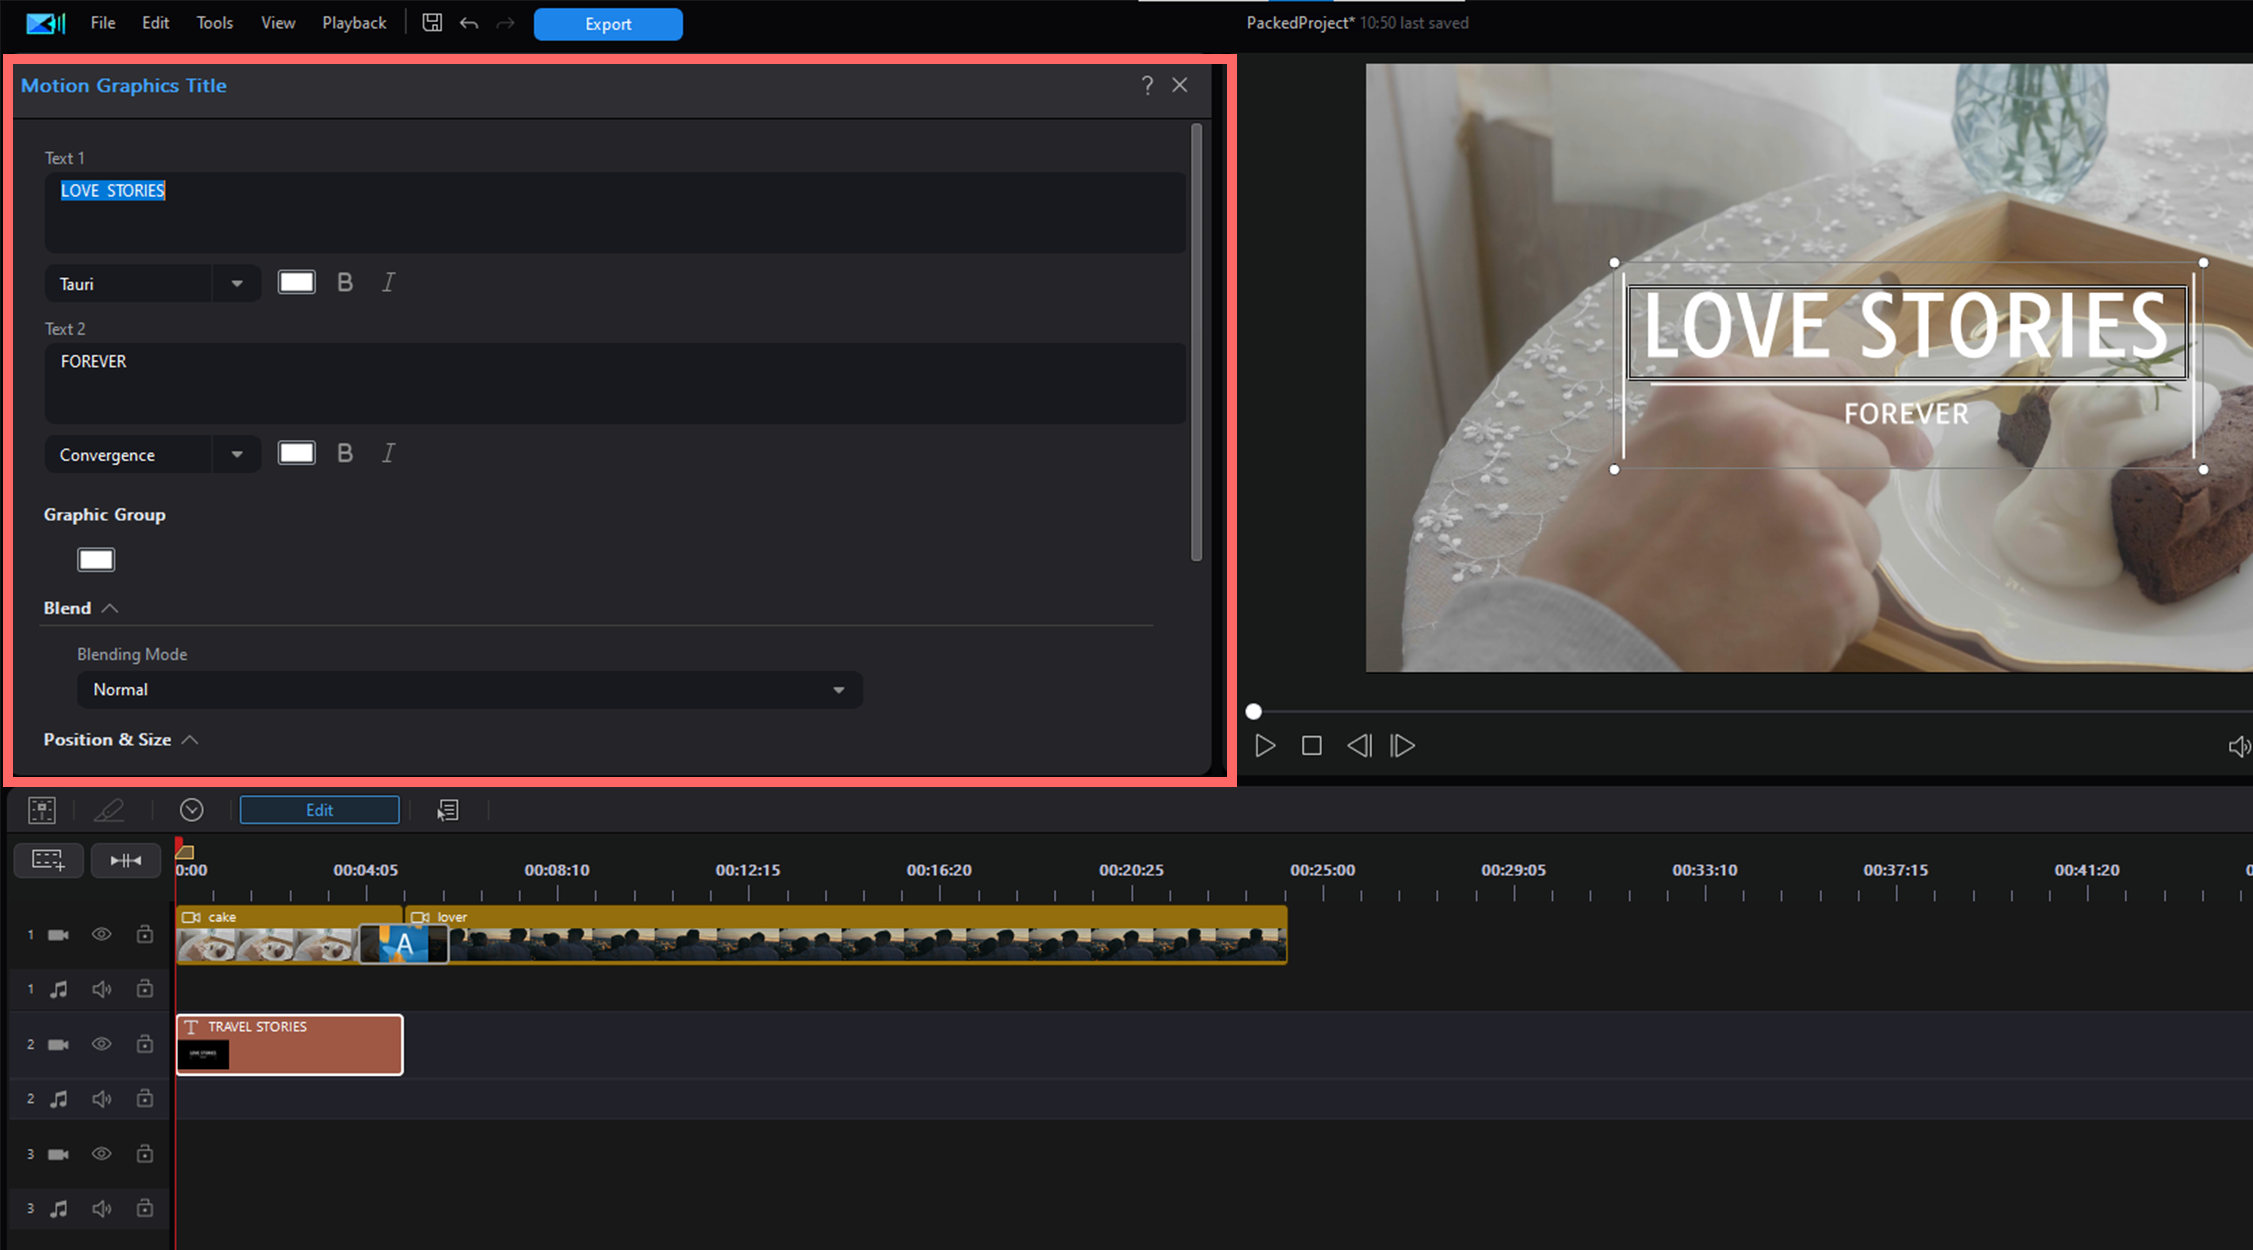
5. Adding Title Text
Let’s add some text now to the video. Adding title text helps to capture the attention of your audience and increase the overall appeal of your video.
1. Click Titles.
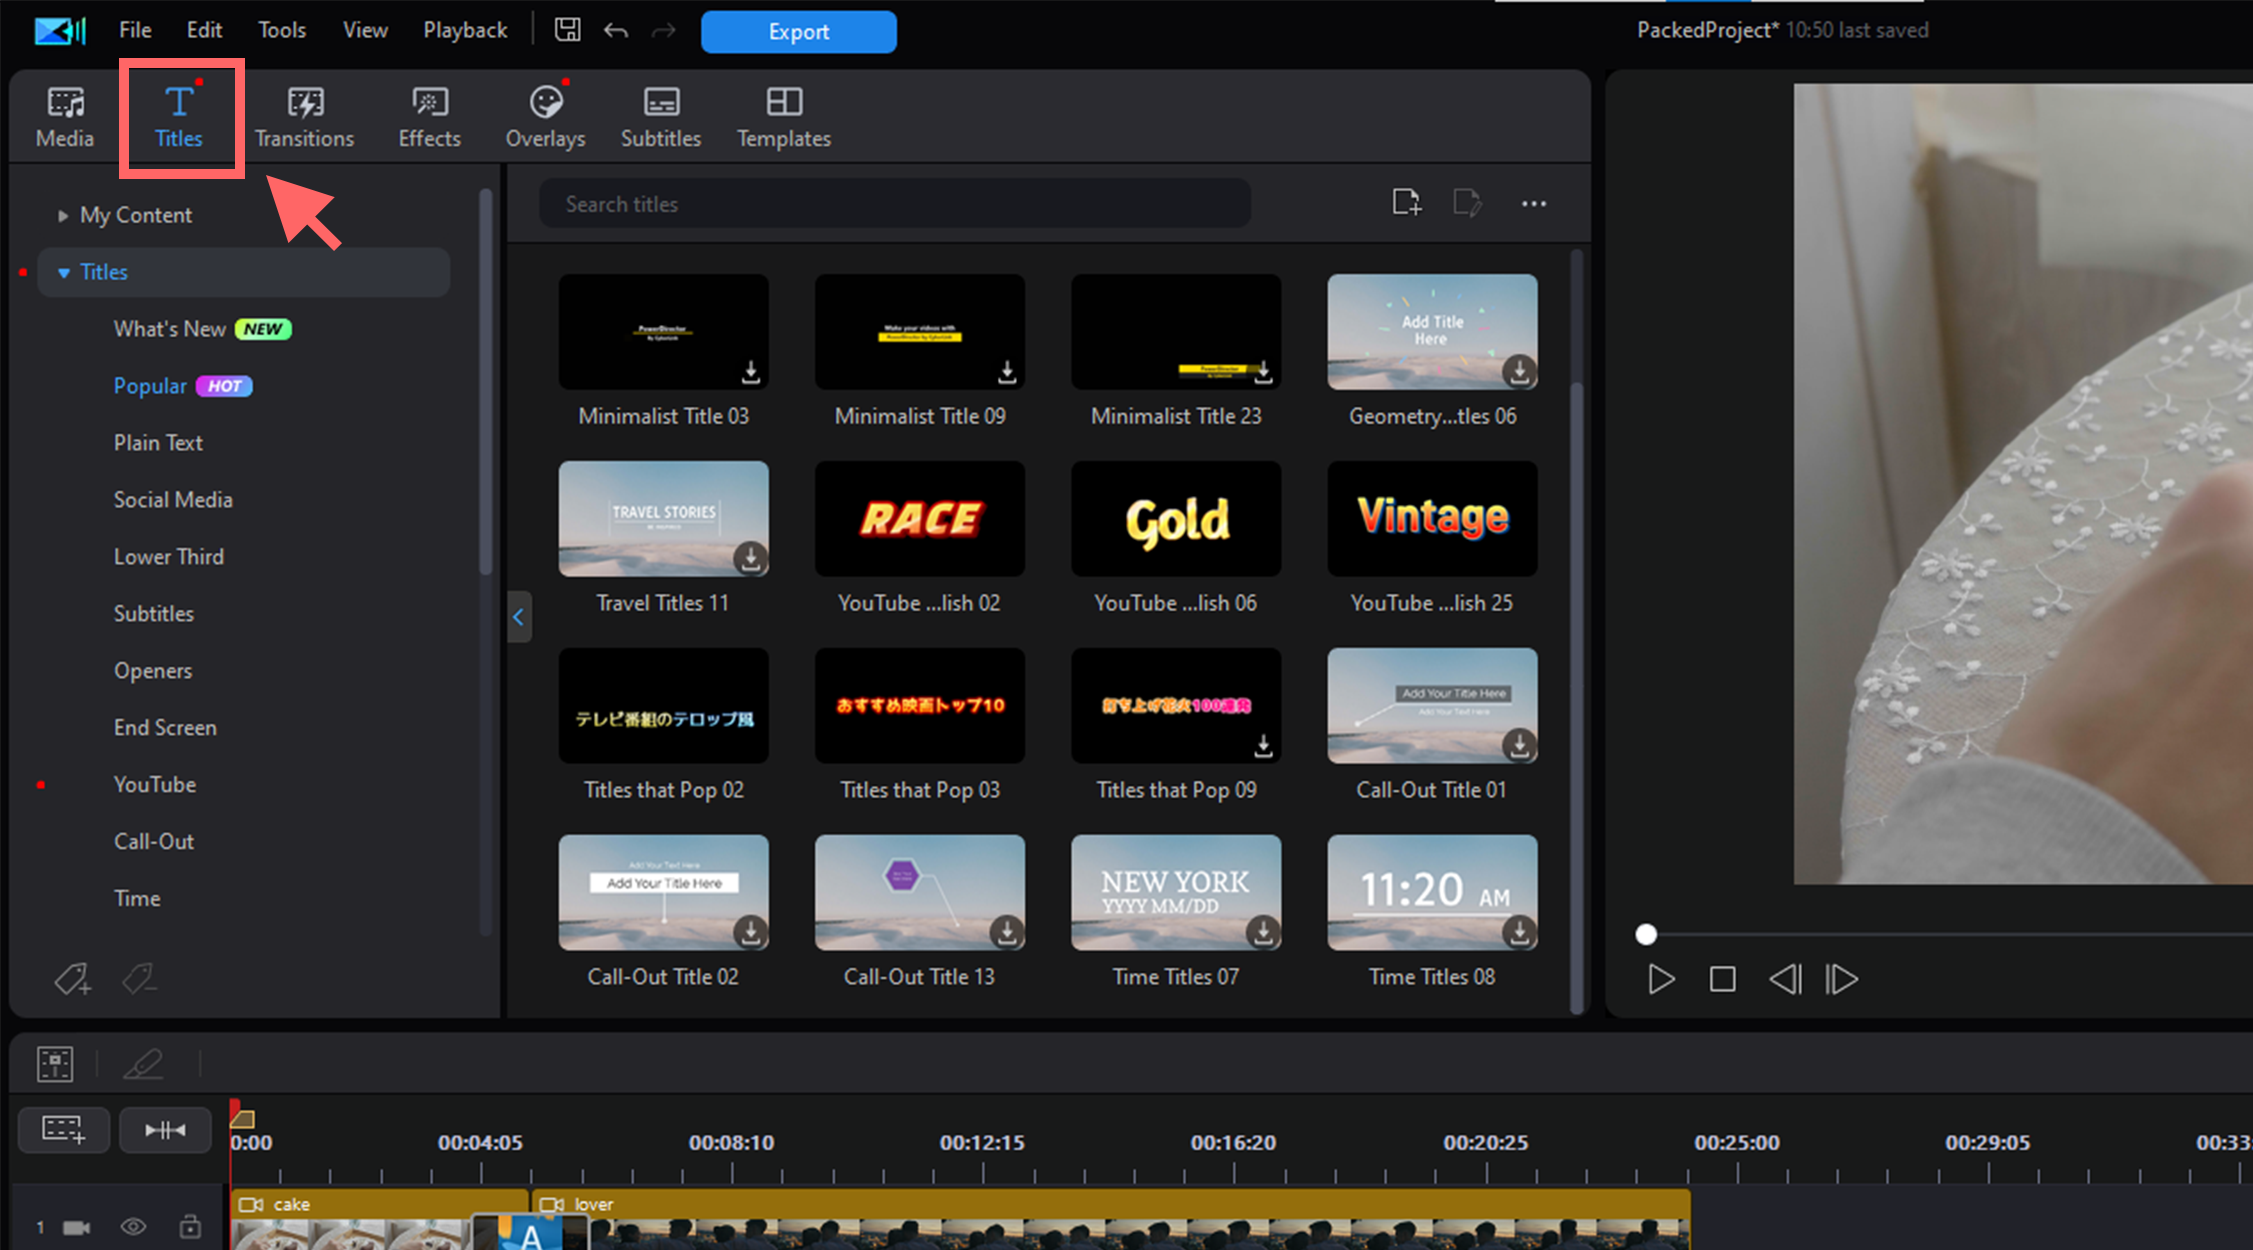
2. Click and drag a title text template to your video timeline.
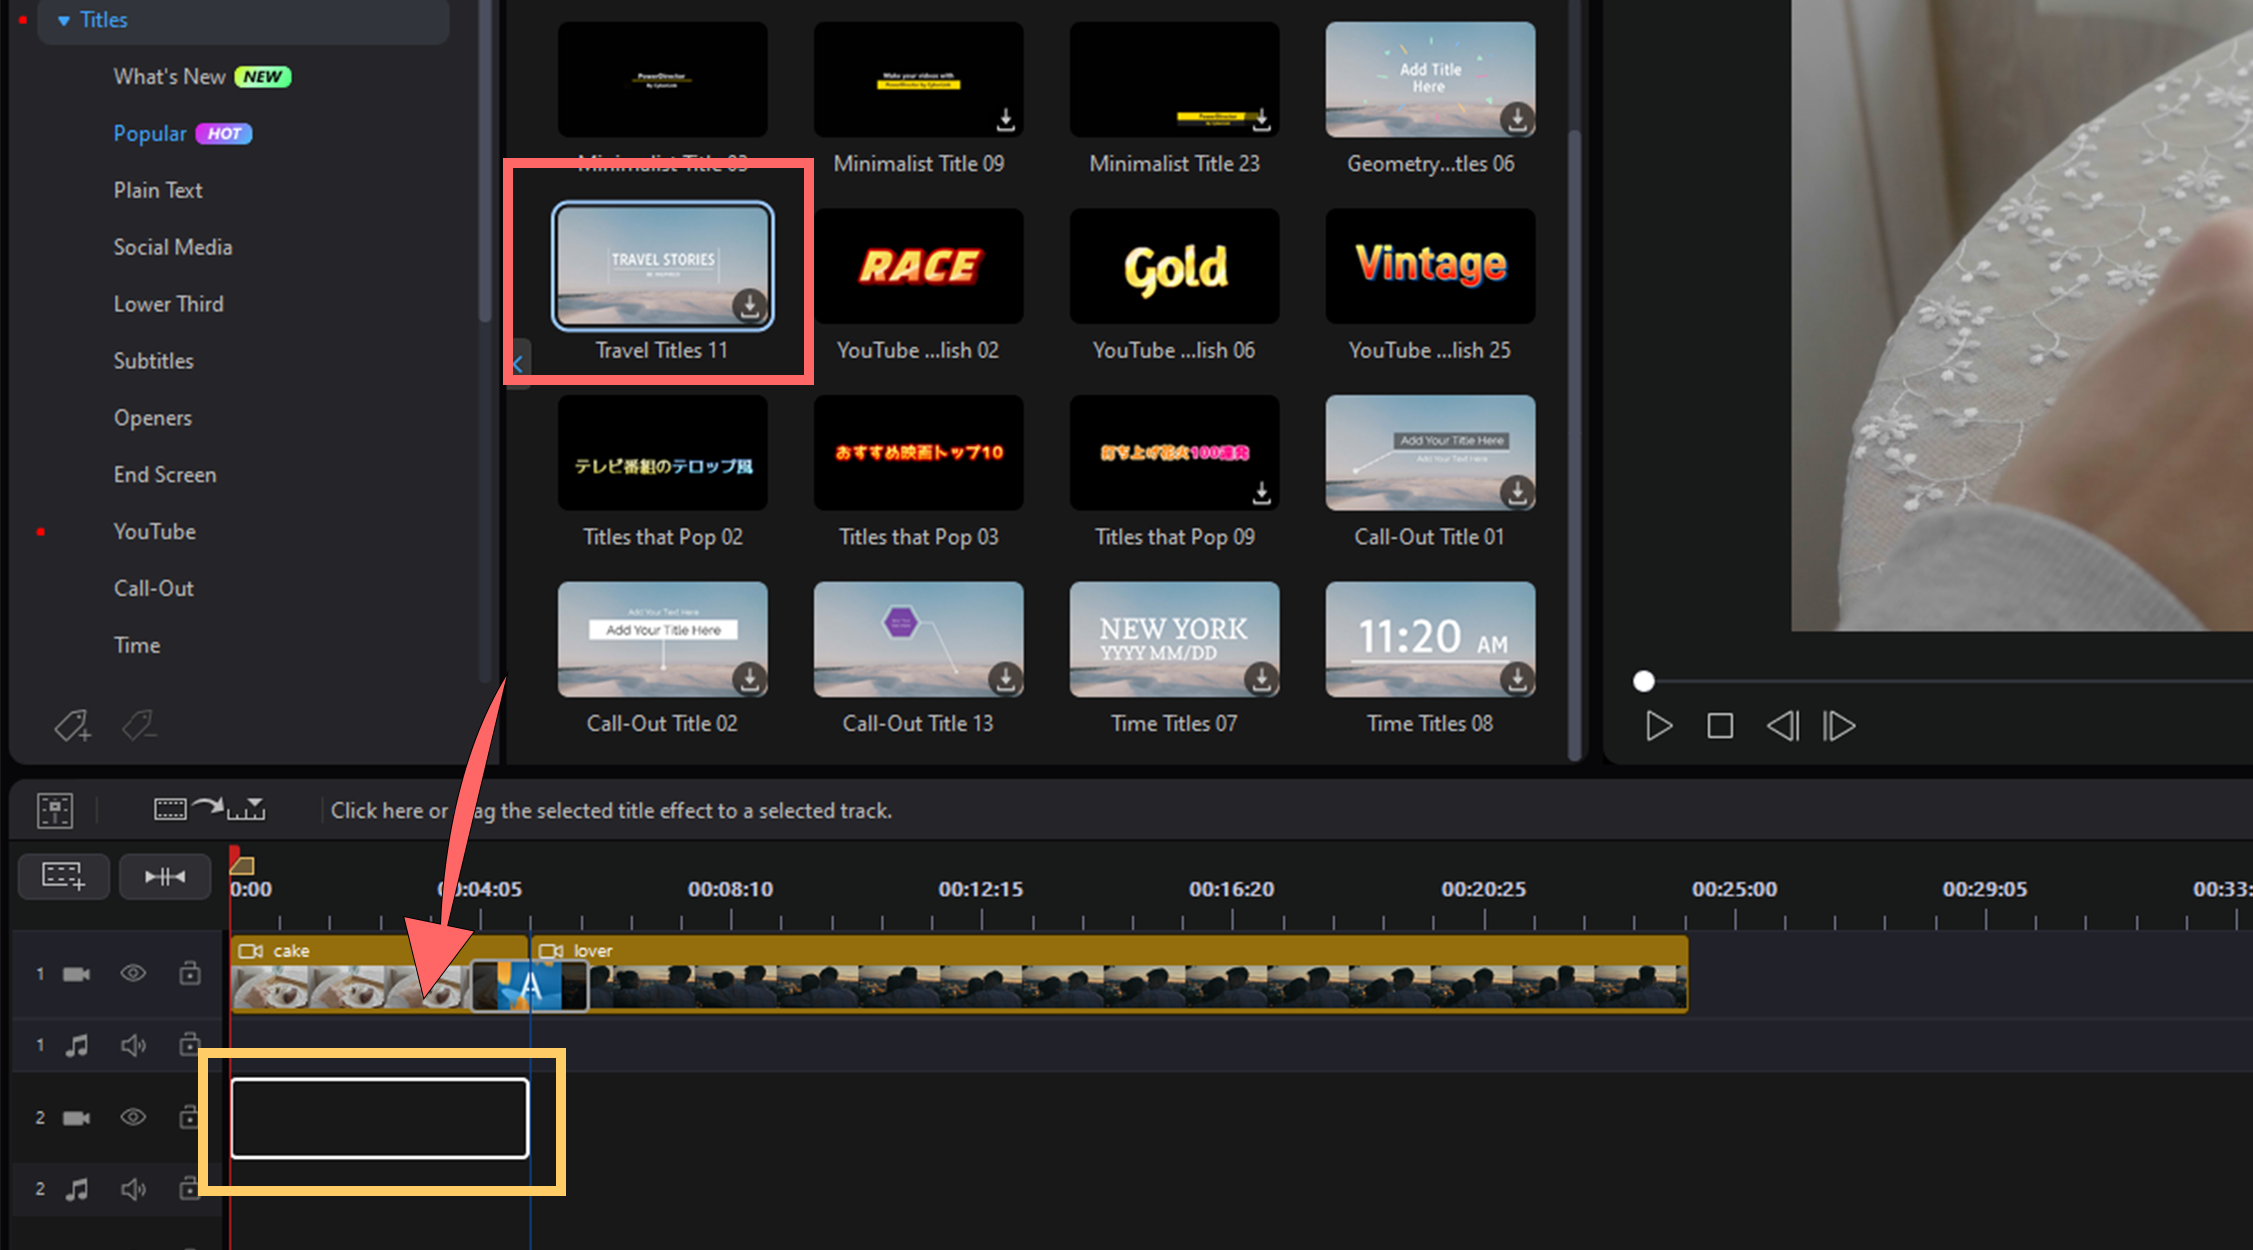
3. Double click your title template to edit any title properties or animation settings easily.
See how to add texts and titles to learn more about adding title text to your videos.
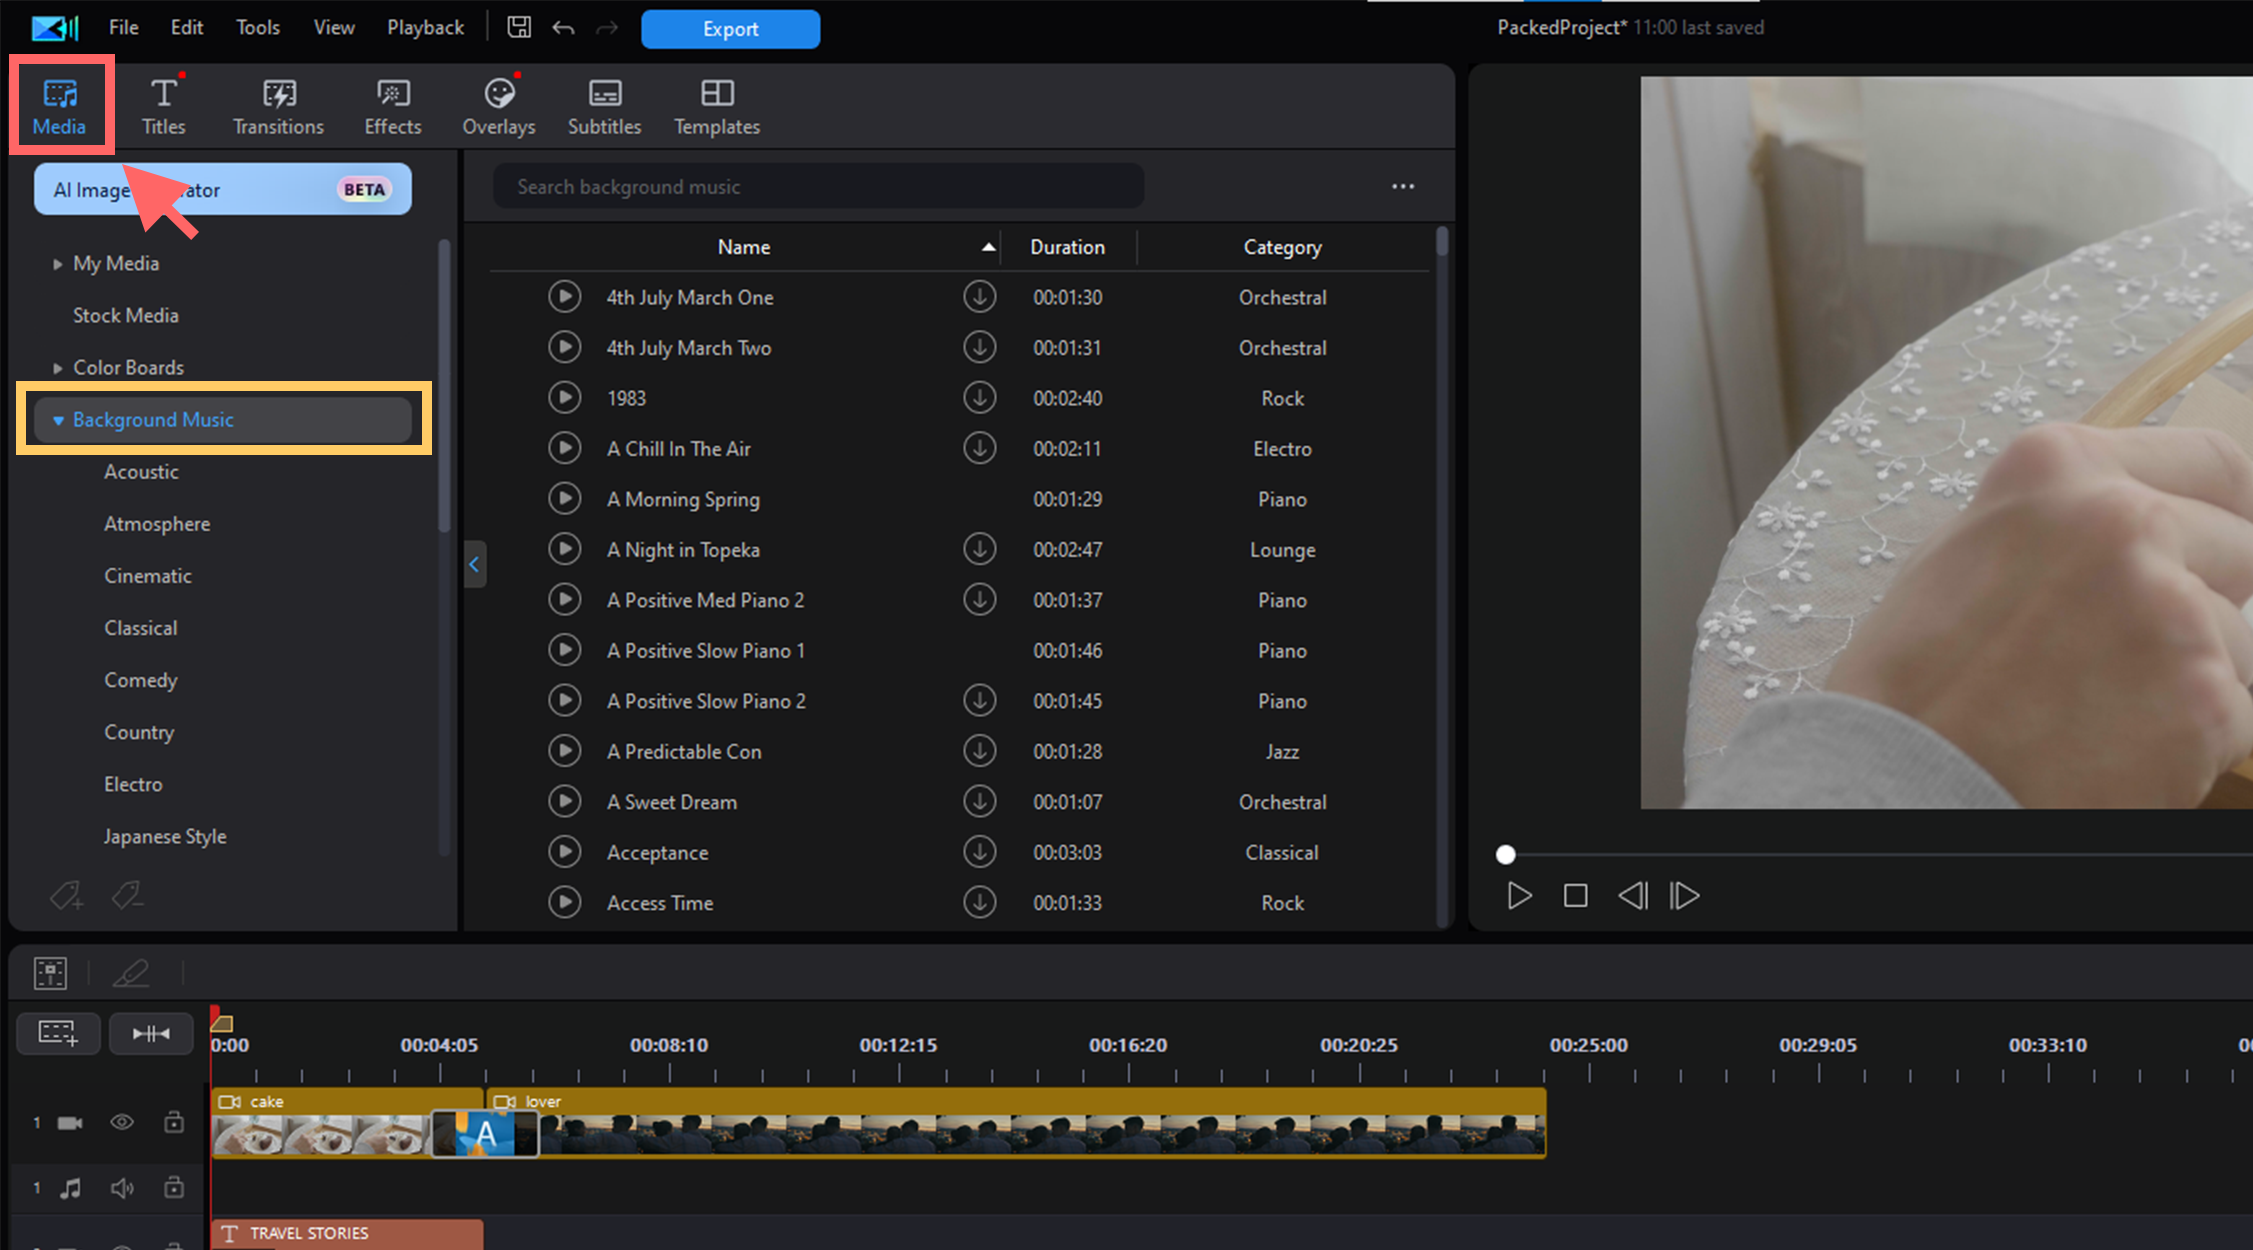
6. Adding Music
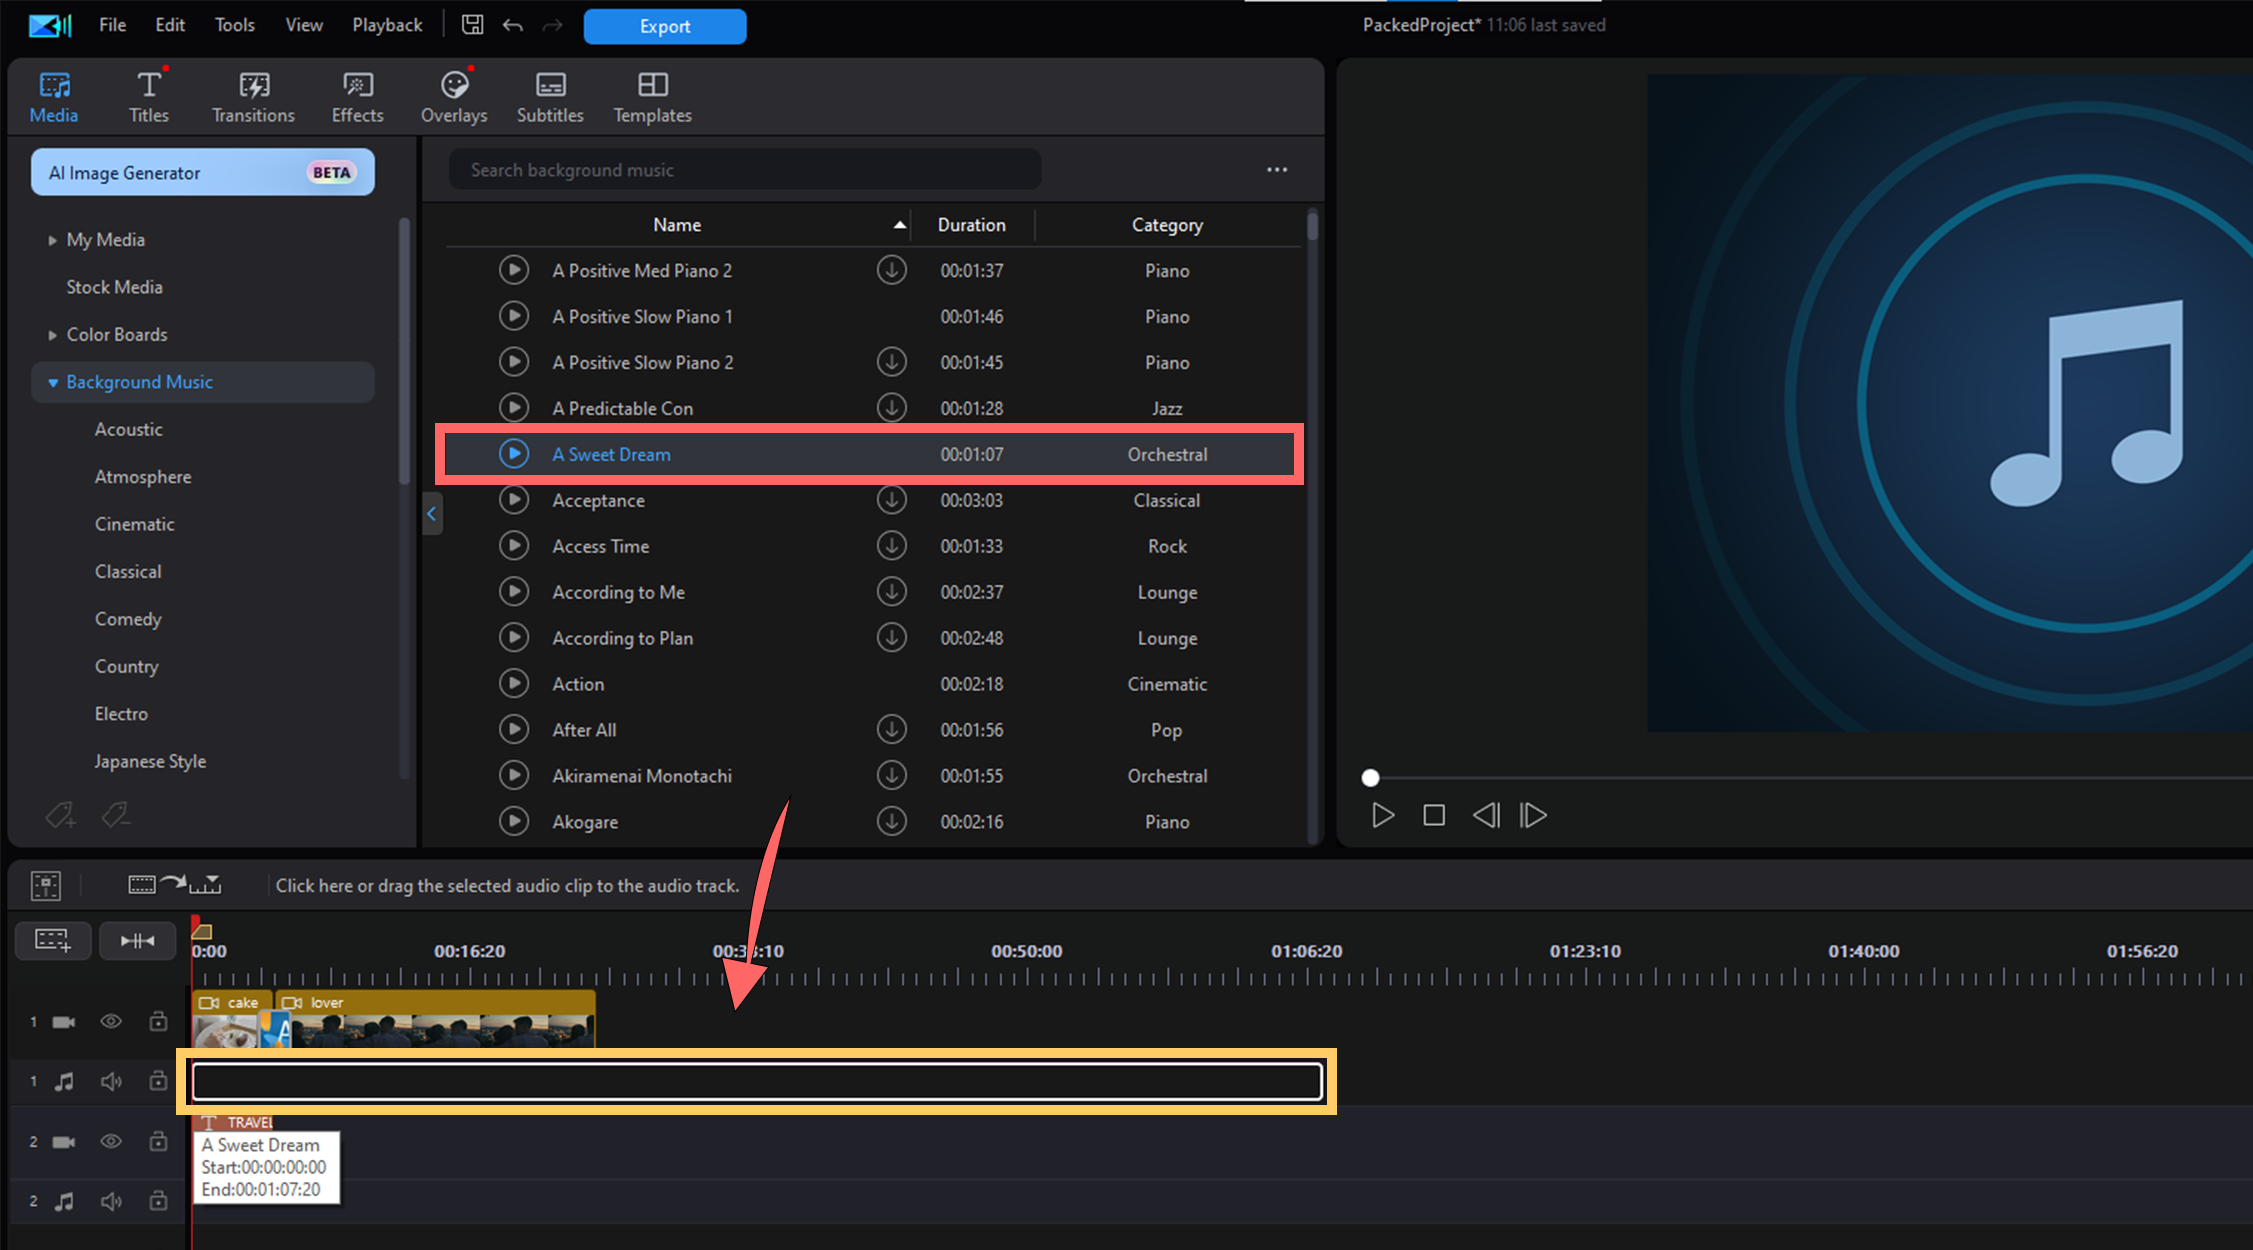
No video is complete until you add some music to it. You can import your own audio or use one of the background music tracks that are included with a 365 subscription.
1. Click Media, and then select Background Music.
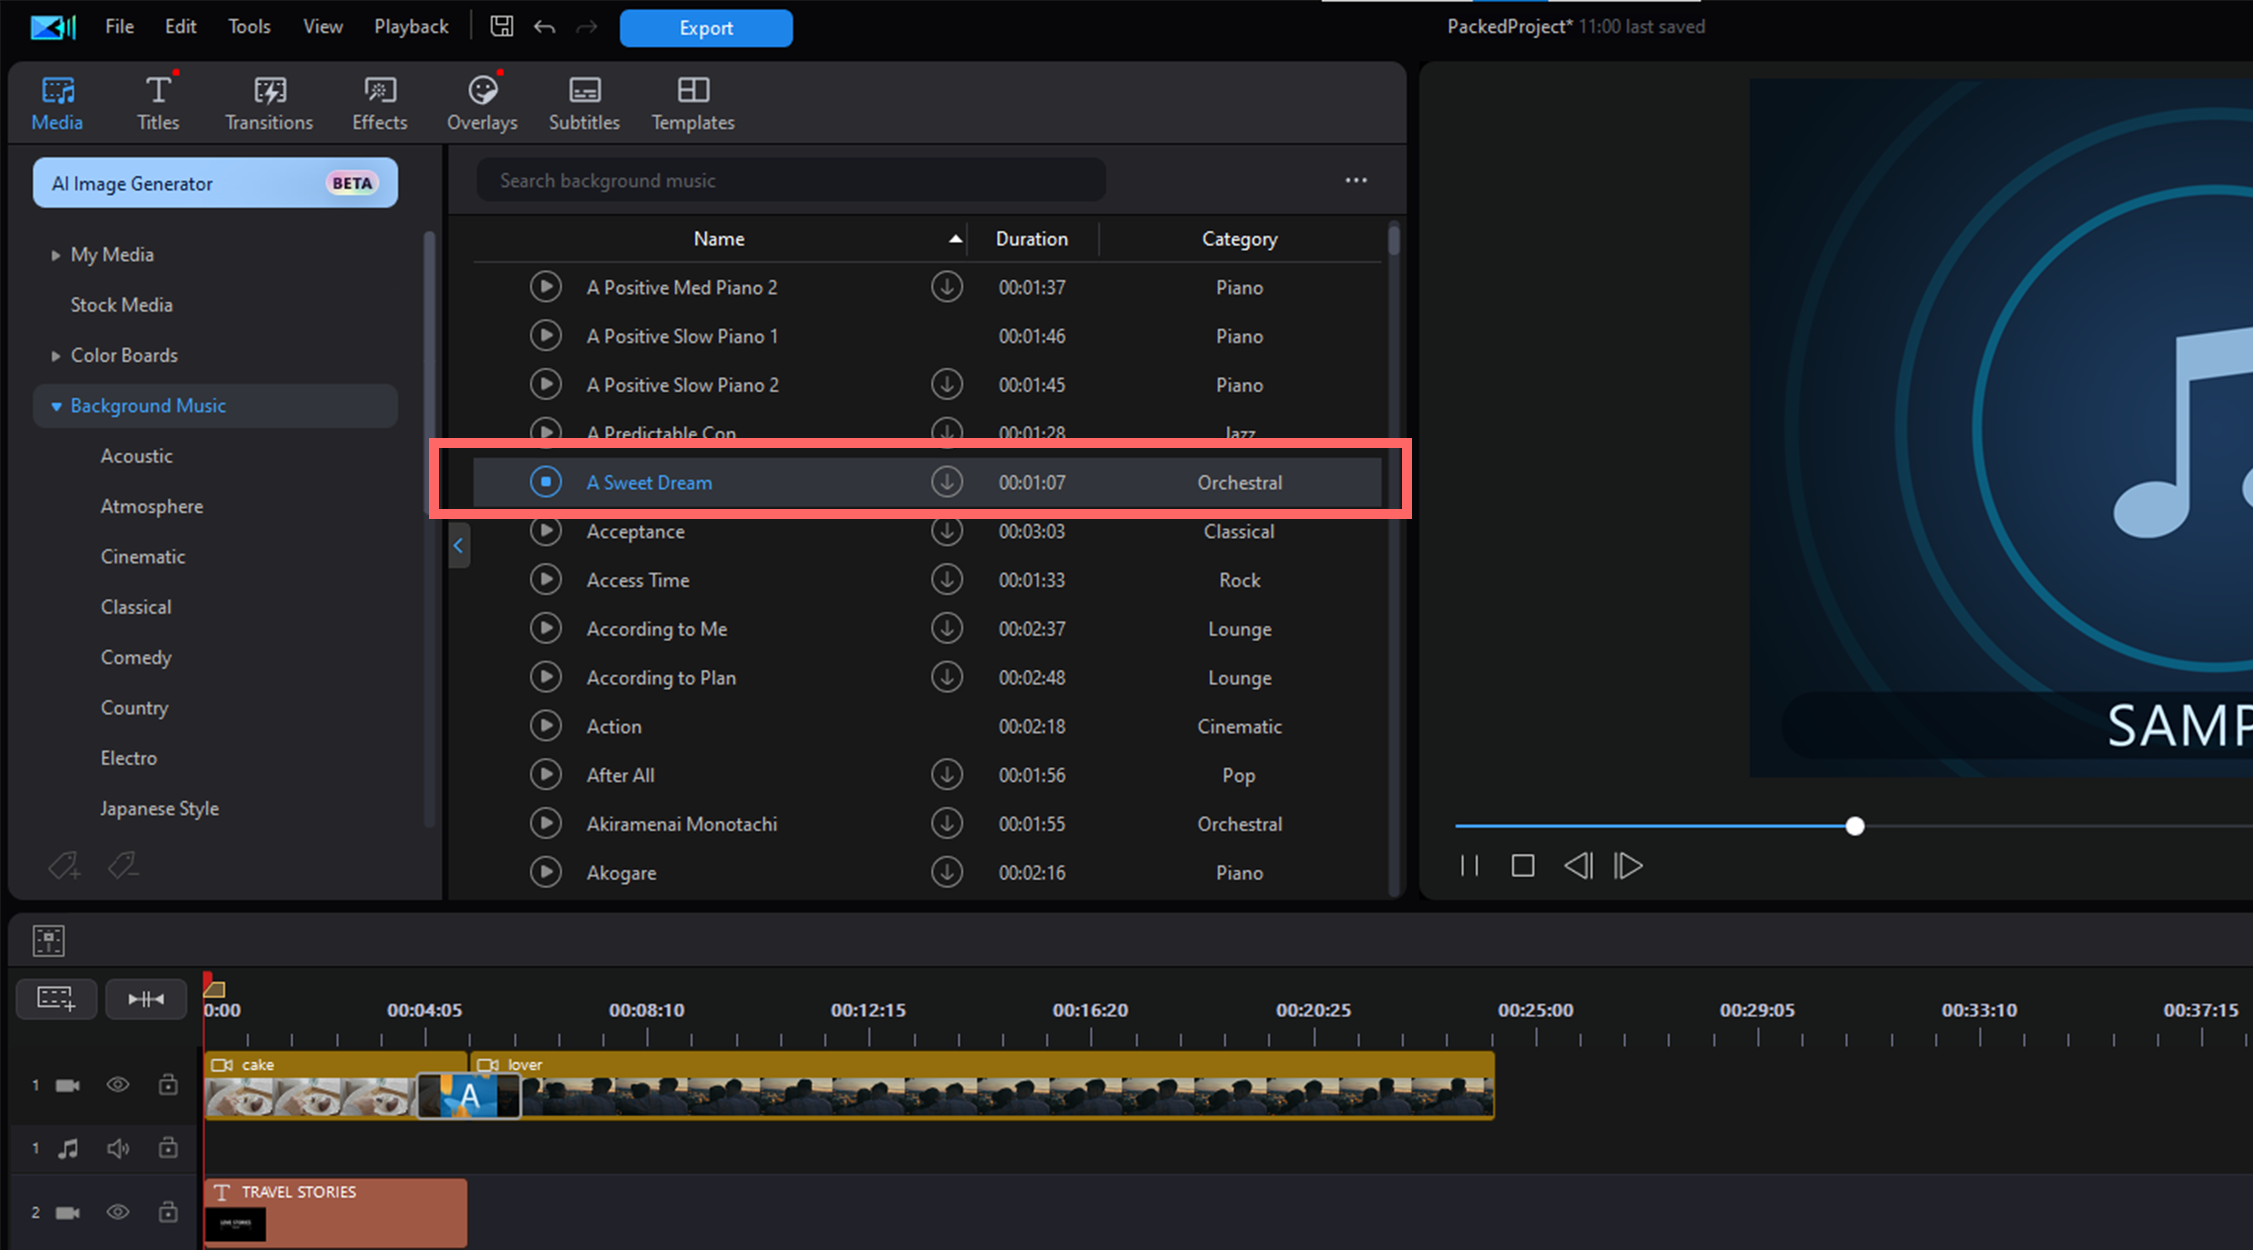
2. Preview and then click the  button to download the background music track you want to use.
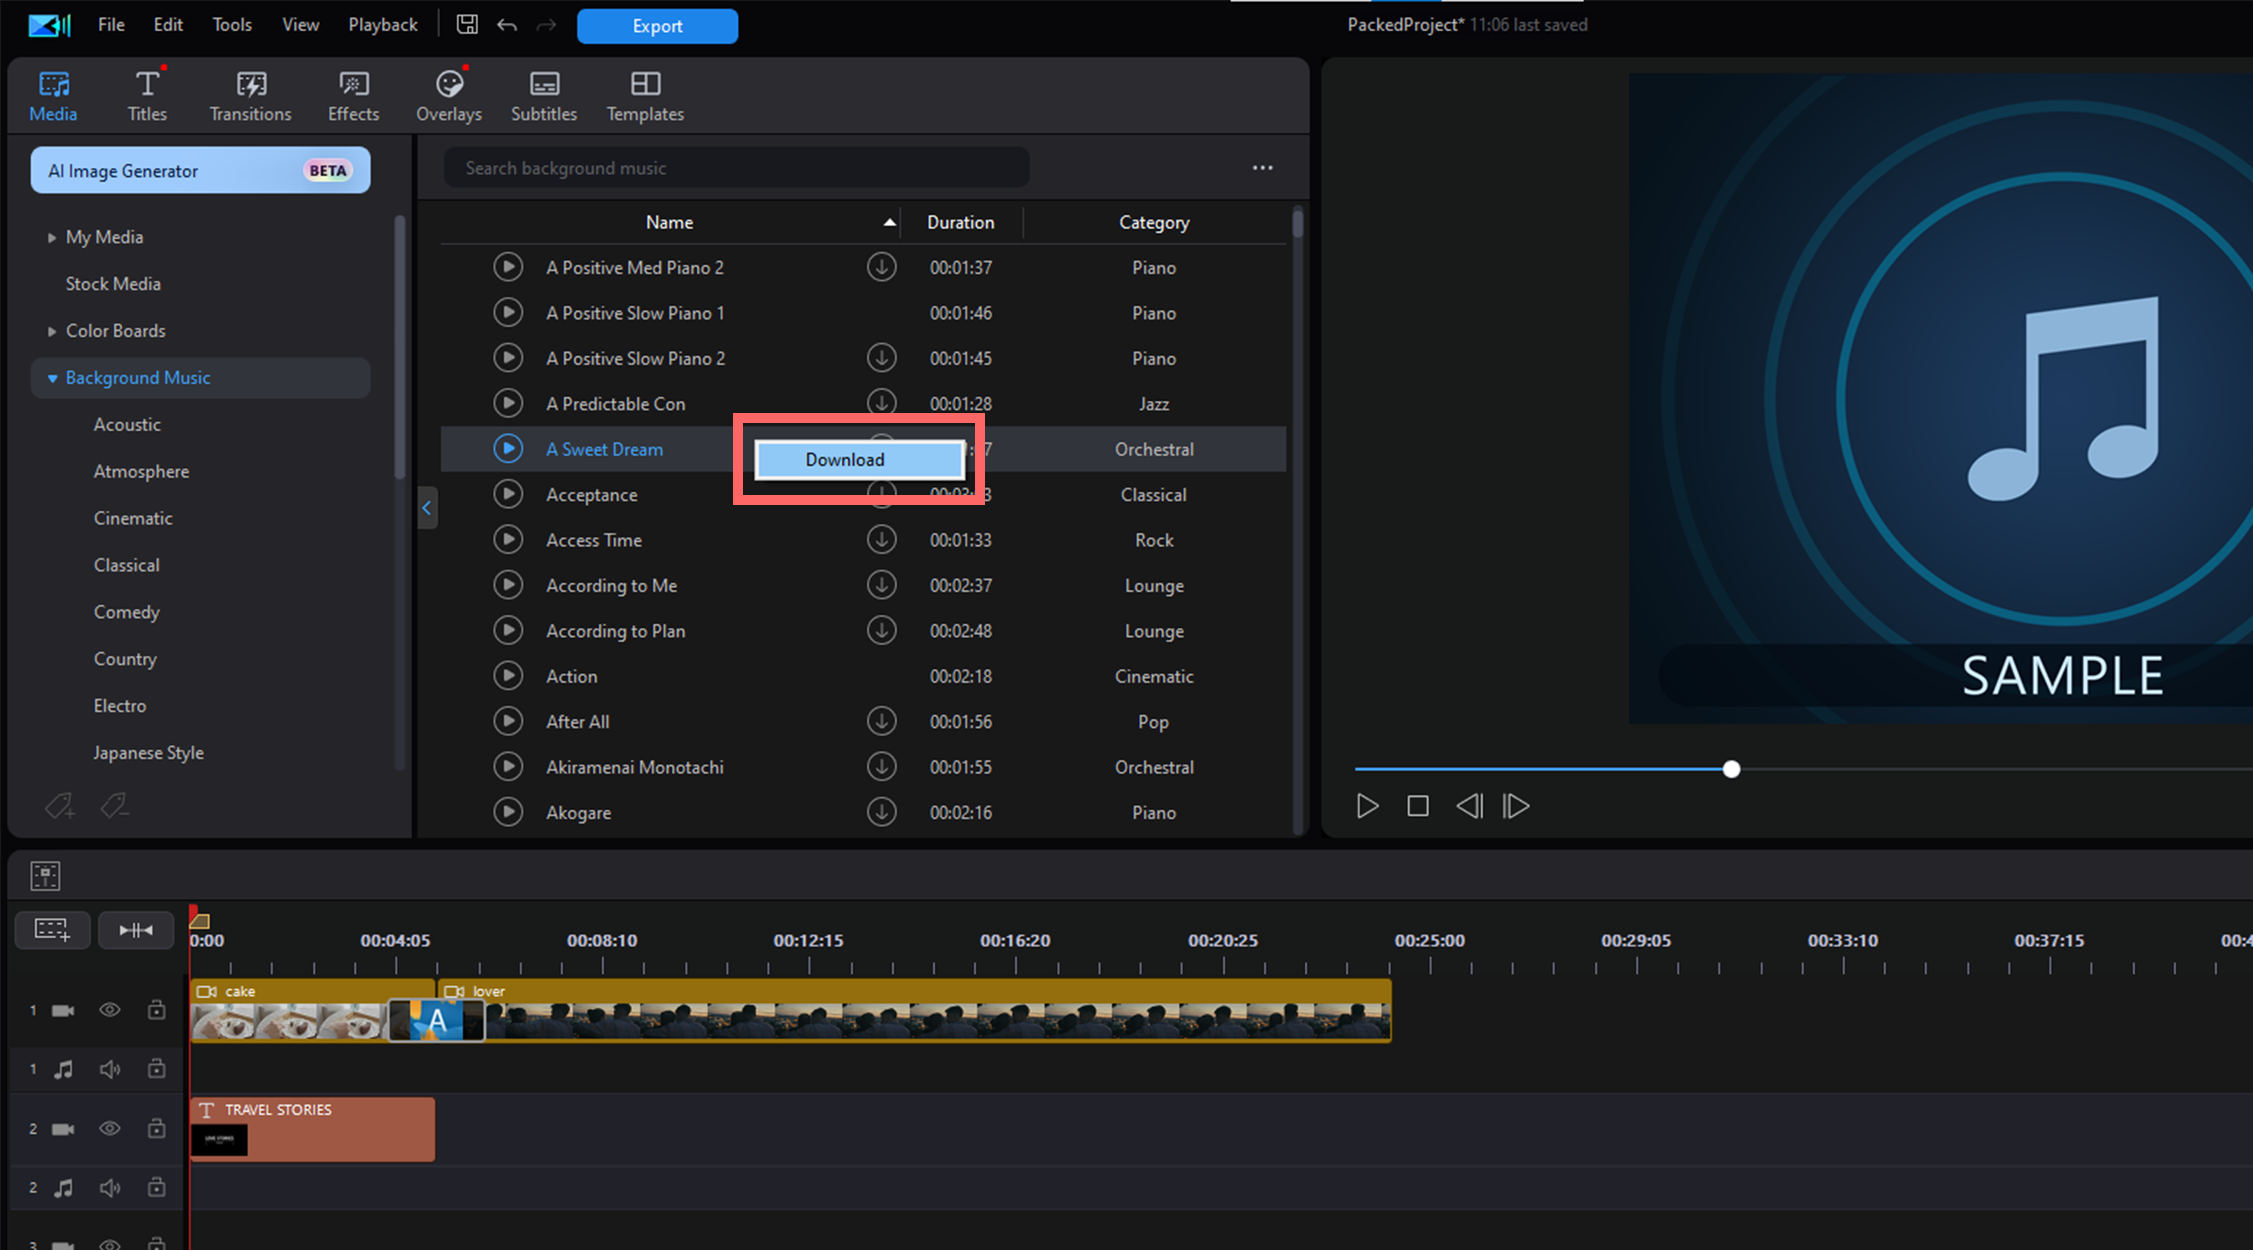
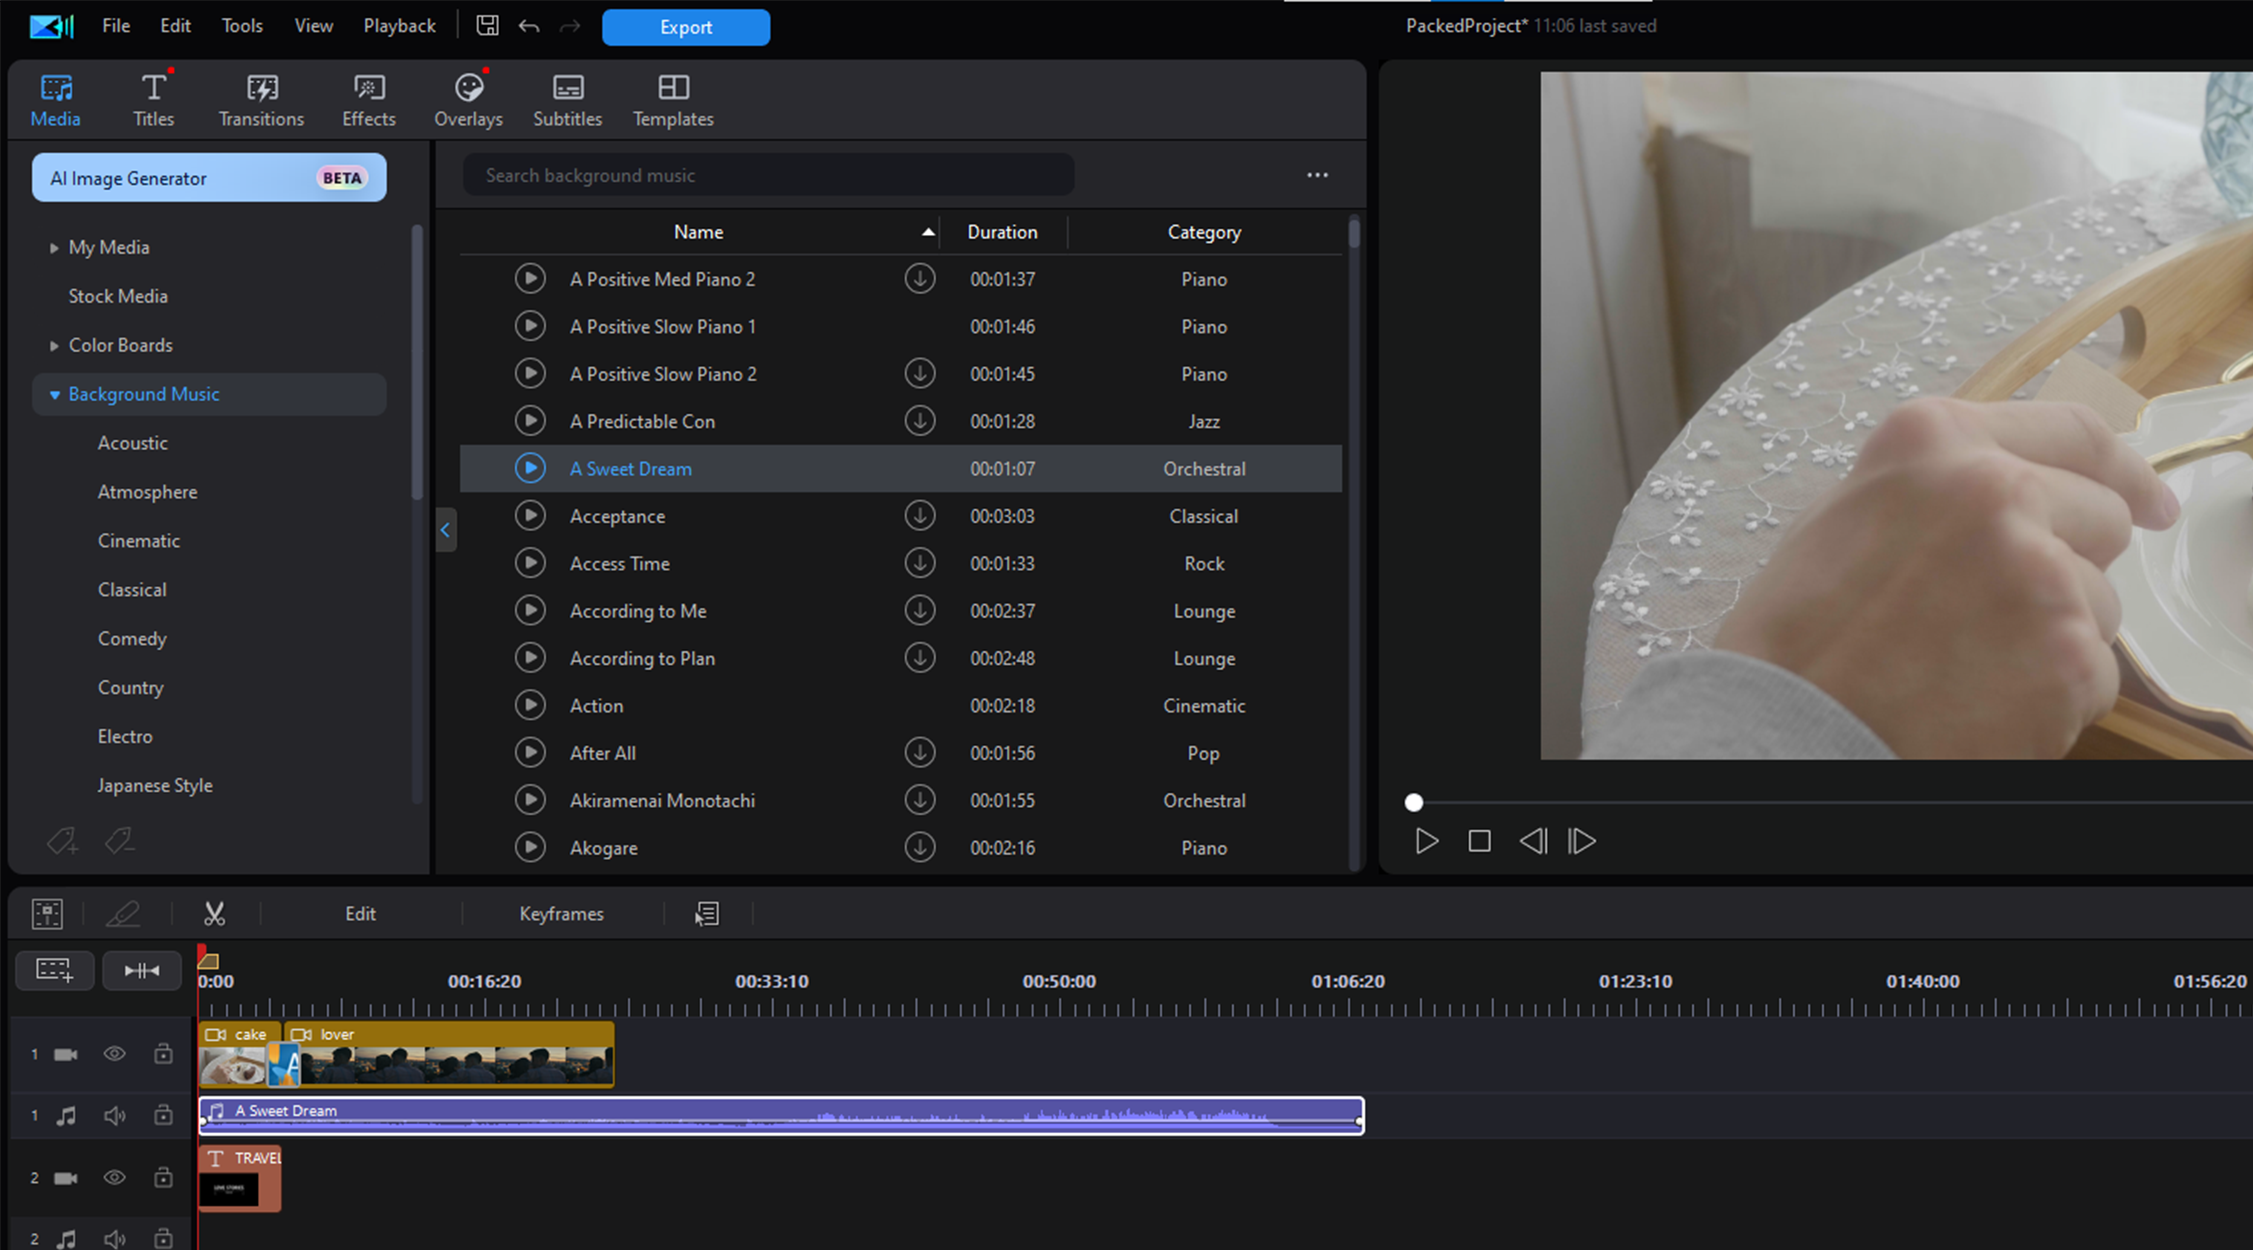
3. After it has downloaded, drag it to the background music track on the video timeline.
Check out the tutorial on editing and importing audio to your projects for a more in depth look at adding music to your videos.
How to Produce and Upload to YouTube
That is it…you’ve learned the basics of creating your first video. In our example video project, we can add the remainder of the video clips in the media library to the timeline, trimming and adding transitions between them.

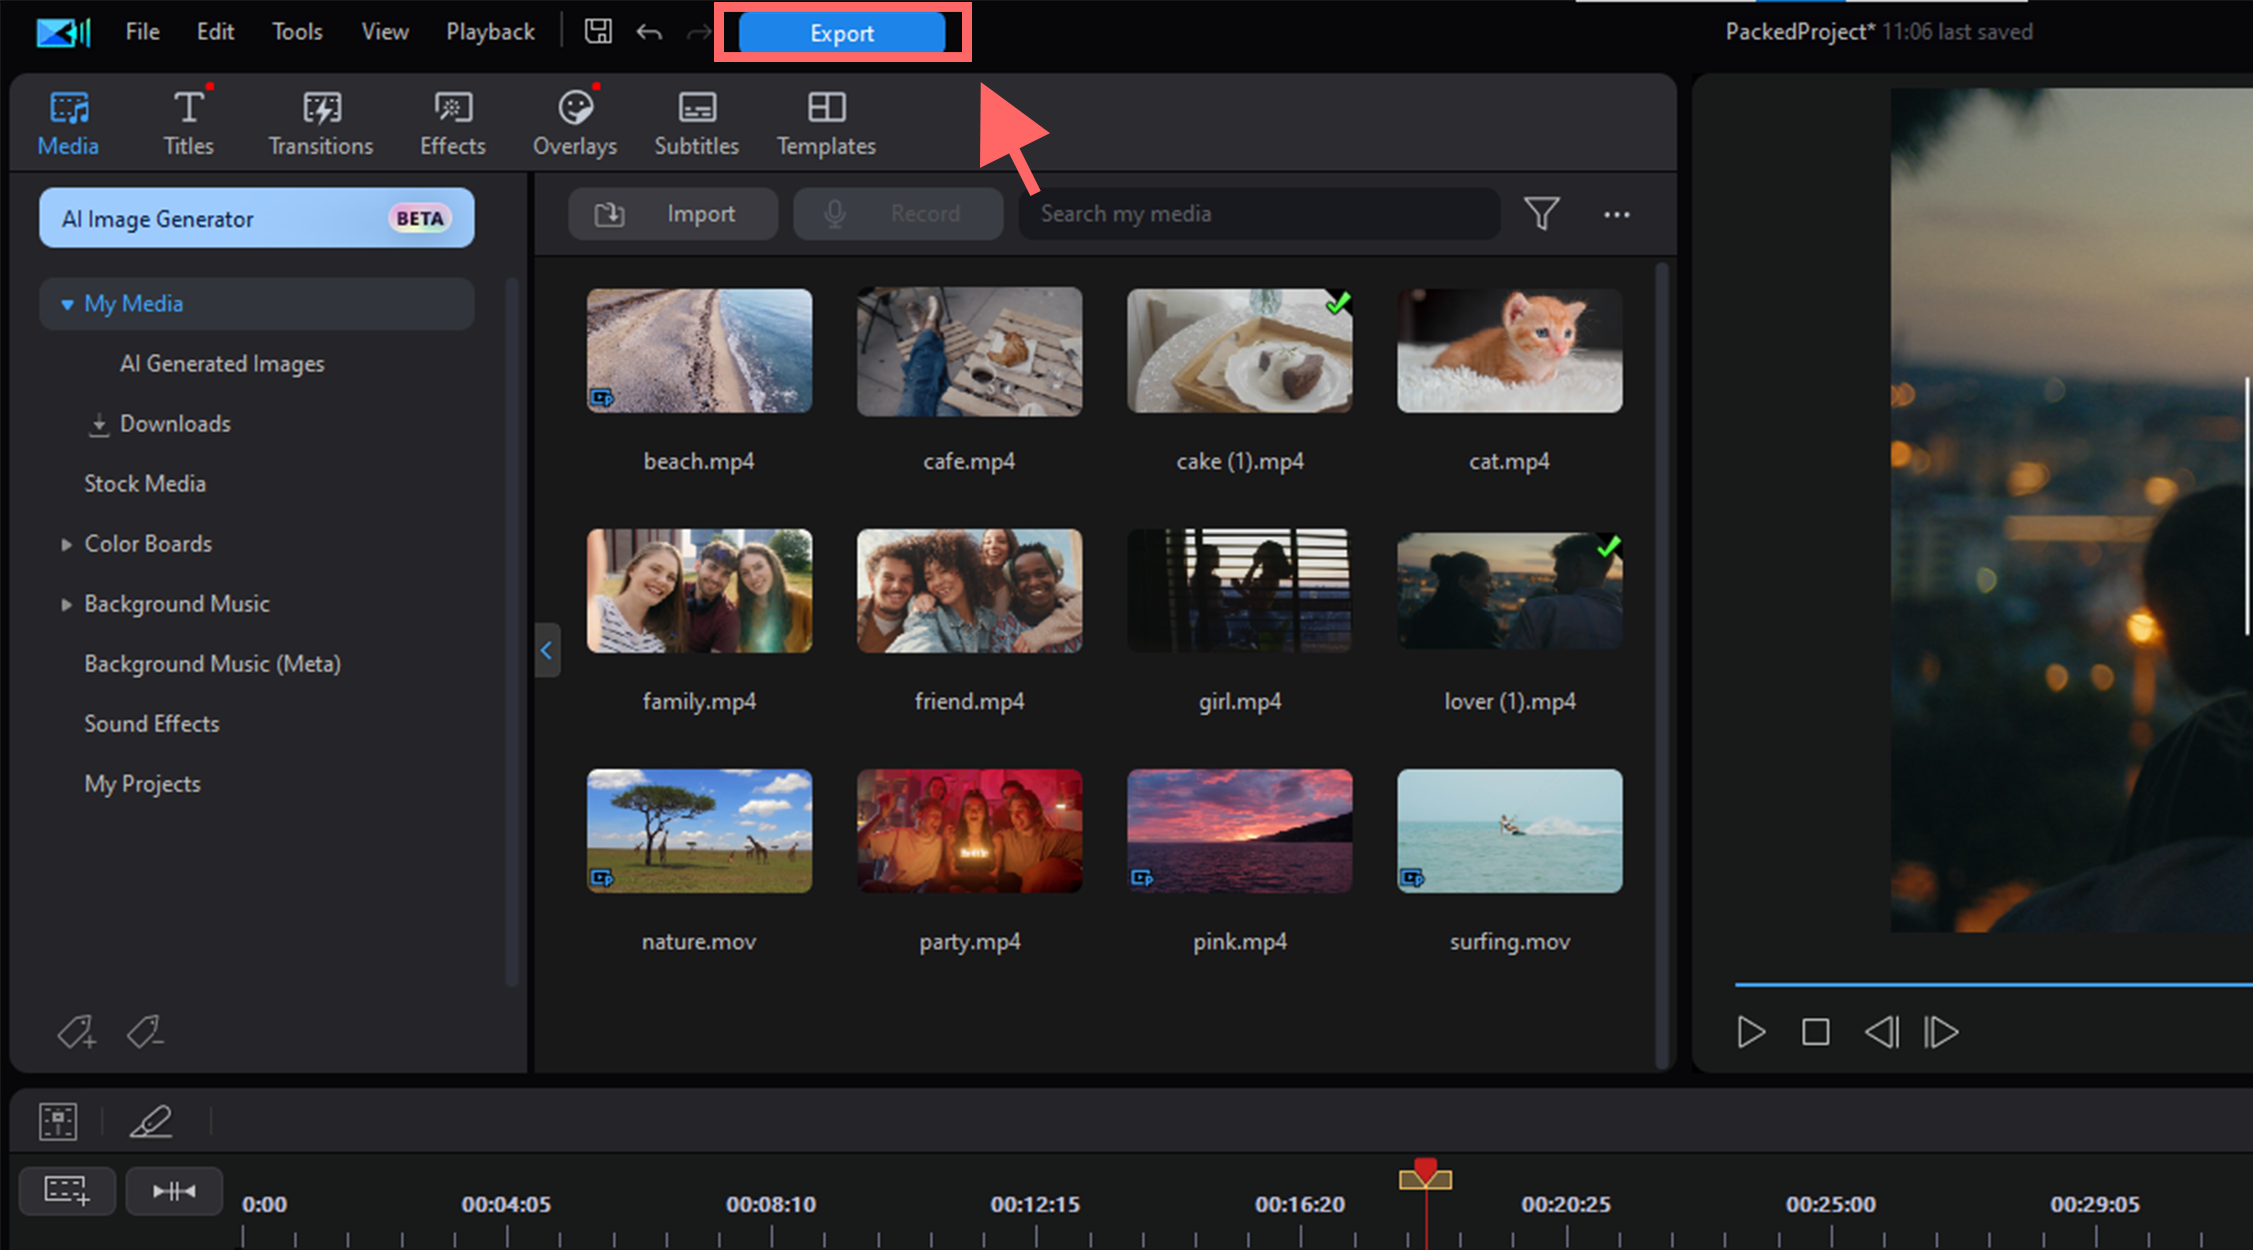
Once you are done editing, it is time to render your video project (produce) as a new video file. Once you have the new file, you can upload it to Facebook to share it with friends and family.
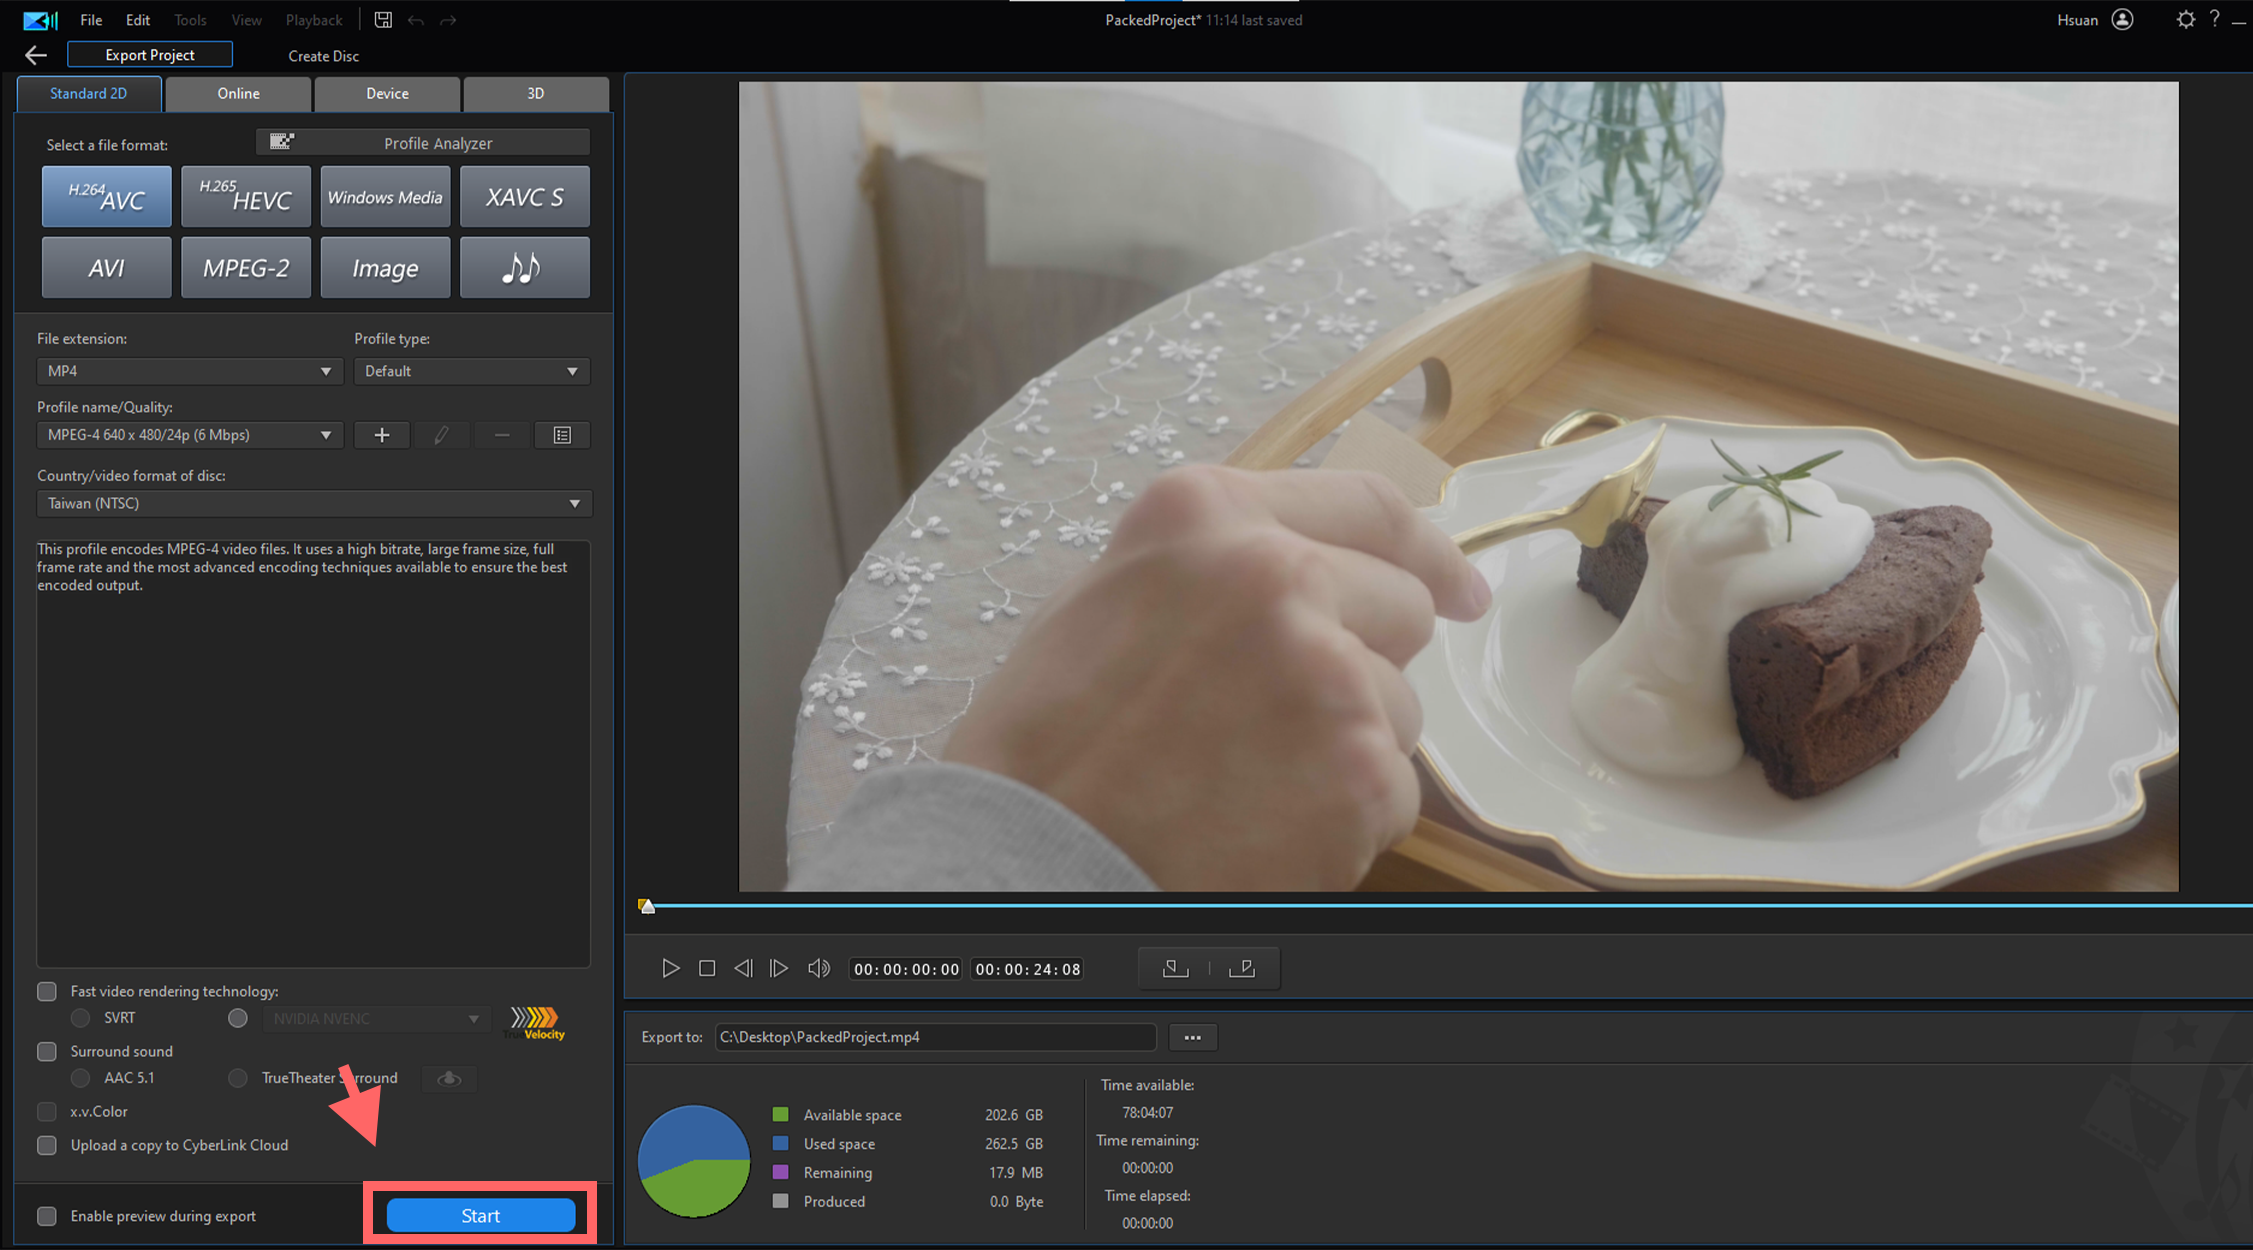
1. Click on the blue Export button to export your video.
2. On the Standard 2D tab, select your preferred video format. We suggest going with the H.264 AVC option (with the MP4 file extension), as it is one of the most popular and accepted formats.
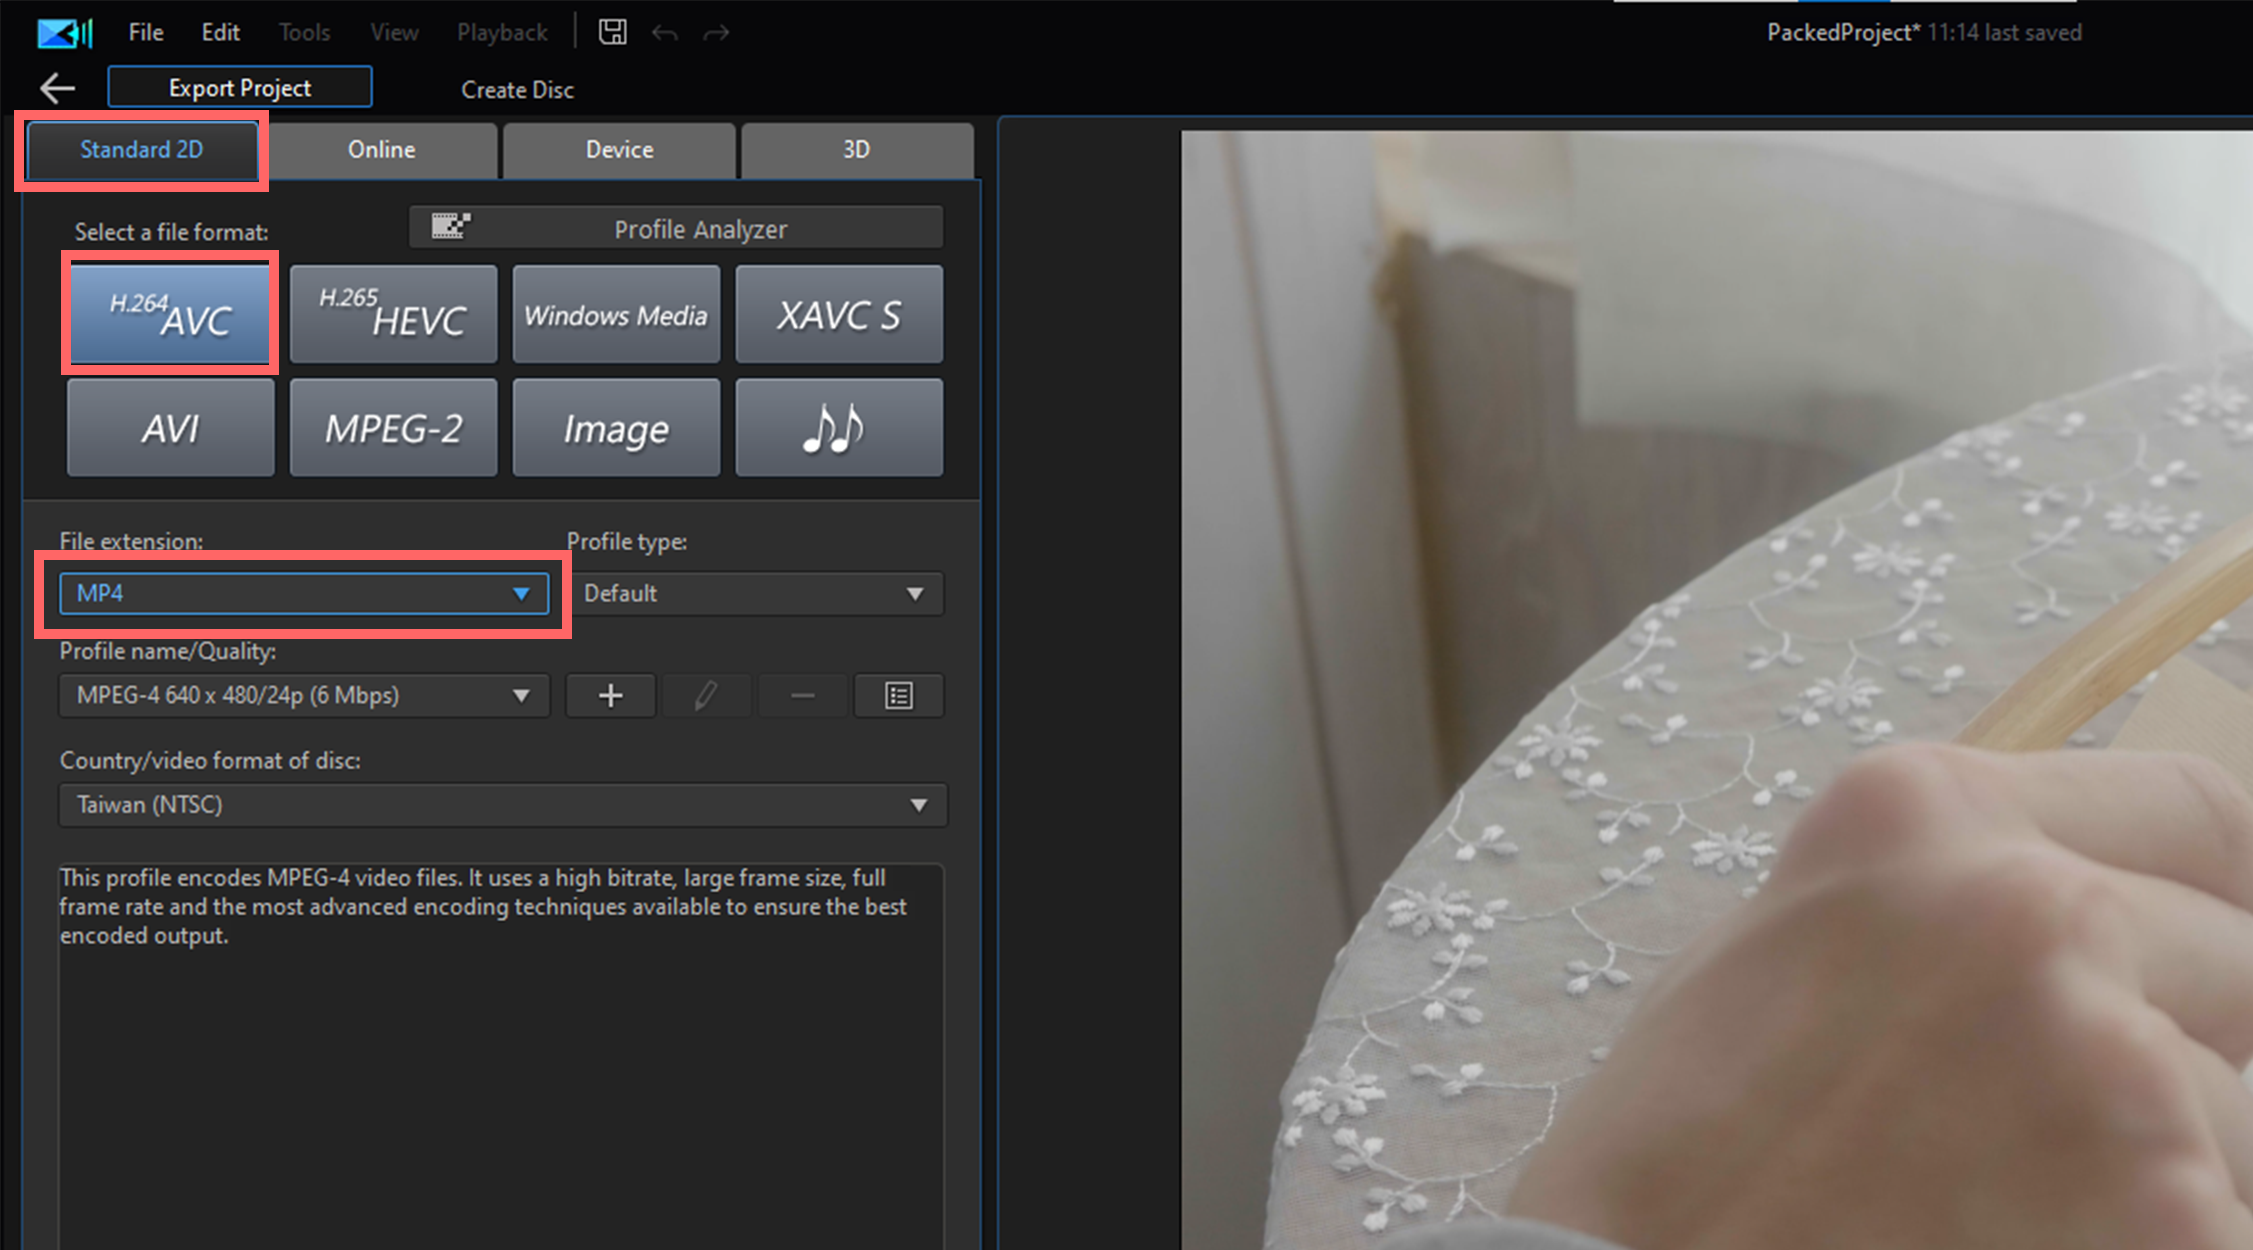
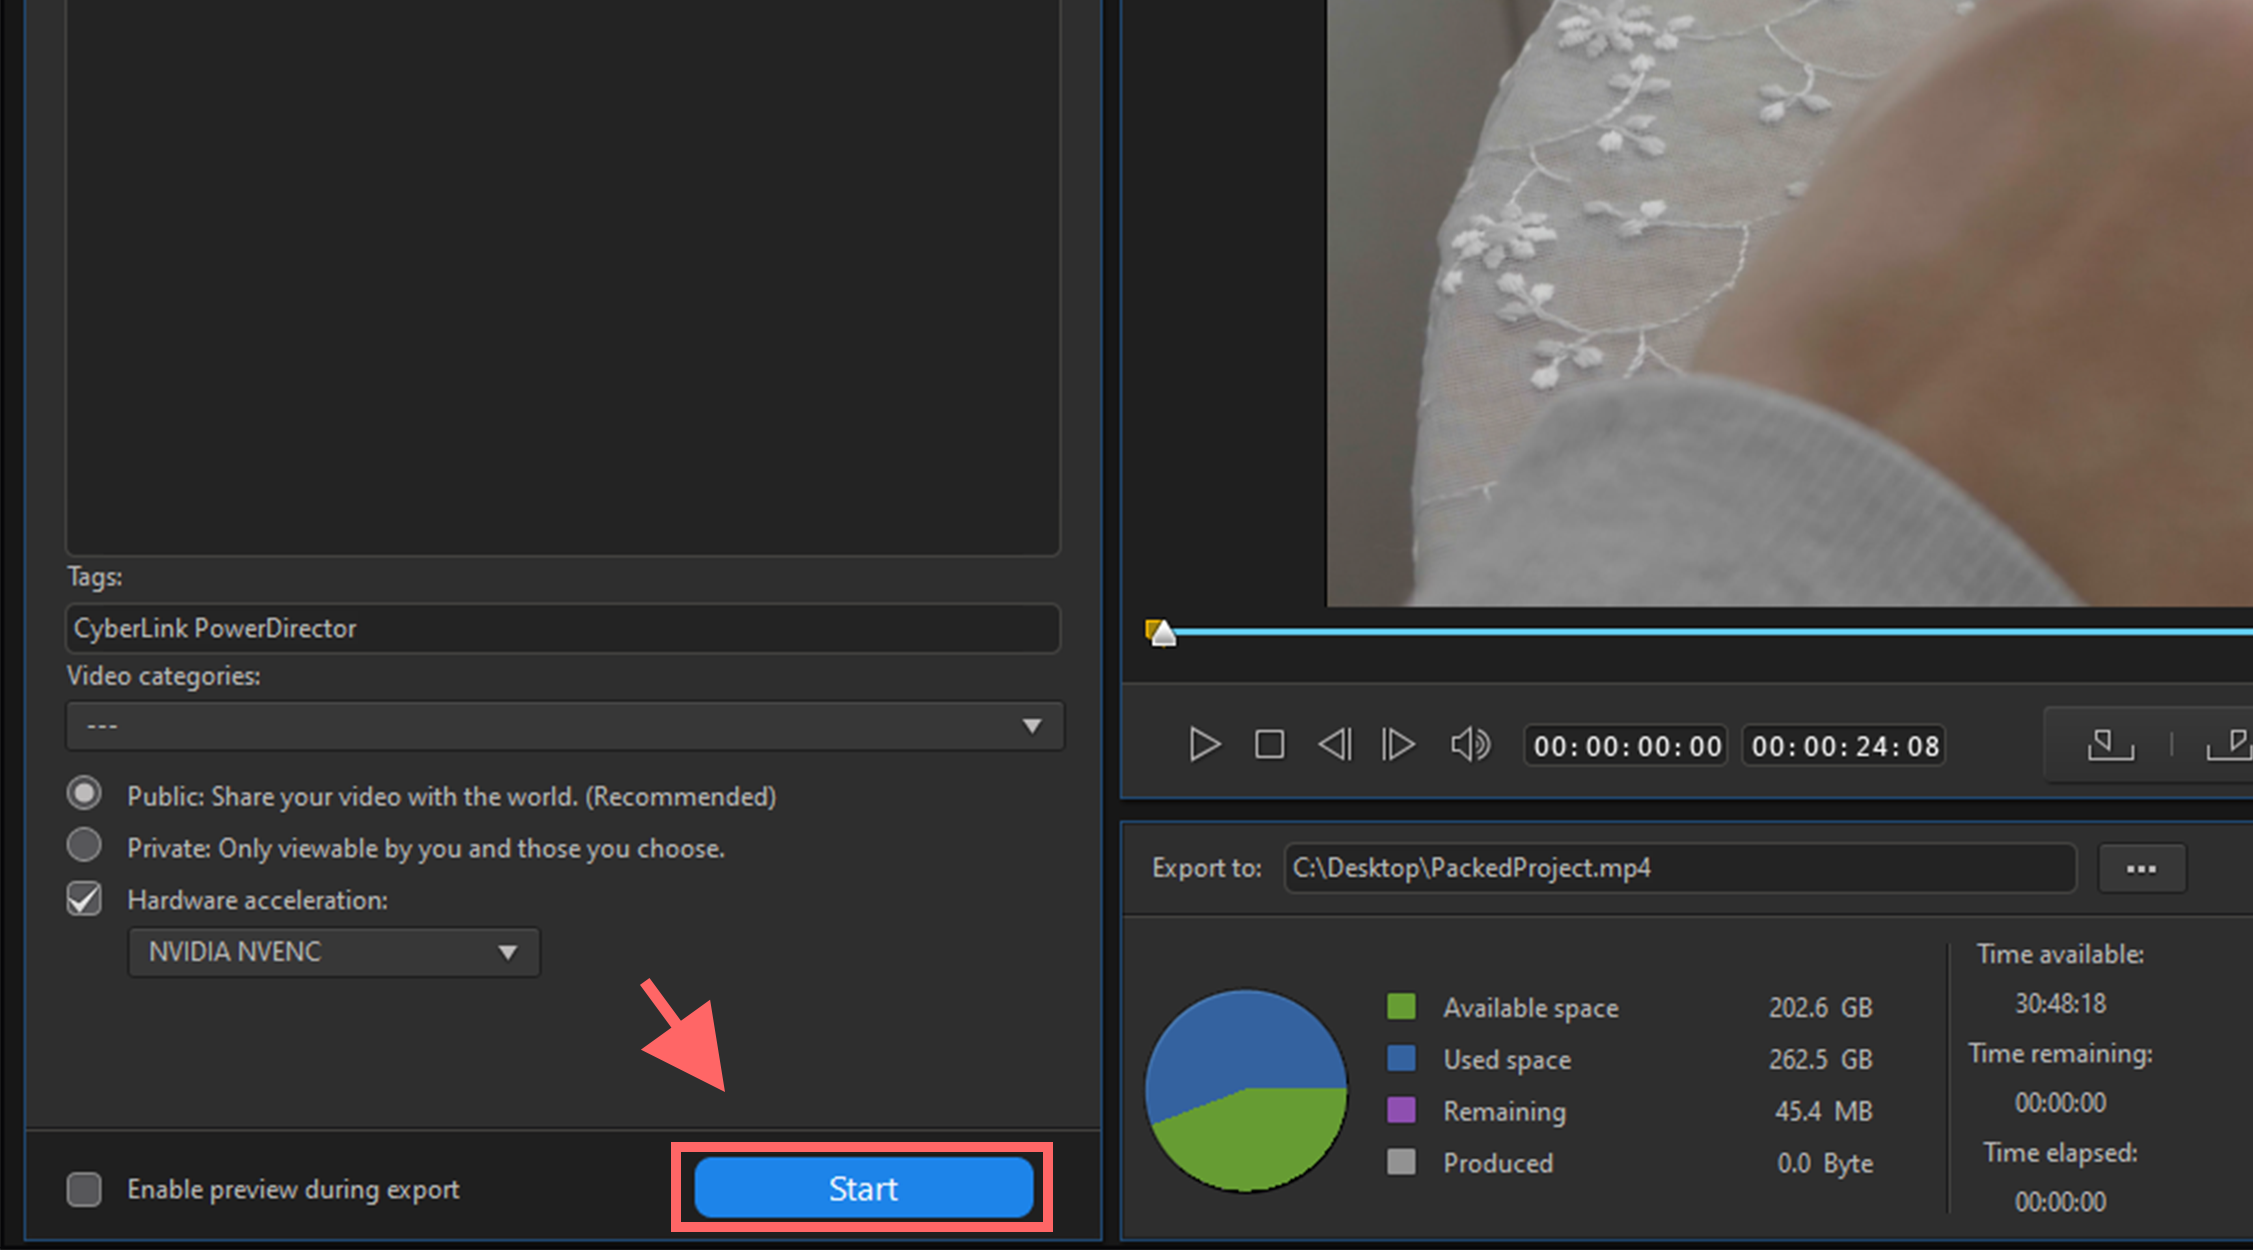
3. Select an output folder where the new video file will be saved.
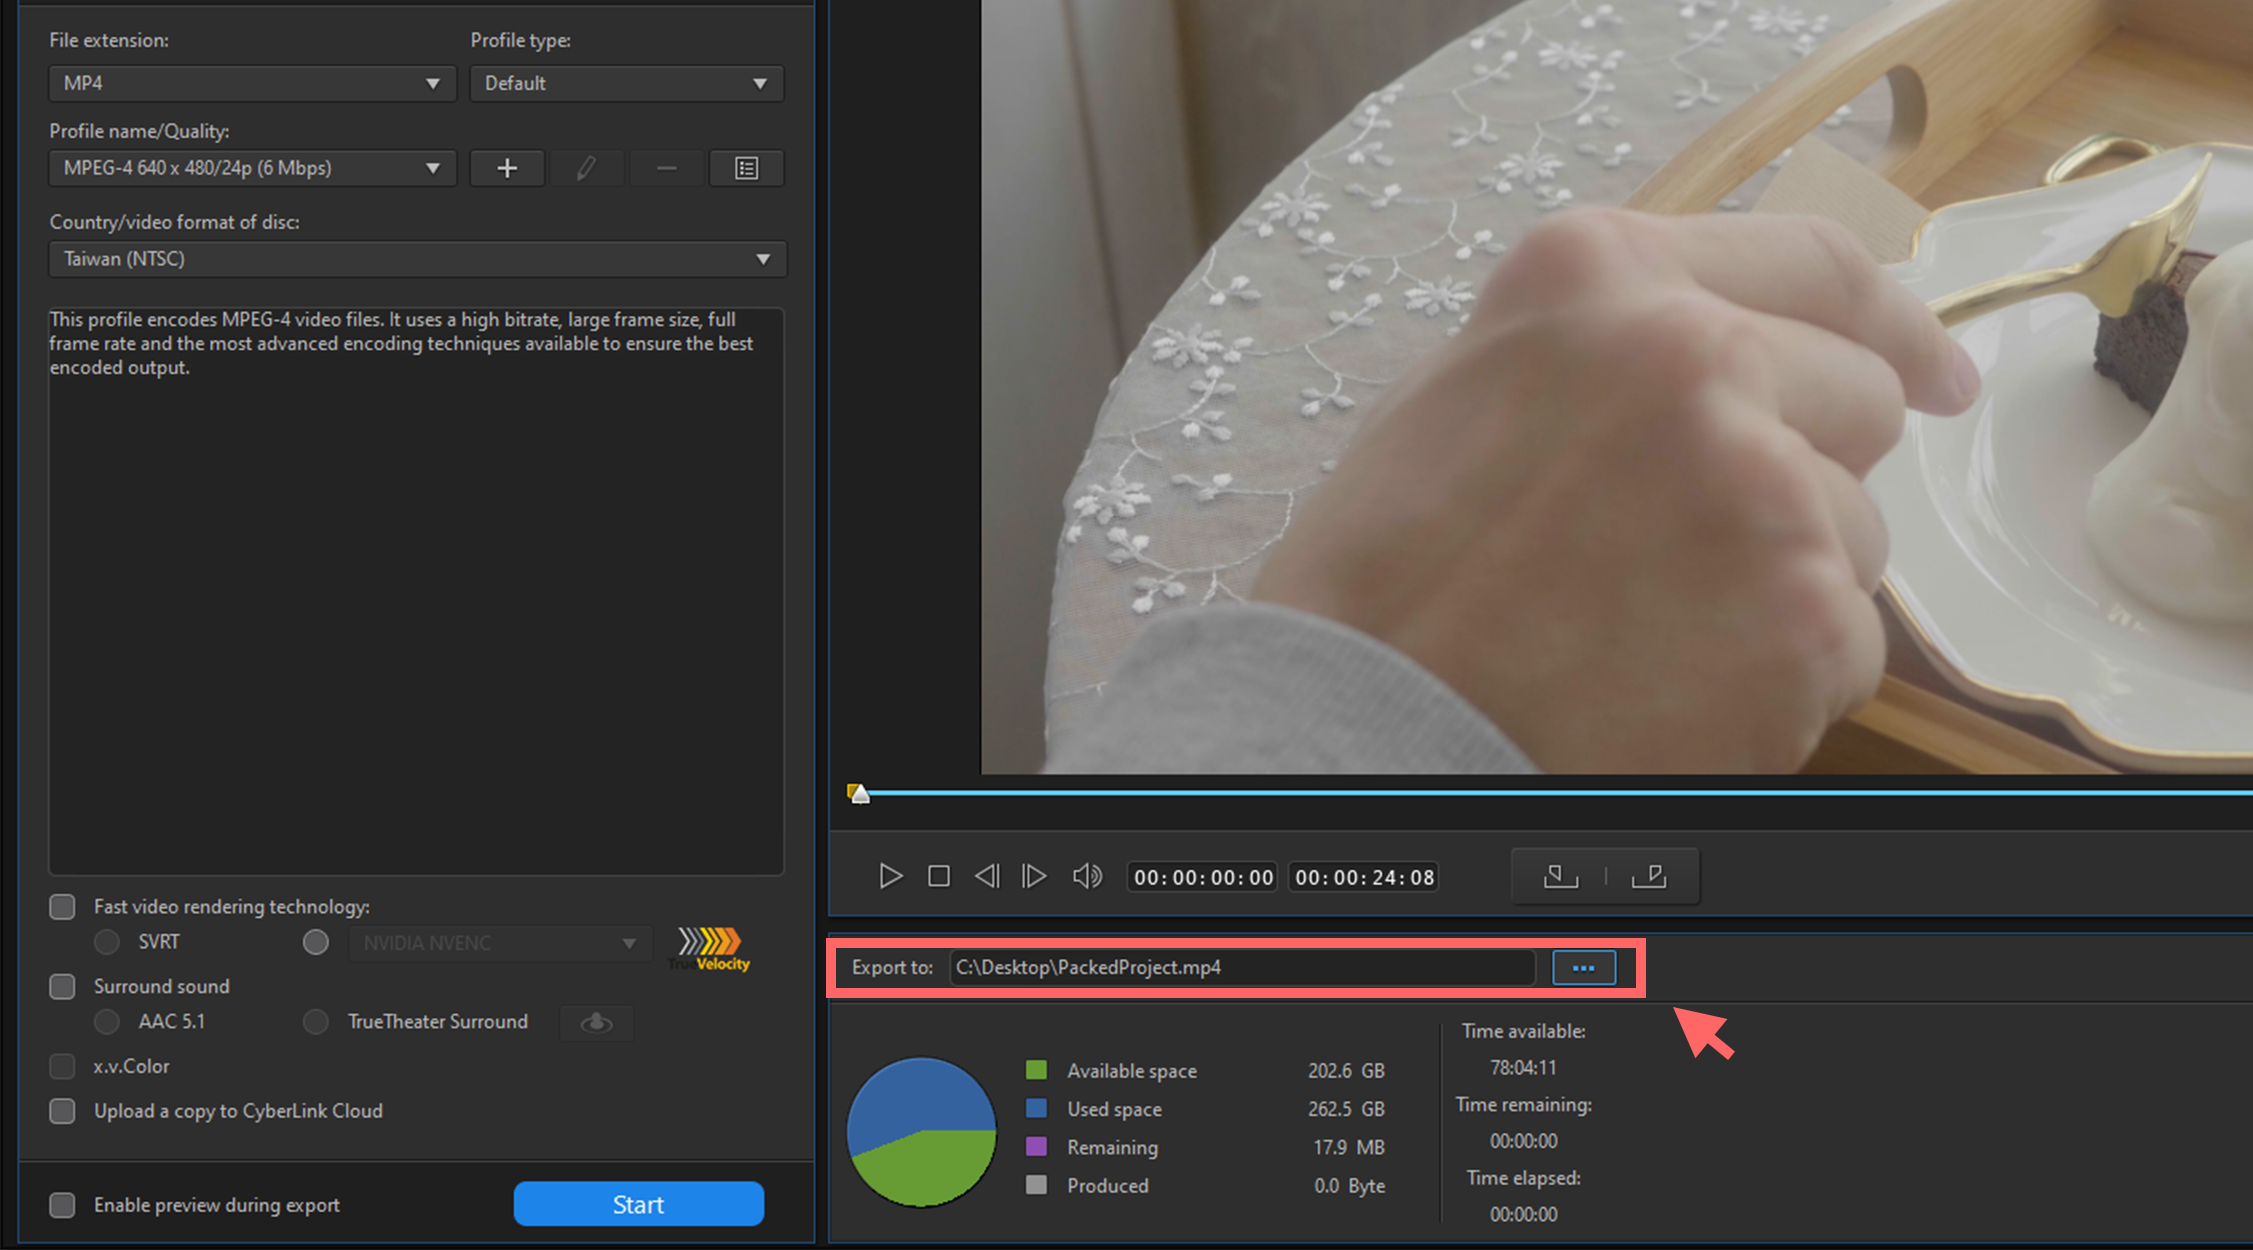
4. Click the Start button to produce the file.
You should also upload your video to YouTube to get more views. Here is how to upload your video directly to YouTube. Be sure to create a YouTube channel first. See this article on tips for creating one.
1. In the Produce module, click the Online tab.
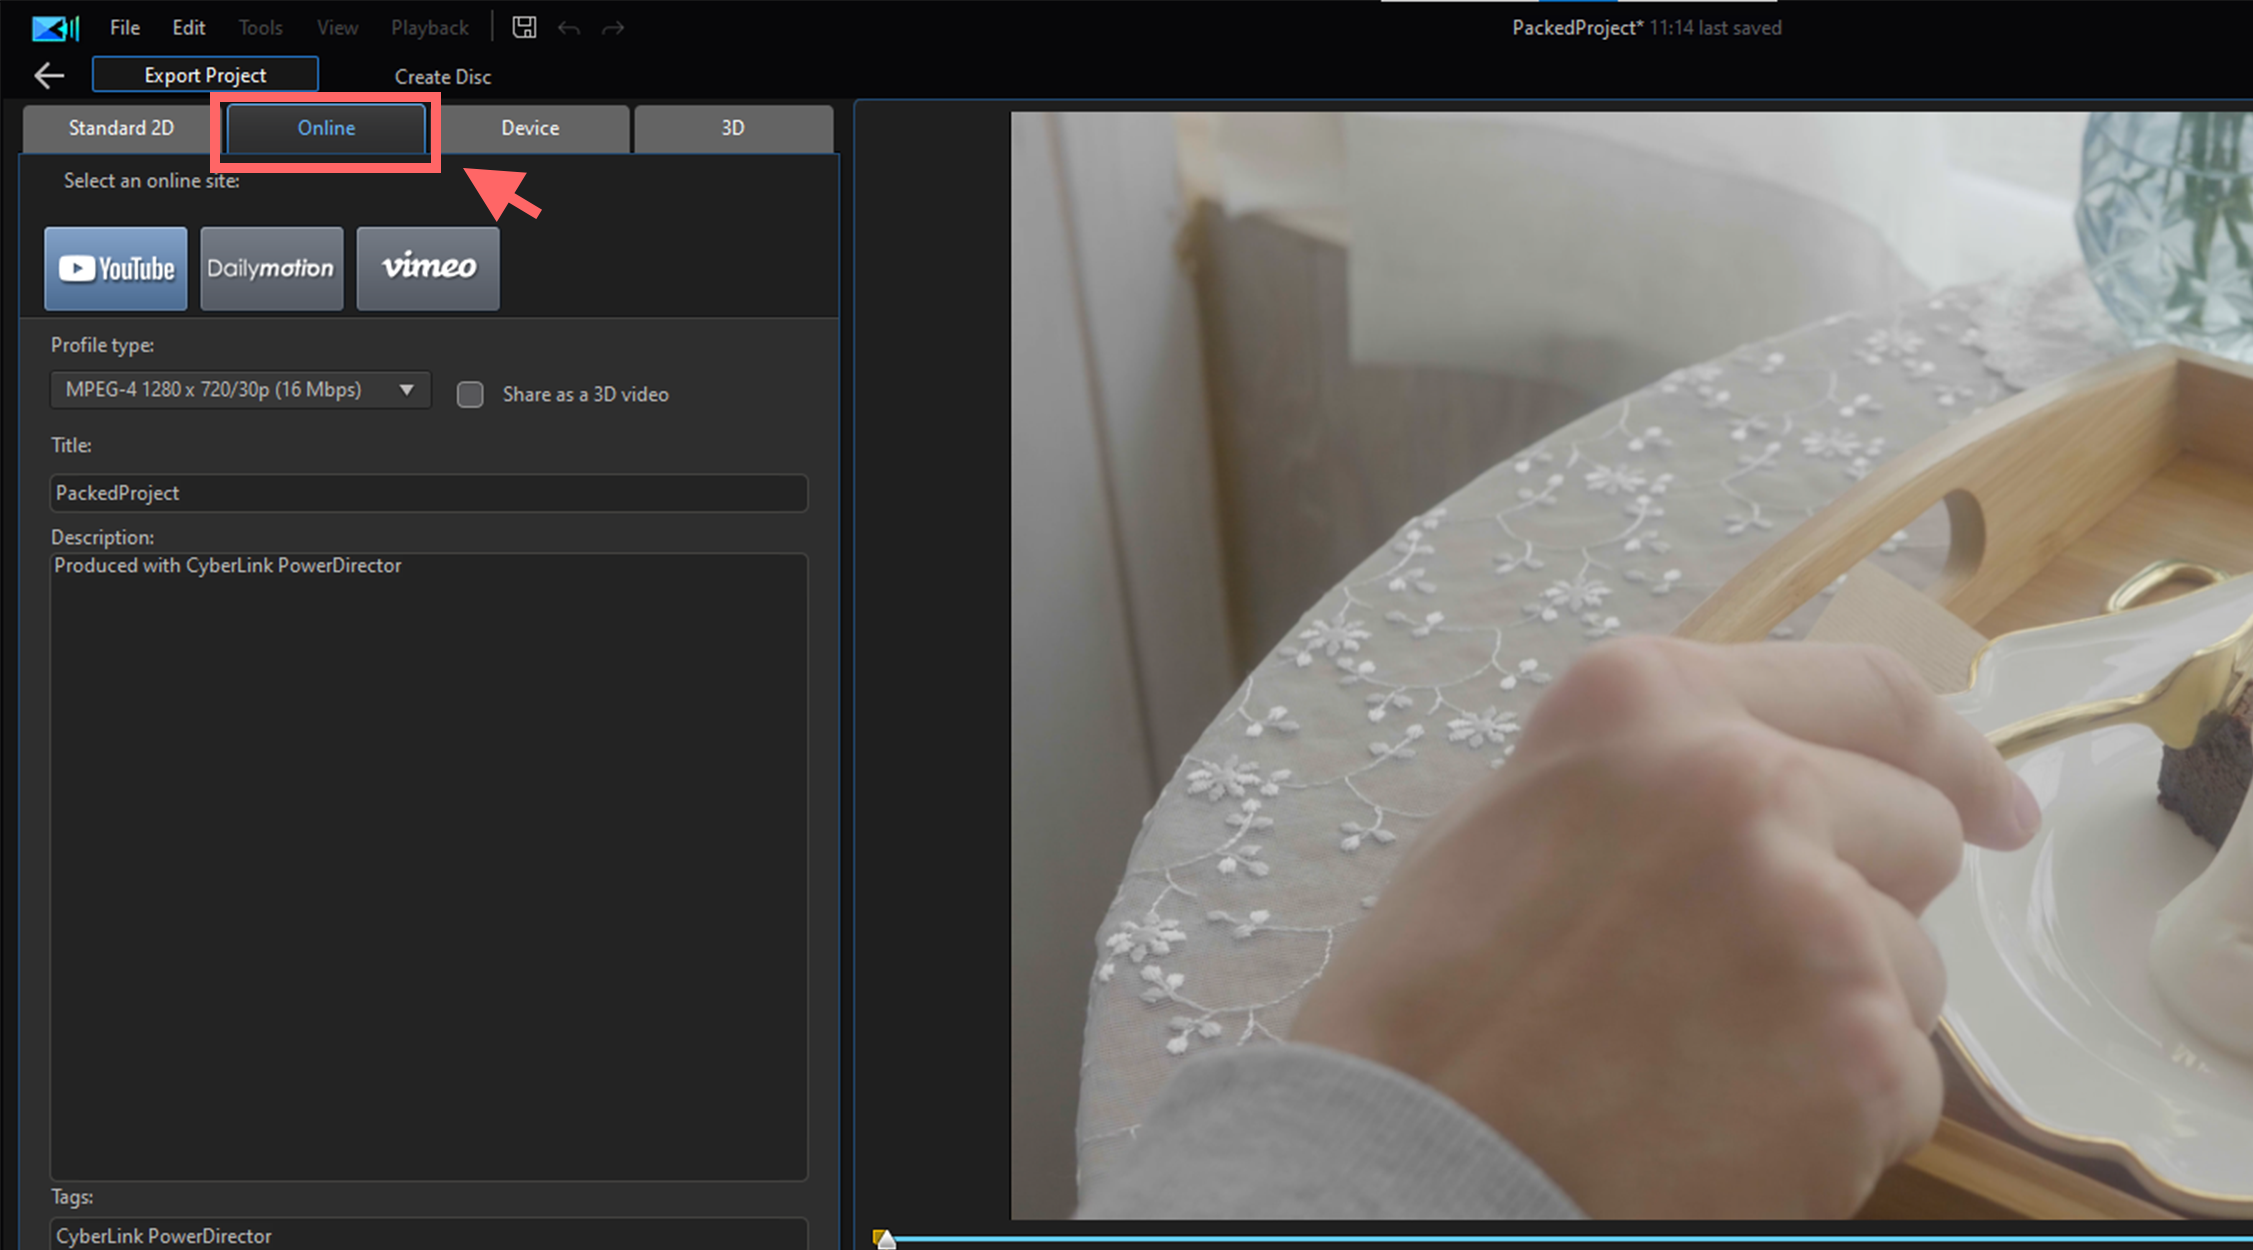
2. Select the YouTube option and then enter the video title, description, and other information.
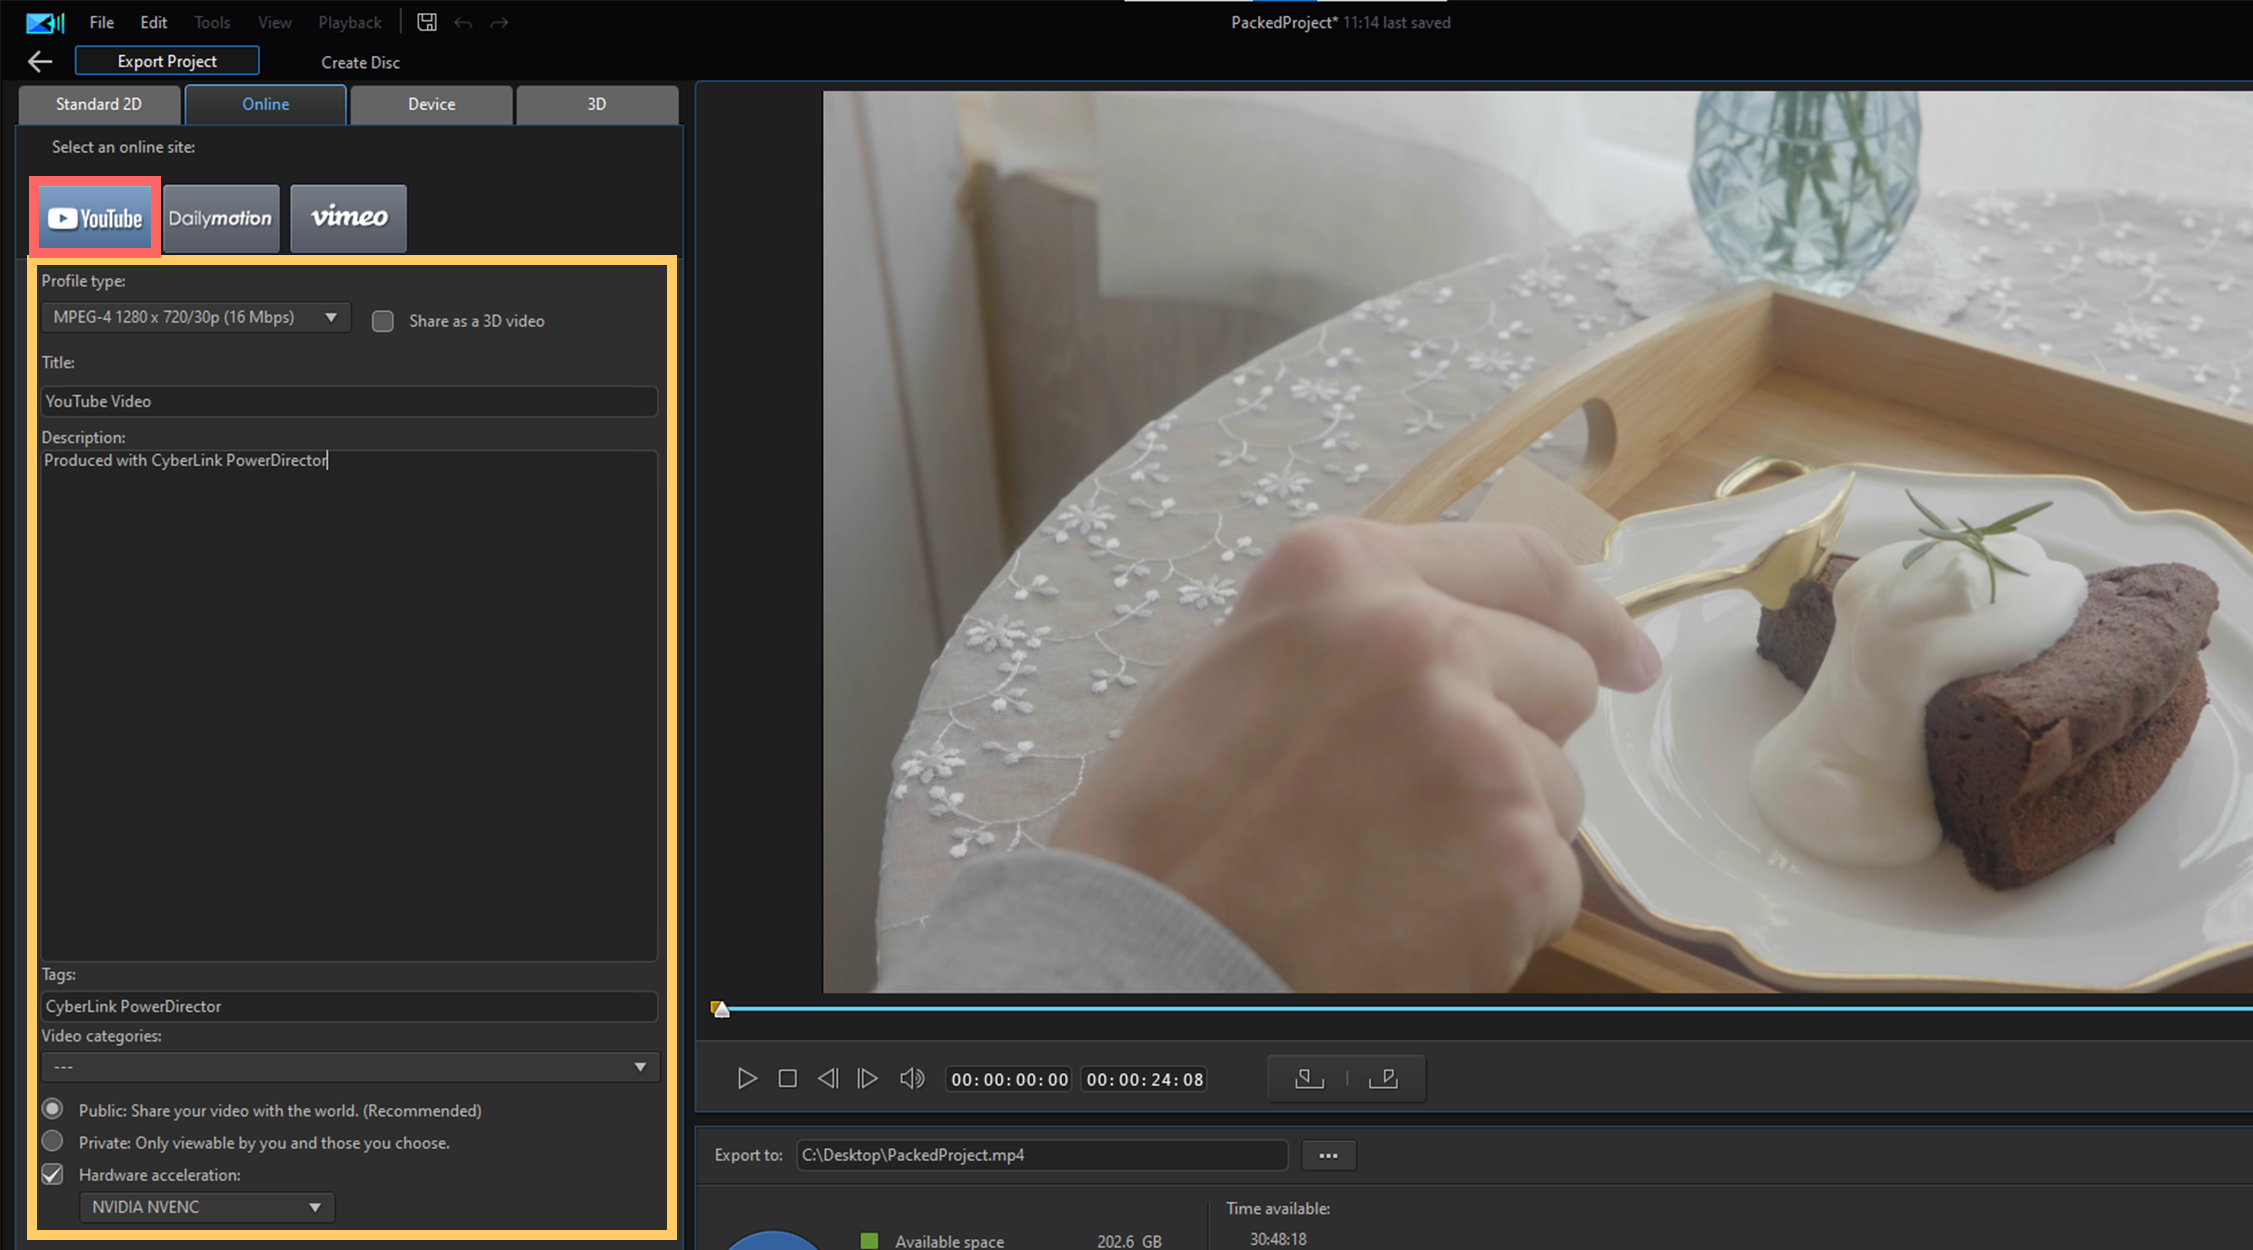
3. Click the Start button to render your video and then upload it to YouTube.
To view a more detailed tutorial on producing and uploading videos to YouTube, go here.
Edit More Videos with PowerDirector
Now that you have edited and uploaded your first video with PowerDirector, the best video editing software for beginners, go ahead and try editing another. The more you edit, the better video editor you will become.
Go check out all of the PowerDirector video editing tutorials in CyberLink’s Learning Center to learn more editing tricks. You can also post your next video in the PowerDirector Showcase on CyberLink’s Community Forum to get feedback from other PowerDirector users.
Get PowerDirector 365 Essential for Free
Take your videos to the next level with the best video editor for Windows PC
