Remove Unwanted People from Photos Online for Free with AI

- Using AI-powered online tools like MyEdit is the fastest method to remove a person from a photo. Simply upload your image and brush over unwanted figures to erase them instantly.
- MyEdit, PicWish, and PhotoRoom are the top recommended websites to remove people from photos. These platforms offer powerful AI removal capabilities that allow you to clean up images without installing software.
- Object removal tools are ideal for erasing ex-partners, removing random tourists from travel shots, eliminating reflections, or cleaning up photobombers to improve overall photo composition.
Remove unwanted people from your photos instantly using free online AI tools. This guide reviews the quickest browser-based solutions to erase background strangers without complex software or hidden costs.

- How to Remove a Person from a Photo Online for Free
- Why use an Object Remover: From Ex to Photobombers
- Can I Remove Text, Watermarks, or Background from Images
- Try The Best Free Tool to Remove People from Photos Online
- FAQ on Removing a Person from Photos Online
How to Remove a Person from a Photo Online for Free
Simply upload your photo and use MyEdit's Object Removal tool to clean it up. It really is that simple. With just a few clicks, you can get a perfect, people-free picture in seconds. Let's get started:
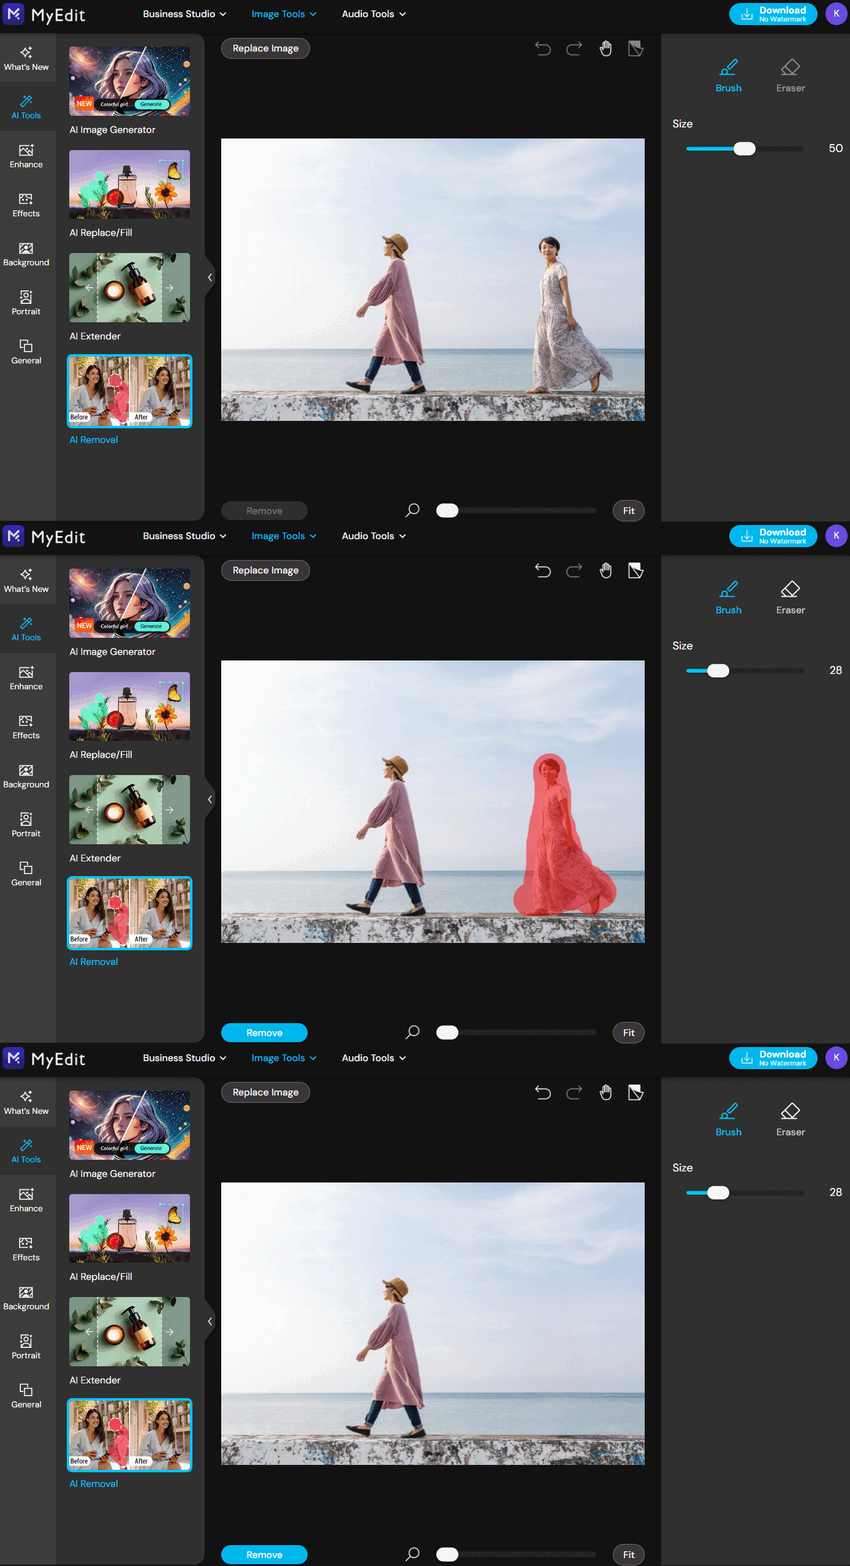
- Go to MyEdit website to remove people from photo background
- Mark the area of the people to be erased
- Preview the removal result and make adjustments if needed
- Download the edited photo with a clean background
Ready to transform your photos? Try MyEdit now and experience the power of effortless online photo editing!

Why use an Object Remover: From Ex to Photobombers
1. Edit Your Ex Out of Photos
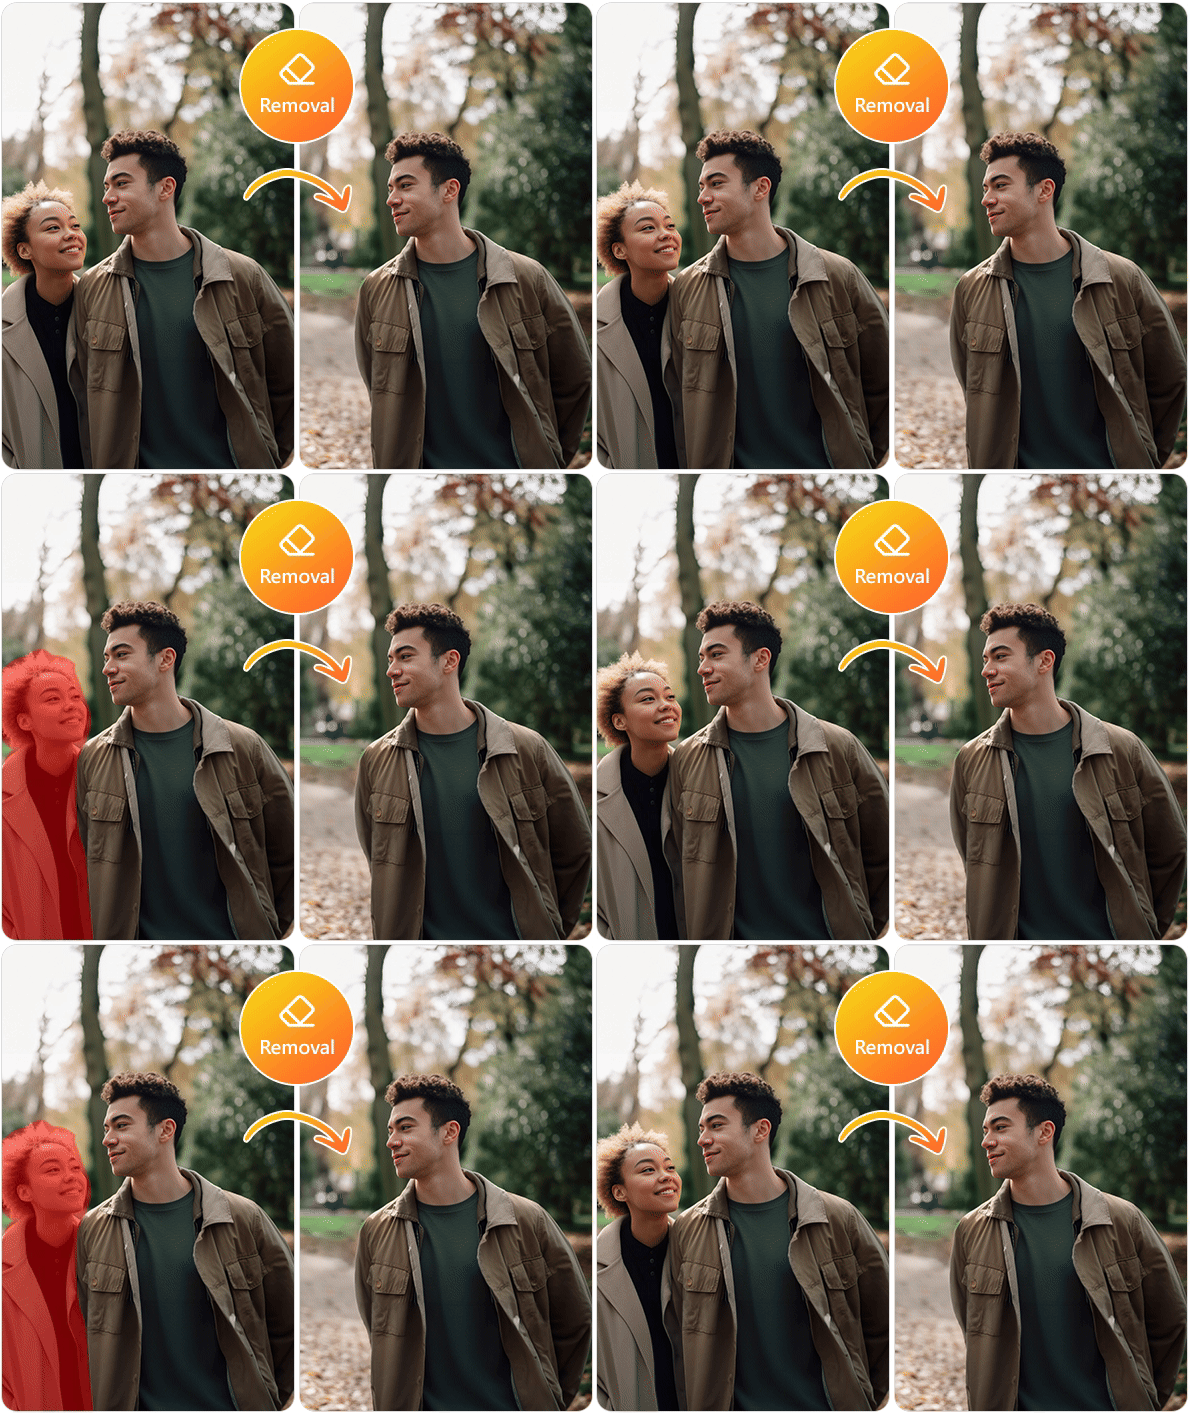

The end of a relationship doesn't have to leave a bittersweet trace in your photo collection. Removing an ex-partner from photos can be a therapeutic step towards moving on. It helps you keep the memories intact without the presence of someone you'd rather forget, allowing you to revisit these memories without the emotional baggage.
2. Remove Random Tourists from Travel Photos
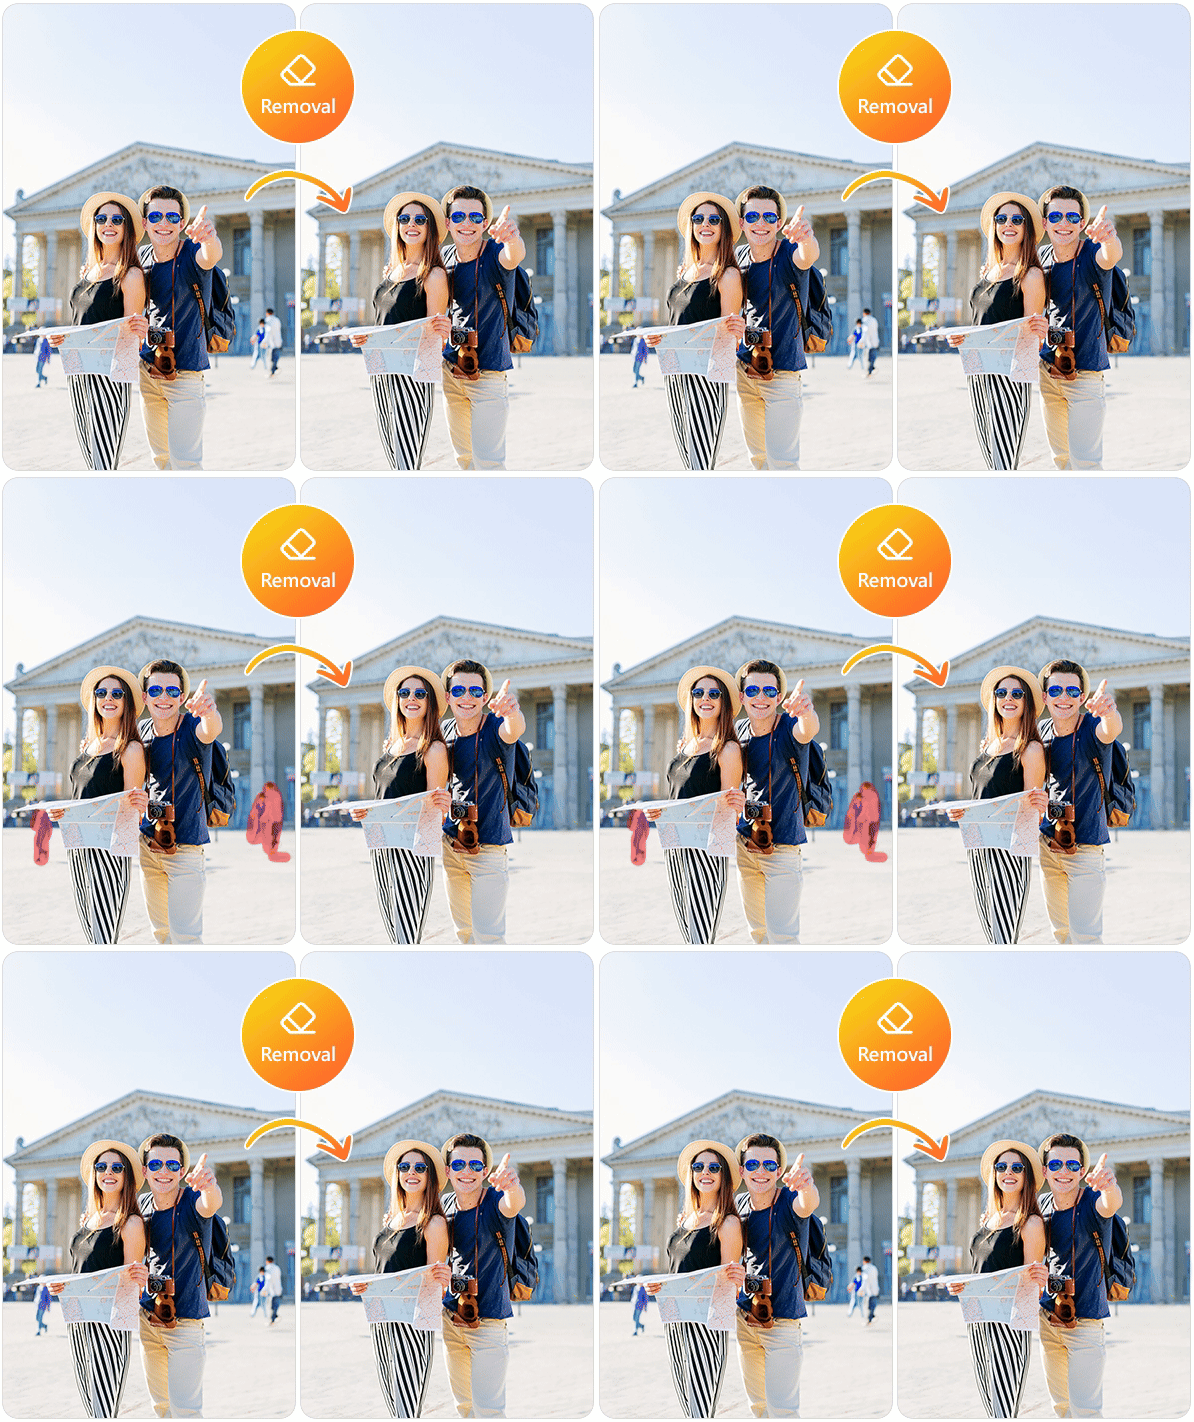

We’ve all experienced the struggle of capturing the perfect shot of a landmark, only to have it crowded with tourists. Removing strangers can turn a chaotic scene into a postcard-perfect image, giving you the chance to showcase the beauty of the destination without any distractions.
3. Remove People from a Landscape Photos
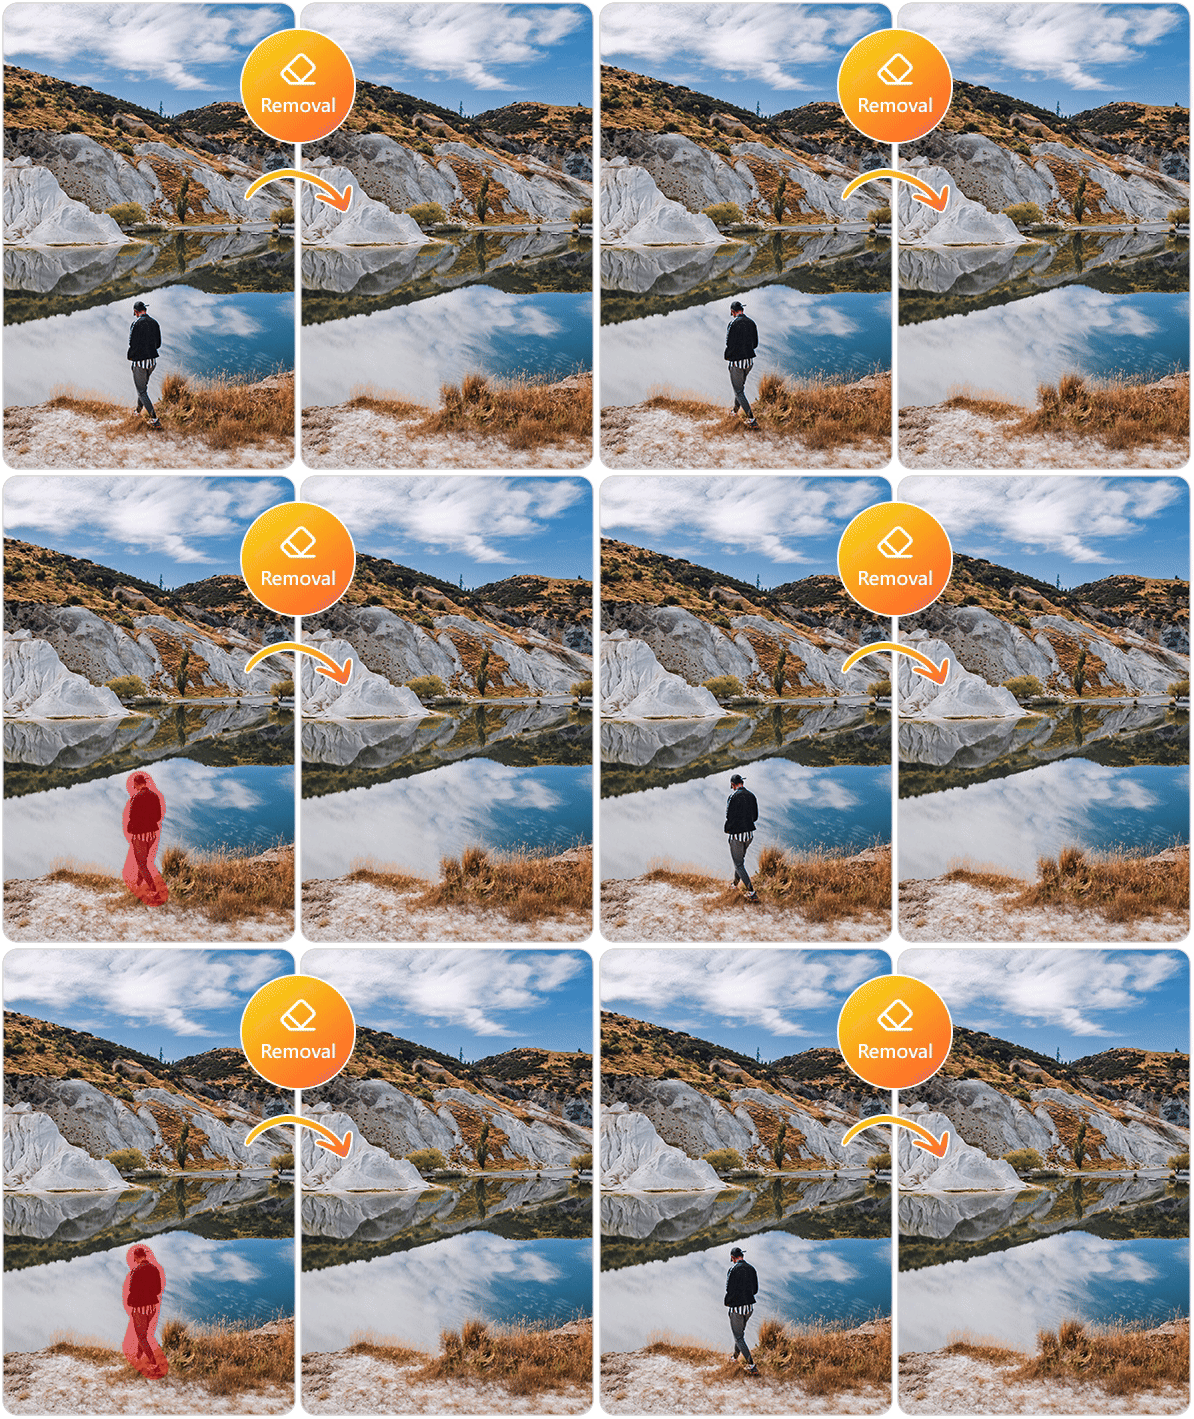

Sometimes people can detract from the majesty of nature in landscape photos. By removing them, you can emphasize the grandeur and serenity of natural scenes, from the untouched wilderness to the peaceful countryside, ensuring the focus remains on the breathtaking vistas.
4. Remove a Reflection of Yourself from Photos
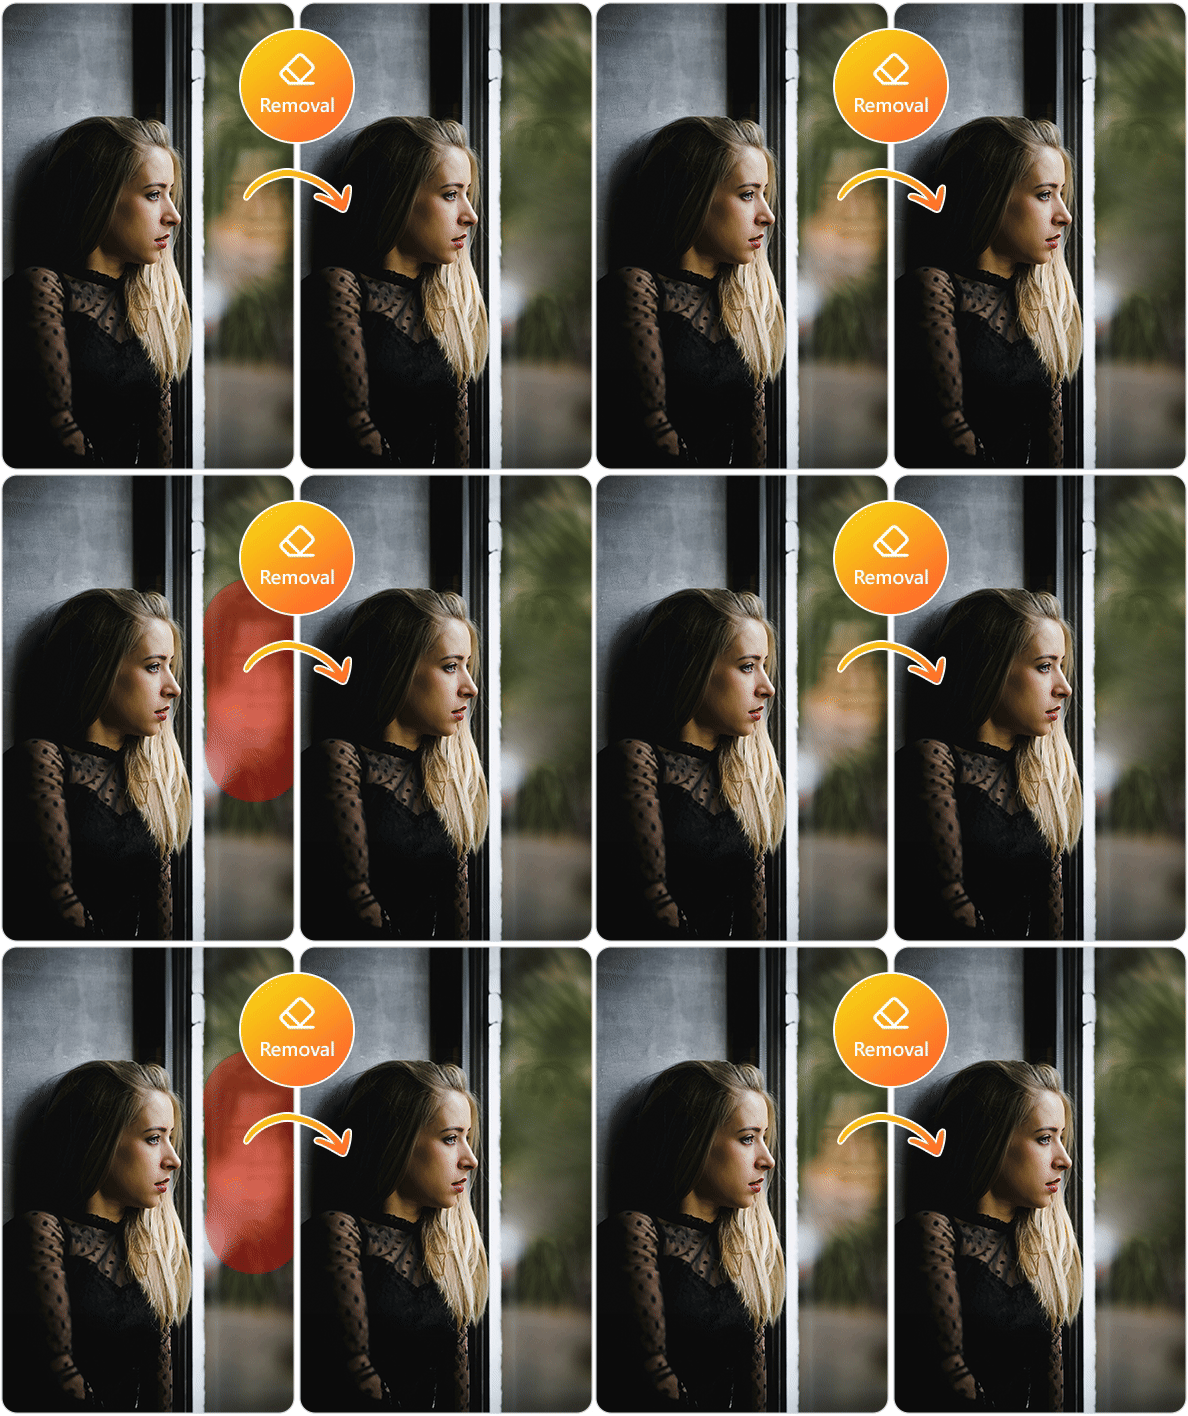

Accidentally capturing your reflection in water, windows, or shiny surfaces can be frustrating. By removing these unintended self-portraits, your photos remain polished and professional, keeping the attention on the intended subject of the photograph.
5. Photo Focus Solely on You
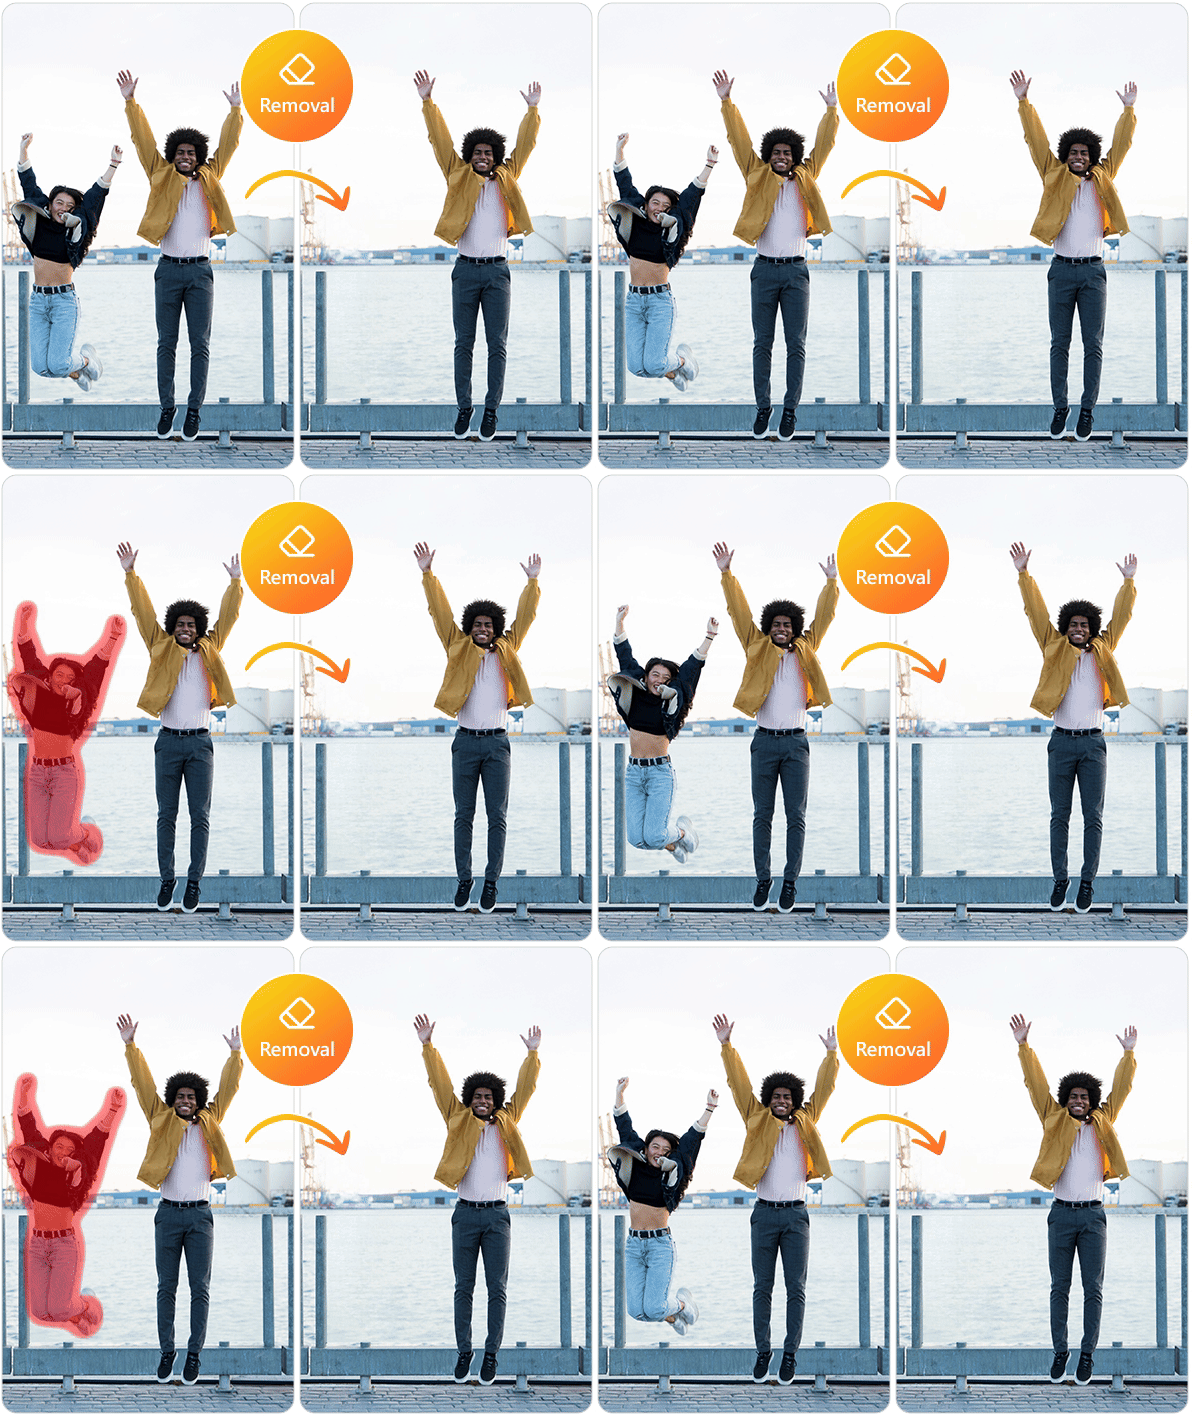

In a world where personal branding is key, having clean, focused images of yourself is crucial. Whether for a professional website, social media, or a personal project, removing other people from the background puts you in the spotlight and sends a clear message that you are the main event.
Can I Remove Text, Watermarks, or Background from Images
1. Remove Text
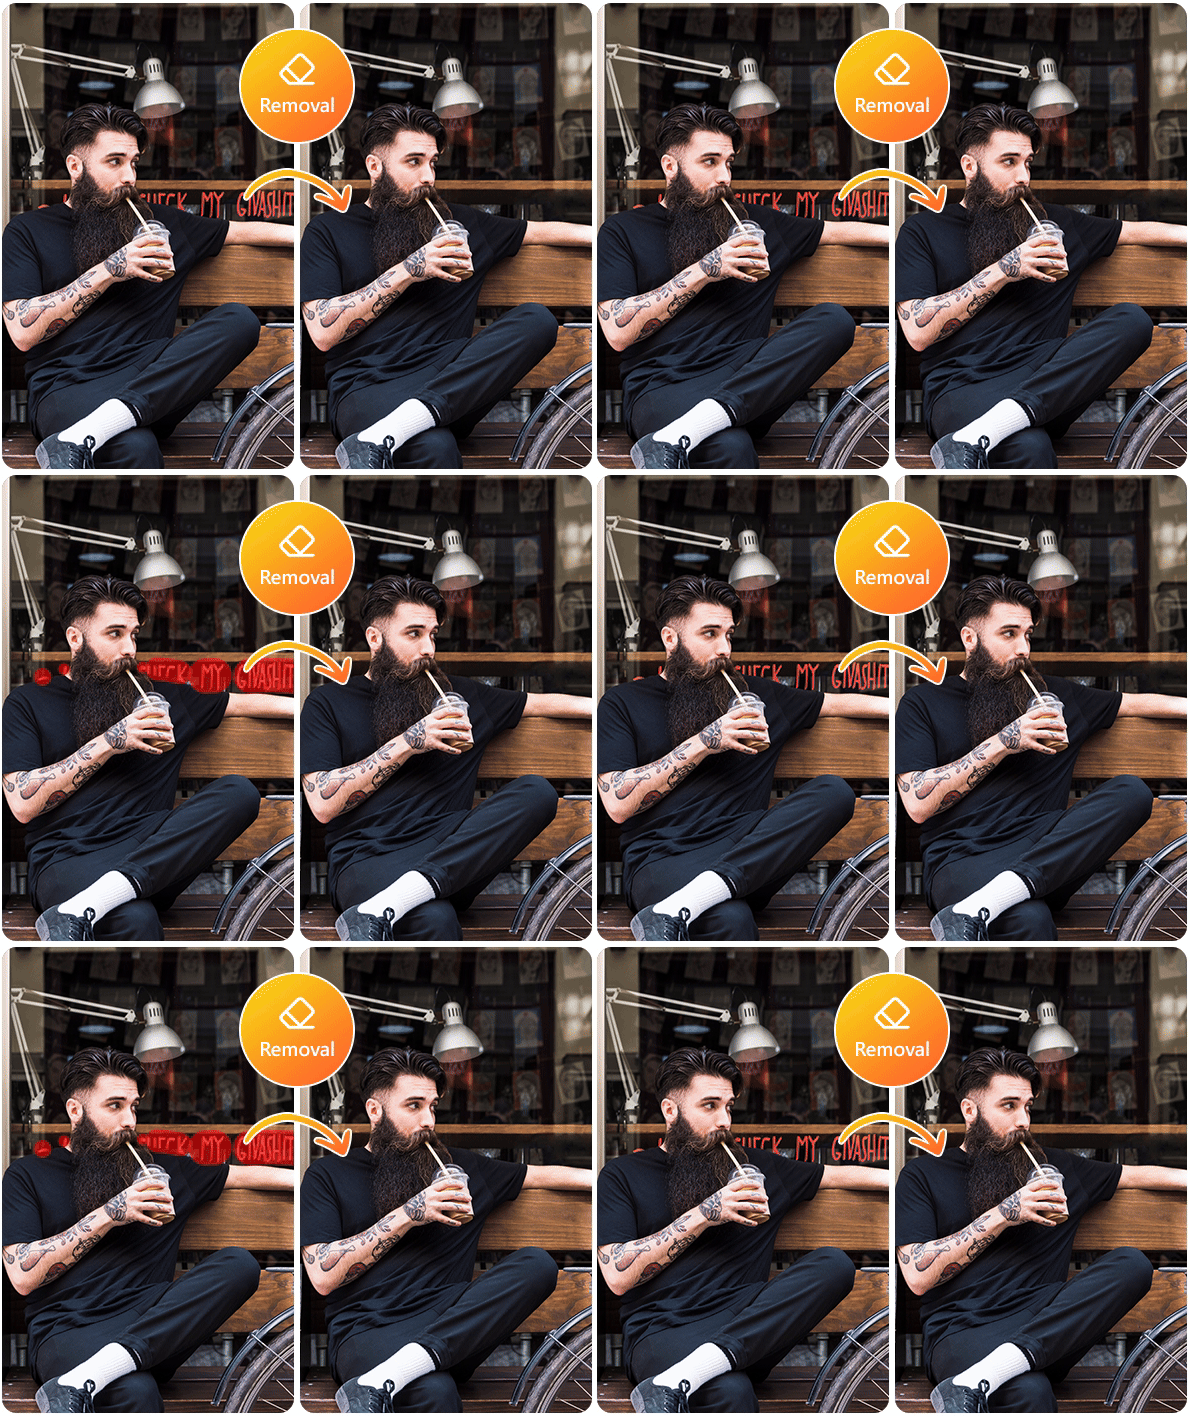

Whether it's an intrusive street sign, graffiti, or an unwanted caption, text can often distract from the main subject of your photo. Advanced editing tools can strip away letters and words, leaving behind a clean image that keeps the viewer’s attention exactly where you want it.
2. Remove Objects
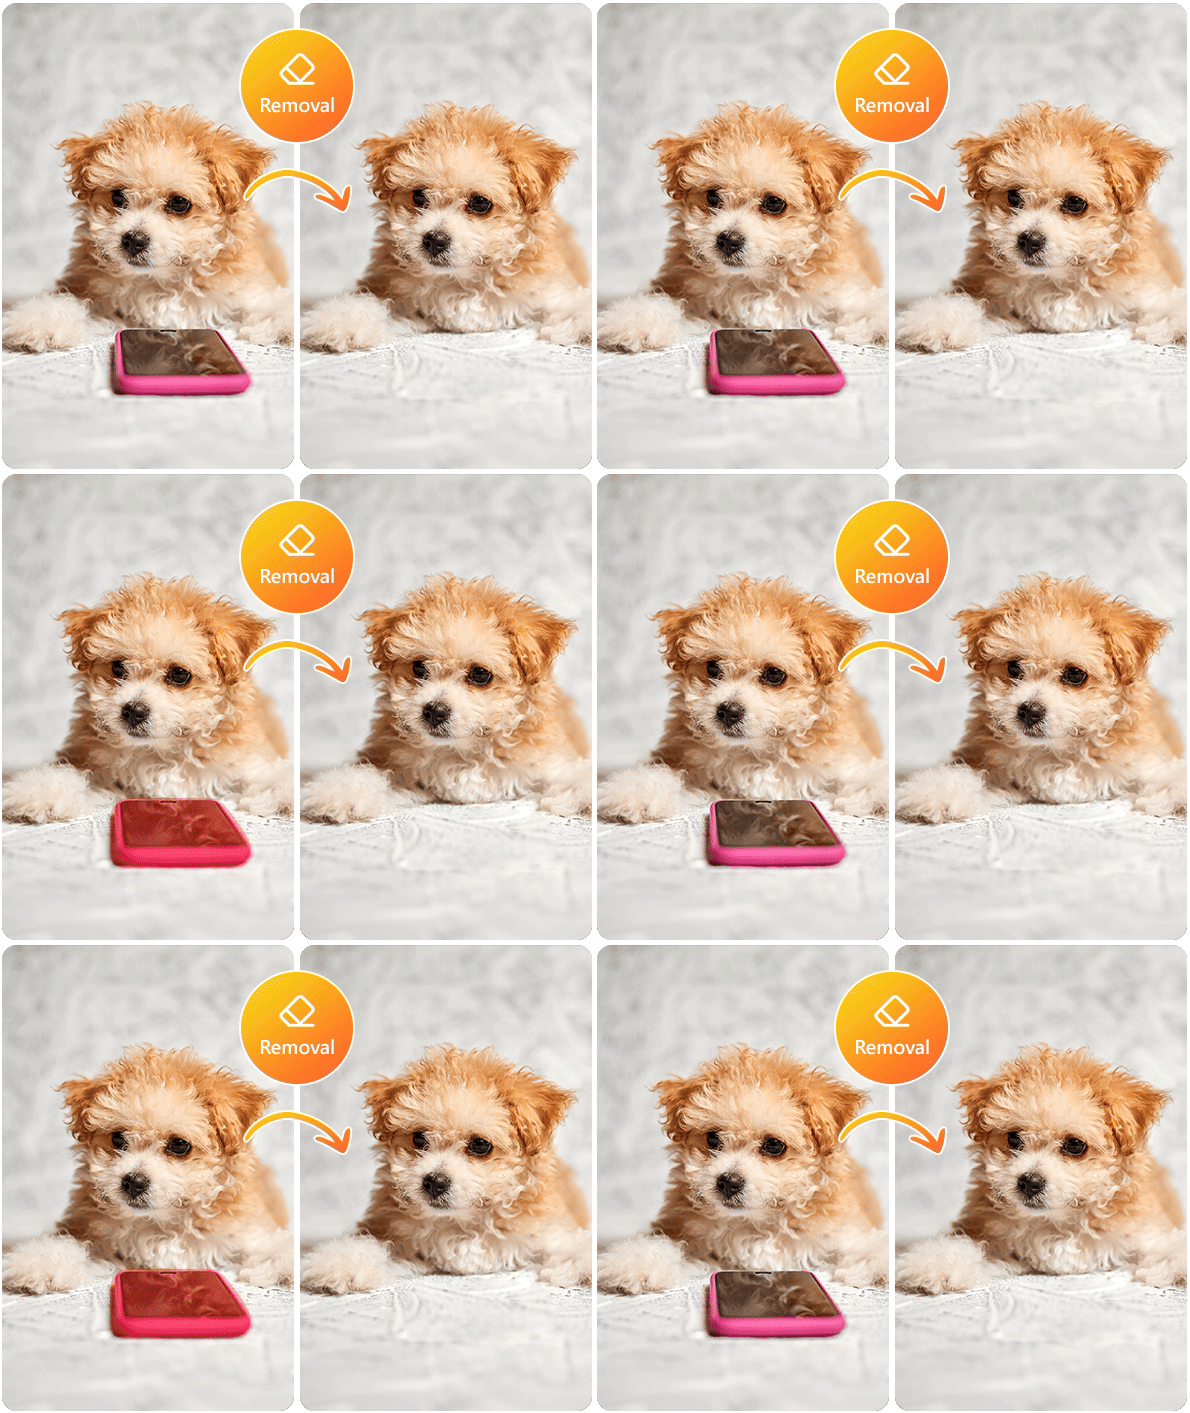

From power lines that cut across a serene sky to a discarded cup on an otherwise pristine beach, random objects can disrupt the composition of your picture. Object removal tools come in handy to preserve the aesthetics of your photo, ensuring that nothing takes away from your image’s intended impact.
3. Remove Blemishes
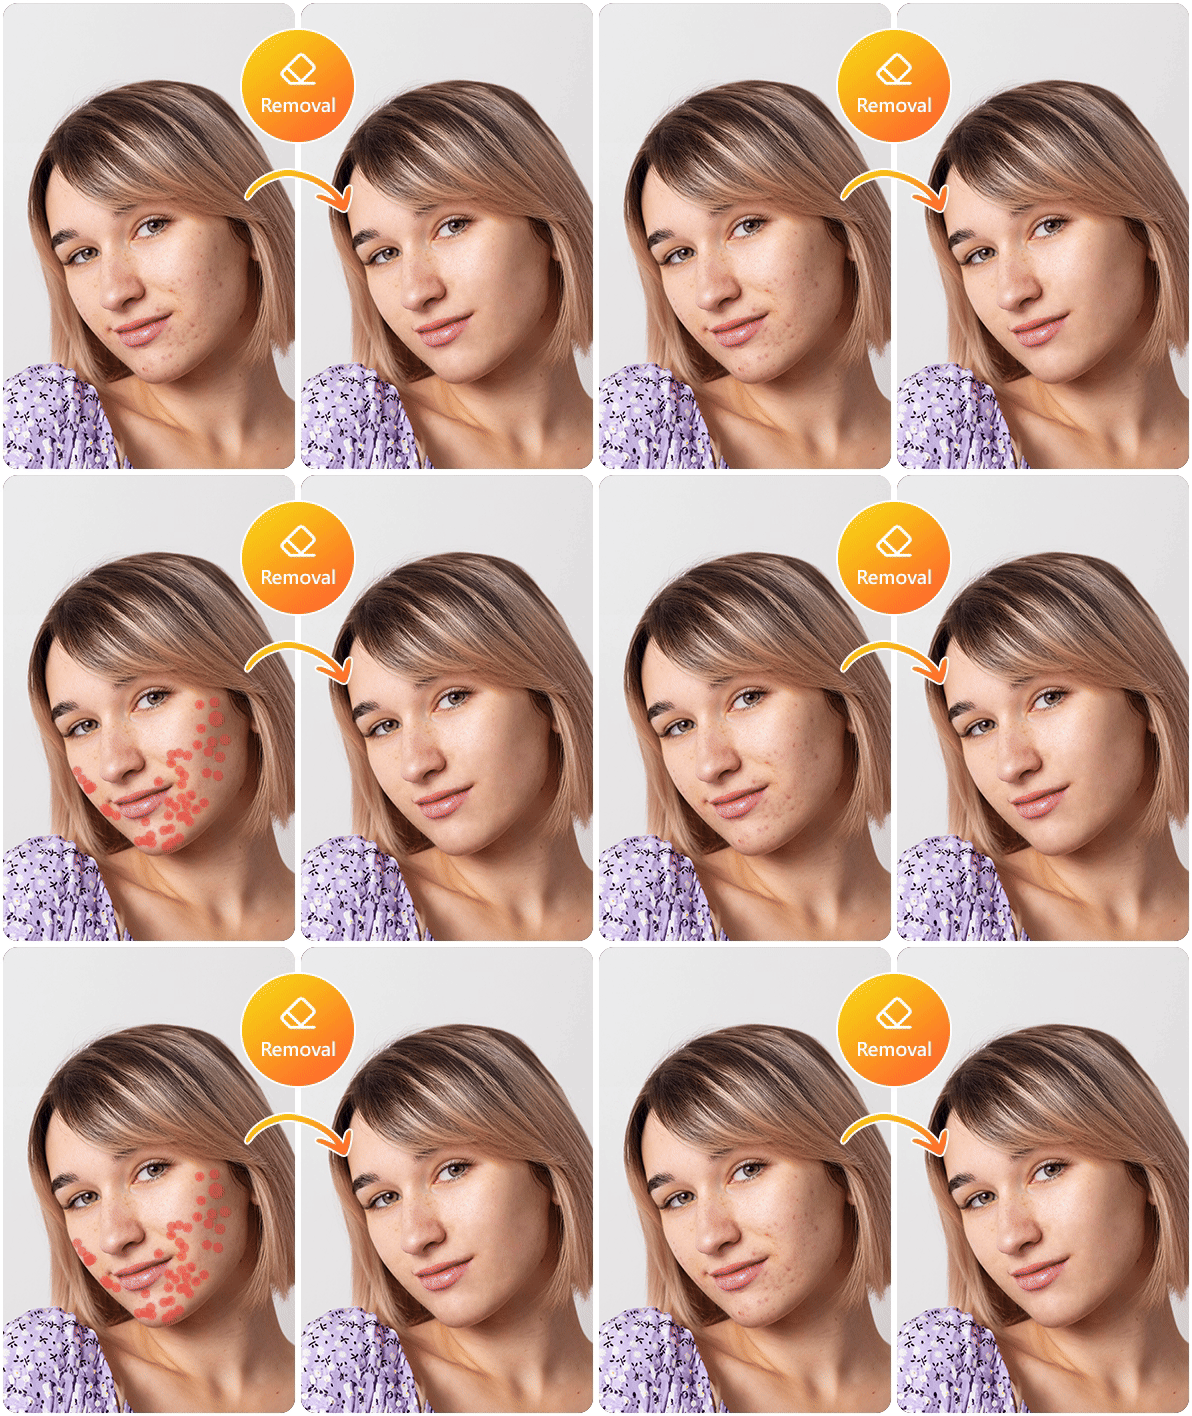

Portrait and close-up photography can sometimes reveal more than we wish. Removing blemishes like pimples, scars, or uneven skin tones helps in creating a flawless look that still retains the subject’s natural beauty.
4. Remove Watermarks
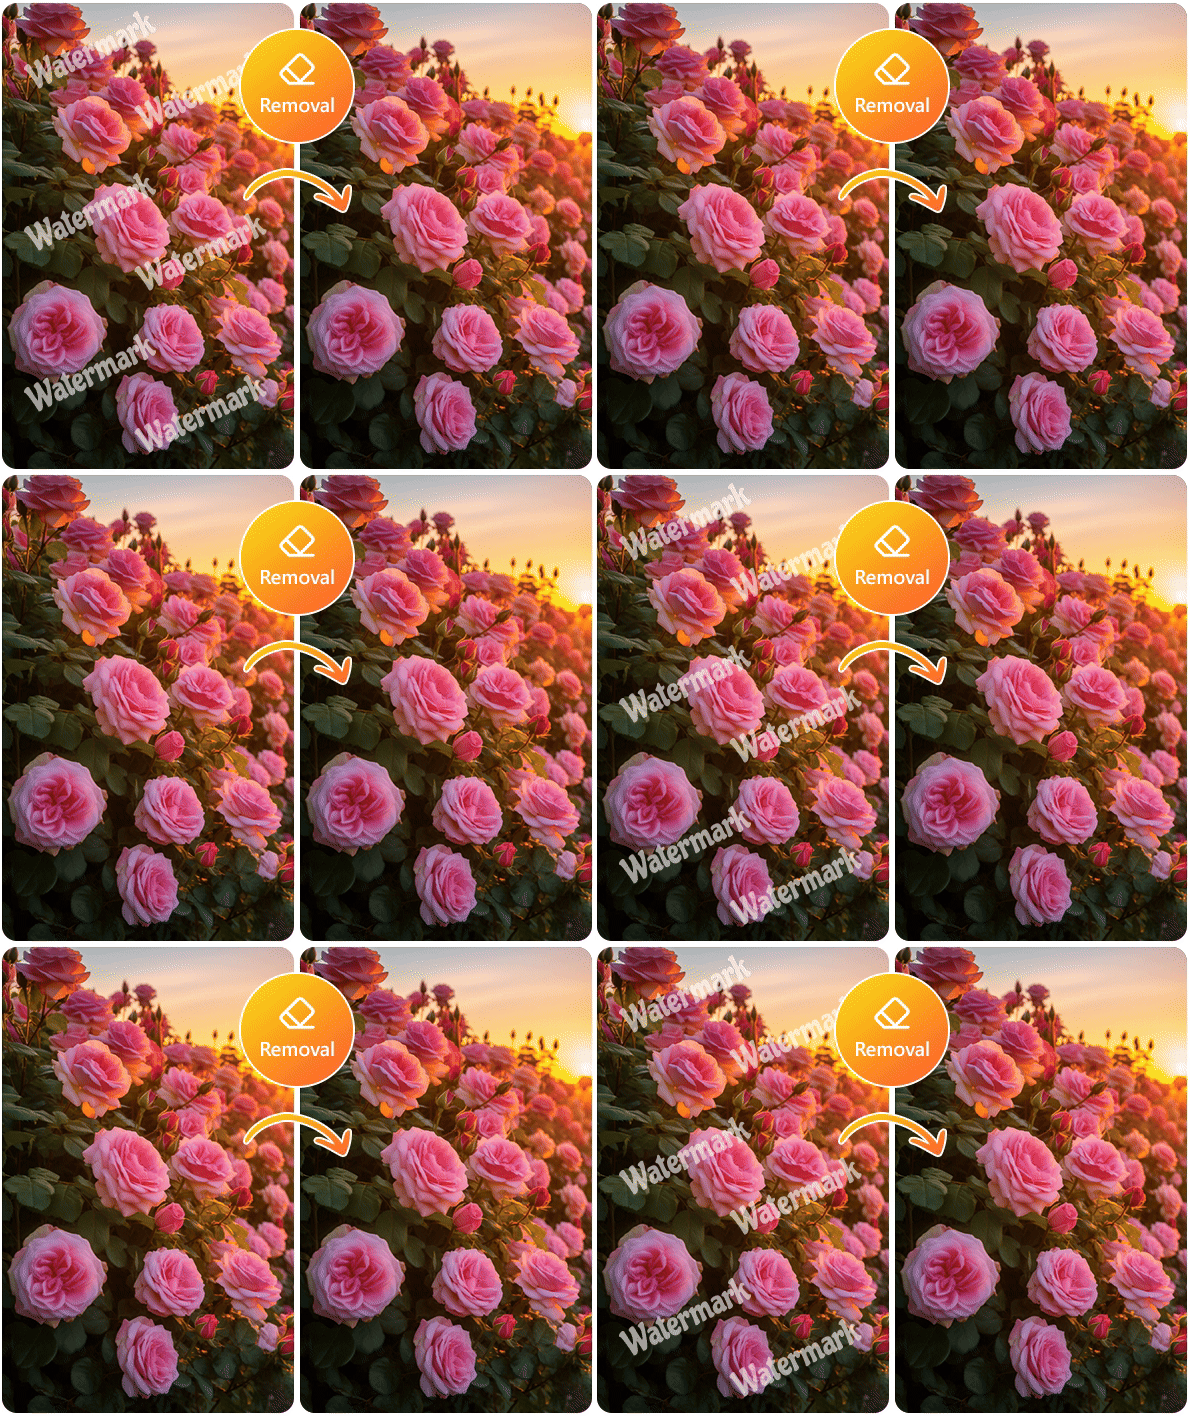

Sometimes you may have the perfect photo, but it's marred by a watermark. Perhaps it's from a stock photo you've now bought the rights to, or maybe it's from a previous branding effort you wish to change. The ability to remove watermarks cleanly can be incredibly beneficial for repurposing images without any trace of the original mark.
5. Remove Backgrounds
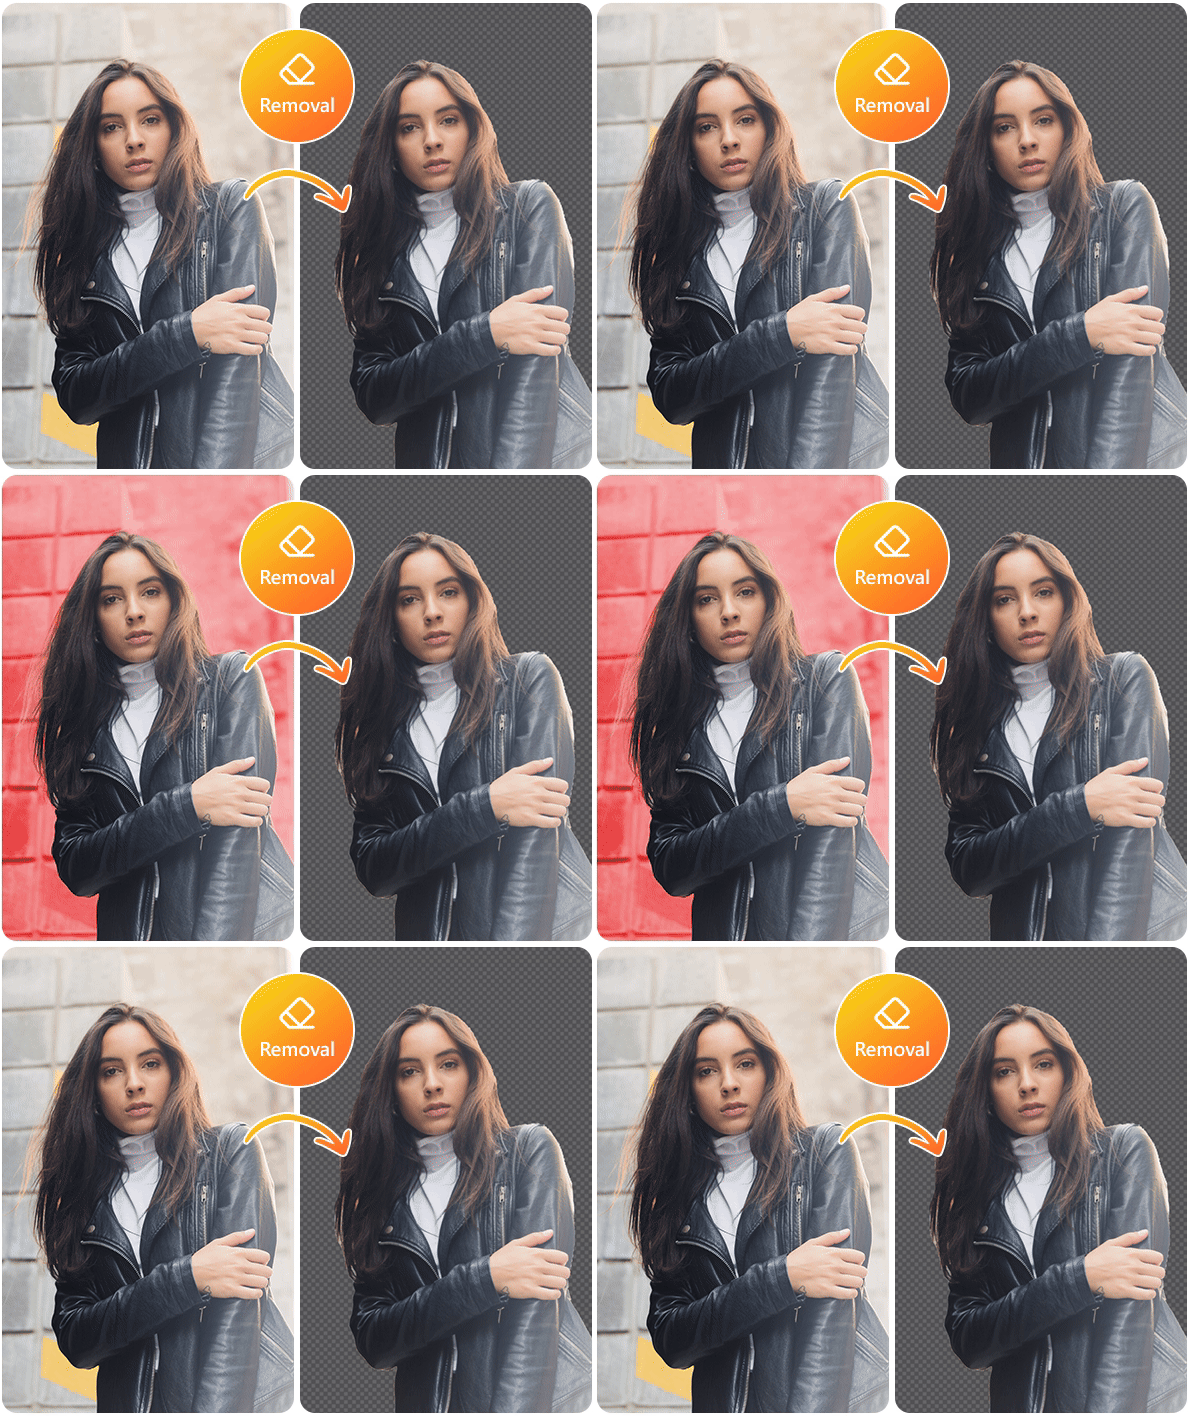

A busy or unflattering background can ruin a great subject. Whether you want a transparent background for graphic design purposes or you're looking to insert a new, more appealing backdrop, removing the background can transform an image from a snapshot into professional-looking material.
Learn More About Background Removal:
- How to Remove Background from Picture Automatically
- Best Free Transparent Background Makers
Try The Best Free Tool to Remove People from Photos Online
Capturing the perfect shot can sometimes be challenging, especially when a person walks into the frame without you noticing. Thankfully, advanced editing tools can remove people or objects from an image without learning complicated software or shell out an expensive monthly subscription fee.
MyEdit is a solid choice for a quick, easy-to-use online photo editor. Along with AI Object Removal, the website also offers AI Background Removal, AI Image Generation, and AI Photo Enhancement.
FAQ on Removing a Person from Photos Online
- No Overlap: Ensure the person or object you want to remove does not touch or block your main subject.
- Clear Distance: Choose photos with significant space between the foreground subject and the background elements.
- Blurred Backgrounds: Images with a shallow depth of field (blurred background) are easier for AI to blend seamlessly after removal.
You can remove a person from an image easily with MyEdit online for free.
- Access MyEdit and go to Object Removal tool
- Upload the photo you'd like to edit
- Brush the person you want to remove
- Tap Remove and preview the result
- Save and share the editied photo
With MyEdit, you can remove any unwanted element effortlessly. The online tool allows one free export a day so you can enjoy the precise AI removal feature without spending a dime.
To crop out a person from a picture, follow these simple steps:
- Access MyEdit and go to Crop tool
- Upload the photo you'd like to edit
- Drag on the picture frame to crop out the unwanted person
- When satisfied, click Crop
- Save and share the editied photo
The top 5 apps to remove people from photos are:
- PhotoDirector
- YouCam Perfect
- TouchRetouch
- Adobe Photoshop Fix
- Snapseed
Read our complete review on the best apps to remove people from pictures here.
Here are the 5 best free people remover websites that we recommend for erasing people from your photos:
- MyEdit
- PicWish
- PhotoRoom
- Fotor
- Picsart
Here's how you can achieve clean, professional-looking edits without any cost:
- Go to the Object Removal tool of MyEdit
- Upload a photo
- Select the person to remove
- Click Remove to apply the change
- Download edited photo
Common scenarios include:
- Enhancing Composition: Eliminate background distractions to shift focus back to your primary subject.
- Professional Use: Create clean, distraction-free images for websites and marketing materials by removing unrelated individuals.
- Privacy Concerns: Respect the privacy of strangers or non-consenting individuals before sharing photos online.
- Travel & Memories: Salvage special moments by erasing random tourists or unexpected photobombers.
- Creative Customization: Modify stock photos or artistic projects to fit your specific theme without unwanted human elements.
The Cyberlink Editorial Team creates in-depth articles on video editing, multimedia innovation, and AI-powered creative tools. Our mission is to provide practical, easy-to-follow tutorials across video and photo editing, while showcasing AI features, product insights, and industry trends that empower creators around the world.


![How to Add Text to Photos on iPhone & Android [2026]](https://dl-file.cyberlink.com/web/content/b1278/Thumbnail.jpg)

